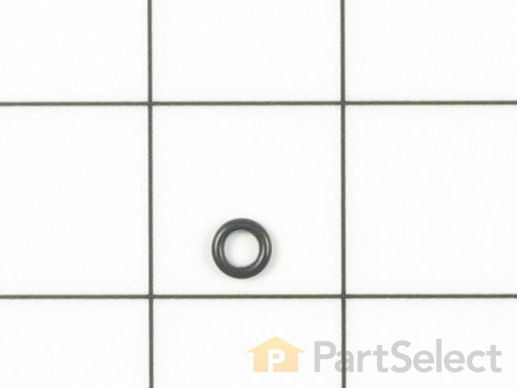
Part Location Diagram of WP910934 Whirlpool O-Ring Seal
See part 13 in the diagram
( Grid squares measure 1x1 inch )
Customer Service Representative

Get in touch, we're here to help!

Monday to Saturday
8am - 9pm EST

customerservice@partselect.com

O-Ring Seal WP910934

Rated by 7 customers 

Easy 

30 - 60 mins 

Ratings submitted by customers like you who bought this part.

$ 5.37
  On Order
Get FREE EconoShip on orders over $100! T&C apply

Does this part fit my model?

Need help finding your model number?
PartSelect Number PS11746845
Manufacturer Part Number WP910934
Manufactured by Whirlpool for Maytag, Jenn-Air, Amana, Crosley
Product Description

O-Ring Seal Specifications

This o-ring seal is well under an inch in diameter. It is all black in color and it is made entirely of rubber.
How Buying OEM Parts Can Save You Time and Money

How Buying OEM Parts Can Save You Time and Money

Troubleshooting
This part fixes the following symptoms:
Not cleaning dishes properly | Noisy | Leaking
This part works with the following products:
Dishwasher.
Part# WP910934 replaces these:
20200032, 7-57298, 757298, 9-0629, 9-10545, 9-10934, 900629, 910545, 910934, Y757298
Back to Top
Customer Repair Stories
 Average Repair Rating: 3.4 / 5.0, 7 reviews. What's this?
Sort by:
  • 1
Sorry, we couldn't find any existing installation instruction that matched.
No water from rotating lower spray arm or center spindle; soap dispenser lid would not open.
Had service man: stated I would need new motor/pump at $400 complete. I didn't like the interior of new dishwashers. Nothing to lose, so I verified that the motor was working; reviewed short PartSelect video. Ref: very helpful PartSelect assembly diagrams with parts list. THANKS PS! Removed two dish racks (top rack: extend fully and flip the roller-keeper clips. Pull rollers and rack-pins apart) Then I started taking the pump apart all the way down to the pump base (fits into tub with seal - did not replace that seal). Very intuitive - some parts are tight and must be encouraged to come apart; take care of seals and o-rings; take notes of sequence if necessary. Look for parts requiring replacement. Unscrew Spray Tower Lower Extension Nozzle and lift off Spray Arm and two lower spray arm seals - check seals for wear. Unscrew pencil-like Spray Arm Support Nut. Cause: I found a totally-clogged Pump Housing Filter, a bit of steel wool about the size of my thumb (same size as water supply opening in bottom), and small piece of broken glass. Cleaned all parts coated with lime; new Pump Housing Filter (could not clean adequately). Cleaned the screens underside of filter support (difficult) with brush and wire. Replaced o-rings for Wash Impeller and Drain Impeller as a matter of principle. Only alignment requirement is with bottom water supplly hole. Everything works like new now! Recommendation: clean Pump Housing Filter annually.
Other Parts Used:
O-Ring Seal Pump Housing Filter O-RING
  • ROBERT from MORTON, IL
  • Difficulty Level:
    Easy
  • Total Repair Time:
    1- 2 hours
  • Tools:
    Nutdriver, Screw drivers
2 of 2 people found this instruction helpful.
Was this instruction helpful to you?
Thank you for voting!
Grinding noise from Dishwasher
Excellent site. When the dishwasher started making a loud grinding sound, i thought "oh great -- now I'll have to buy a new one". After searching the internet (I just entered the model number of my Maytag dishwasher), Partsselect.com came up in the search results. I read several postings from previous customers which described the same problem I was having... followed their step-by-step instructions and was able to disassemble the lower washer arm and find the culprit -- a broken wash impeller. Ordered the parts, they arrived within a couple of days, spent 15 mins putting everything back together and I'm now good to go! THANKS PARTS SELECT!!!!! I owe somebody a free lunch!
Other Parts Used:
Silverware Basket - Gray Impeller Assembly Lower Spray Arm Seal O-Ring Seal
  • Kenneth from Tallahassee, FL
  • Difficulty Level:
    Really Easy
  • Total Repair Time:
    15 - 30 mins
  • Tools:
    Pliers, Screw drivers, Socket set
2 of 3 people found this instruction helpful.
Was this instruction helpful to you?
Thank you for voting!
started to make loud noise
this repair is done from the inside,remove lower basket,screw off the center nut (its not to tight came off by hand, no tools)take off spray arm,take all the torque bolts out,remove the screen filter take the 3 bolts out of the pump housing and remove, mine came apart that was the noise. The impeller may not need to be replaced but mine had marks on it so I did.Install new seals clean up parts and put it back together with new parts ..works as good as new!!! I had my new parts in 1 (ONE)day PartSelect thank you. Andy,
Other Parts Used:
Discharge Pump Housing Impeller Assembly Upper Discharge Housing Gasket O-Ring Seal
  • Andy from Port Deposit, MD
  • Difficulty Level:
    Really Easy
  • Total Repair Time:
    30 - 60 mins
  • Tools:
    Nutdriver, Screw drivers, Wrench (Adjustable)
1 of 3 people found this instruction helpful.
Was this instruction helpful to you?
Thank you for voting!
Loud whining noise immediately after draining
Removed all parts down to wash impeller following online videos and parts breakdowns (took a while to figure out how to do this). The only difficult part was separating the Discharge Pump housing from the Suction Plate. They are fitted together with friction, and a flat-blade screwdriver can push them apart. Replaced broken parts including Wash Impeller, Suction Plate, and Discharge Pump Housing. Purchased Filter Support because it was involved and appeared to have been damaged, but the new part looks identical to the old part. Purchased new o-ring & gasket to avoid digging them out of broken parts. Cleaned out the spray arms top & bottom and it now works like new!
Other Parts Used:
Discharge Pump Housing Impeller Assembly Filter Support - White Suction Plate Upper Discharge Housing Gasket O-Ring Seal
  • Todd from Albuquerque, NM
  • Difficulty Level:
    Easy
  • Total Repair Time:
    15 - 30 mins
  • Tools:
    Pliers, Screw drivers, Socket set
1 person found this instruction helpful.
Was this instruction helpful to you?
Thank you for voting!
Dishes weren't getting clean
Using the break down view suppled by the PartSelect website I removed the parts covering the broken pump impala. The busted impala also scored the pump housing, which also needed to be replaced. For added measure, I replaced the O rings I encountered (alway a good thing to do while your in there). The shaft of the motor is rusted and I needed to break off the last of the impala with small chisel and some light taps. Before reassembling I used some fine grit sandpaper on the shaft, don't go wild here, a tight fit is better than a sloppy one. Total time on the repair wasn't that long. (But don't tell the wife, it bought me a cupple quarters of football!)
Other Parts Used:
Discharge Pump Housing Impeller Assembly Upper Discharge Housing Gasket O-Ring Seal
  • Robert from Port Jefferson Station, NY
  • Difficulty Level:
    Easy
  • Total Repair Time:
    30 - 60 mins
  • Tools:
    Nutdriver, Screw drivers
1 person found this instruction helpful.
Was this instruction helpful to you?
Thank you for voting!
Leak Developed Above Pump
First, I used the diagrams to disassemble the internal components to inspect the various seals. Then, I reassembled the components and replaced the seals in the process with new ones.
Other Parts Used:
O-Ring Seal Drain Impeller Seal Ring Motor Shaft Seal Lower Wash Arm Support and O-Ring Gasket Kit O-RING
  • Benjamin from Fallston, MD
  • Difficulty Level:
    Easy
  • Total Repair Time:
    15 - 30 mins
  • Tools:
    Screw drivers
1 of 4 people found this instruction helpful.
Was this instruction helpful to you?
Thank you for voting!
Unit had shaft seal leak.
After shutting off power and water to the unit, I disconnected the water supply line using a Crescent wrench and a pair of channellock pliers to support the solenoid.
I then disconnected the power at the junction box and the drain and circulate lines and clamps.
Then unlatched the retaining ring under the unit and lifted the pump assembly out.
Using the detail drawing from the web site I disassembled the pump assembly and laid out the parts in order of removal.
I then reassembled the pump assembly in reverse order replacing the worn parts with the new parts purchased from PartSelect.
I then reassembled the unit in reverse order checking for leaks as I went along.
The part worked great and my friend's dishwasher works beautifully.
Other Parts Used:
Drain Hose O-Ring Seal Drain Impeller Seal Ring Motor Shaft Seal O-RING Hose Clamp
  • Jay from Victoria, TX
  • Difficulty Level:
    Really Easy
  • Total Repair Time:
    1- 2 hours
  • Tools:
    Nutdriver, Pliers, Screw drivers, Socket set
6 of 9 people found this instruction helpful.
Was this instruction helpful to you?
Thank you for voting!
  • 1
Questions and Answers

We're sorry, but our Q&A experts are temporarily unavailable.
Please check back later if you still haven't found the answer you need.

You May Also Need ?
Model Cross Reference
This part works with the following models:
PartSelect Number: PS11746845
Manufacturer Part Number: WP910934
Brand
Model Number
Description
Kenmore
1949
Dishwasher - Kenmore Dishwasher 19495(1988)
Kenmore
19495
Dishwasher - Kenmore Dishwasher Model 19495(1988) Parts
Kenmore
1959
Dishwasher - Kenmore Dishwasher 19595(1988)
Kenmore
19595
Dishwasher - Kenmore Dishwasher Model 19595(1988) Parts
Kenmore
1988
Dishwasher - Kenmore Dishwasher 19885(1988)
Kenmore
19885
Dishwasher - Kenmore Dishwasher Model 19885(1988) Parts
Kenmore
1999
Dishwasher - Kenmore Dishwasher 19995(1988)
Kenmore
19995
Dishwasher - Kenmore Dishwasher Model 19995(1988) Parts
Amana
ADW662EAB
Dishwasher
Amana
ADW662EAB-PADW662EAB0
Dishwasher - Amana Dishwasher Model ADW662EAB-PADW662EAB0 (ADW662EABPADW662EAB0, ADW662EAB PADW662EAB0) Parts
Amana
ADW662EAC
Dishwasher
Amana
ADW662EAC-PADW662EAC0
Dishwasher - Amana Dishwasher Model ADW662EAC-PADW662EAC0 (ADW662EACPADW662EAC0, ADW662EAC PADW662EAC0) Parts
Amana
ADW662EAS
Dishwasher
Amana
ADW662EAW
Dishwasher
Amana
ADW662EAW-PADW662EAW0
Dishwasher - Amana Dishwasher Model ADW662EAW-PADW662EAW0 (ADW662EAWPADW662EAW0, ADW662EAW PADW662EAW0) Parts
Amana
ADW862EAB
Dishwasher
Amana
ADW862EAC
Dishwasher
Amana
ADW862EAS
Dishwasher
Amana
ADW862EAW
Dishwasher
Magic Chef
CDB3100AWE
Dishwasher
Magic Chef
CDB3100AWT
Dishwasher
Magic Chef
CDB3100AWX
Dishwasher
Magic Chef
CDB6100AWE
Dishwasher
Magic Chef
CDB6100AWN
Dishwasher
Magic Chef
CDB6100AWX
Dishwasher
Crosley
CDC610B
Dishwasher
Crosley
CDU510B
Dishwasher
Crosley
CDU510V
Dishwasher
Crosley
CDU610B
Dishwasher
Crosley
CDU610N
Dishwasher
Customer Service Representative

Get in touch, we're here to help!

Monday to Saturday
8am - 9pm EST

Contact Customer Service