We're sorry, but our Q&A experts are temporarily unavailable.
Please check back later if you still haven't found the answer you need.
15 questions answered by our experts.
< Prev
1
2
Next >
Sort by:
Search filter:
Clear Filter
Your search term must have 3 or more characters.
Keep searches simple. Use keywords, e.g. "leaking", "pump", "broken" or "fit".
Sorry, we couldn't find any existing answers that matched.Try using some different or simpler keywords, or submit your new question by using the "Ask a Question" button above!
Robert
September 12, 2017
May tag electric stove stopped working. No burners, no oven, no clock, no oven light. If i turn the left 6" burner knob back and forth the clock and over lights work but not the oven or burners are working.? could it be caused by left infinite switch? thanks
For model number PER5710BAQ
Hi Robert,
Thank you for your inquiry. It may be your switch. You can test it with a multi-meter to be sure, however it sounds more like it is going to be your wiring or the control board that may be the issue. I hope that helps. Good luck with your repair.
2 people found this helpful.
Was this helpful?
Thank you for voting!
Andre
March 20, 2018
No power after cleaning oven and changing light in oven...
For model number MER5750BAQ
Hi Andre,
Thank you for your question. There are a number of things that could have happened to make your appliance stop working after changing the bulb. If you did not turn off the power to your appliance when changing the part, you should check your breaker. You might also want to check your elements and your temperature sensor. If all of those parts are fine, then you might have shorted out your electronic control board. I hope that helps. Good luck with your repair.
1 person found this helpful.
Was this helpful?
Thank you for voting!
Becky
March 28, 2019
Due to a fall in the kitchen, the front right burner knob broke off, including the shaft. I understand i need to replace the element switch. This is a dual-sized element control. What part do i need to order? Thanks!
For model number GY397LXUB02
Hello Becky, Thank you for contacting us. I have researched the model you have provided and have found the part you are looking for is Part Number: PS11744412 for the switch. Hope this helps!
1 person found this helpful.
Was this helpful?
Thank you for voting!
Ken
January 22, 2019
Why do you charge $54 for this part when amazon only charges $23?
For model number MER6765BAQ
Hello Ken, Thank you for the question.We apologize that our prices are not as low as you expected. We base our prices on what we are charged by the manufacturer for the parts. We try to keep our prices as low as possible but do also have to keep them at a level to help cover our costs. We also only carry brand new never used or refurbished OEM parts. We hope this helps to explain the reasoning behind the prices!
Was this helpful?
Thank you for voting!
Peter
December 5, 2018
I have a Maytag ceramic cook top range mer6772bab. The right front burner turns on and goes very hot when turned on. Does not matter whether it is set at low, medium or high. It is either full on or off. What should i replace to fix this problem?
For model number MER6772BAB
Hi Peter, thank you for your question. There are a couple of parts that could cause this issue specifically. You will need a multi meter to be able to test the parts. The first part you will want to check is your radiant element. It should be reading between 0 - 120 ohms to be working correctly. The other part to check would be your infinite (or surface burner) switch. When you remove that part from the appliance, connect each probe from your multi meter to the prongs and then turn the switch to an on position. If you get no continuity then the switch is the issue. I hope that helps. Good luck with your repair.
Was this helpful?
Thank you for voting!
Mike
September 9, 2017
Hello, my range will preheat but then at some point will shut completely off. The oven light will go off and will have to be re started. Thanks
For model number MER5550AAW
Hi Mike,
Thank you for your inquiry. There are a few parts that you will have to check to see which one is causing the issue. You will need to check the long oven sensor, the terminal block, the bake element, the surface burner receptacle, the indicator light and the infinite switches. I hope this helps. Thank you and have a great day!
Was this helpful?
Thank you for voting!
Samuel
August 14, 2017
Heating switch turns off, but indicator light stays on, right side of stove, left side works ok.
For model number MER6769BAW
Hi Samuel,
Thank you for your inquiry. It sounds like you will have to replace this switch then. If you would like, you can test the part with a multi-meter to see if it is in fact the part that is causing your issue. Good luck with your repair!
Was this helpful?
Thank you for voting!
Jeff
January 14, 2019
Top oven will not heat check wires they are good .I get 120 on each side on element but don't get 220 if you touch both side
For model number MER6755AAW
Hi Jeff, thank you for your question. There are a few parts that could cause this issue in your appliance. First I would say test your elements with a multi meter to see if they are working correctly or not. They should be reading between 0 - 50 ohms to be working correctly. The other part you should check would be your oven temperature sensor. That can also be tested with a multi meter and should be reading between 1000 - 1100 ohms. If those three parts are fine however, then the issue may be in your control board. I hope that helps. Good luck with your repair.
Was this helpful?
Thank you for voting!
Mike
September 30, 2017
My oven will preheat but then go off at some point before cooking is finished. The stove top burners continue to work only the oven cools down.
For model number MER5550AAW
Hi Mike,
Thank you for your inquiry. There are some parts that you will need to check to see which one is causing the issue. You will need to check the long oven sensor, the terminal block, the bake element, the surface burner receptacle, the infinite switches and the indicator light. I hope this helps. Thank you and have a great day!
Was this helpful?
Thank you for voting!
Eric
January 24, 2018
The front right burner gets hotter than the dial indicates.
For model number Gge388lxs02
Hi Eric,
Thank you for your question. If the front right burner is is getting hotter than the dial indicates, than you will need to replace the 8 inch infinite burner switch. The part number for it is PS11744487. I hope this helps. Thank you and have a great day!
Was this helpful?
Thank you for voting!
< Prev
1
2
Next >
Part Videos
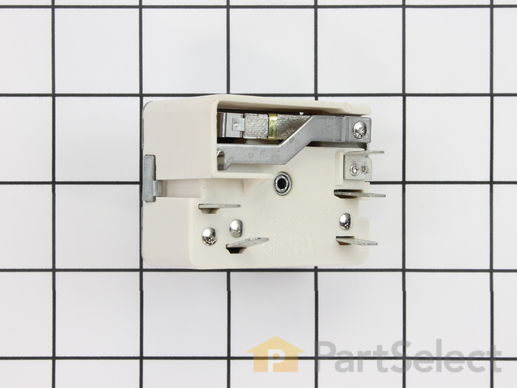
Replacing your Maytag Range Infinite Switch - 6 Inch
Customer Repair Stories
Average Repair Rating: 3.4 / 5.0, 7 reviews.
What's this?
< Prev
1
Next >
Sort by:
Search filter:
Clear Filter
Your search term must have 3 or more characters.
Keep searches simple. Use keywords, e.g. "leaking", "pump", "broken" or "fit".
Sorry, we couldn't find any existing installation instruction that matched.
installed new switches and elements
just move one wire at a time. Each switch has 5 wires and I am sure mixing them would not be good.
Ordered parts, they shipped same day. Arrived exactly as predicted. Totally non-stress. Can't find a thing to complain about.
Burner would only cook on high setting or not heat up at all.
Shut off power to stove. Moved stove out. Loosened screws in top and middle back of stove and removed cover. Took mental note of color order of each wire and unhooked each wire from old switch and reattached to new switch in exact order of color of wire as original. Remounted cover on back of stove and reattached screws. Turned on power and turned on burner and tested burner for heat. Turned off burner, slid stove back and bingo - done. Saved a lot of money.
Judy from West Salem, IL
Difficulty Level:
A Bit Difficult
Total Repair Time:
30 - 60 mins
Tools:
Screw drivers
9 of 13 peoplefound this instruction helpful.
Was this instruction helpful to you?
Thank you for voting!
Replacement of bad switch
I marked all wires separately attaching a paper strip with tape to each connector and made a separate small chart where each wire should attach to the bottom of the switch. On this particular model there are three or four colored wires and two have both double and single connections to the same switch so the small chart told me where a single or double connector would attach even if I lost the attached taped information. Then since wires were marked separately, even if paper was lost I could still proceed with no outside help. I had the luxury of leaving the breaker shut off while waiting for part to arrive. After arrival which was only a couple of days, I raised the stove top and let it rest on a small board maybe 1.5 feet so it would keep itself up. The under assembly was already taken loose before so I just removed the broken switch taking all wires loose, which are already marked and replaced the switch with the new one. Gently placing each wire at its place after removing the tape for that connection. After all four wires were connected I held the switch up in place while screwing the two set screws into place. Then reattached the bottom assembly cover and then let the top down and reattached the four screws, one in each stove hole to attach the stove top to the under assembly. I then reattached one element and flipped the breaker switch on. No sound or problems so I tried the element and all is well. Reattached all elements and the project is done. PartSelect.com made this repair easy and economical. Replacement would have been 4x the part and shipping. Thanks.
Don from Roanoke, VA
Difficulty Level:
Easy
Total Repair Time:
15 - 30 mins
Tools:
Screw drivers
7 of 12 peoplefound this instruction helpful.
Was this instruction helpful to you?
Thank you for voting!
6" surface heating coil remained warm when "off"
Removed the large lower back panel of range (6-8 phillips screws) which holds upper control back panel in place. Removed upper control back panel (2 screws), exposing infinite switch electrical connections. At front face of control panel, removed (pulled off) control knob, exposing 2 phillips screws holding switch in place. (NOTE: A sleeve is on the switch arm or maybe remains inside the control knob). Look for this sleeve. Without it, the knob will NOT seize the switch rotary arm. Removed each wire connection individually, one at a time, installing it in the proper position on the new switch. Reverse all procedures to put things back together. A very simple, straight-forward operation.
William C. from Sealy, TX
Difficulty Level:
Easy
Total Repair Time:
30 - 60 mins
Tools:
Screw drivers
7 of 14 peoplefound this instruction helpful.
Was this instruction helpful to you?
Thank you for voting!
power light on, but burner not getting hot
It was really easy. It took about 5 minutes to remove the screws holding the back in place. Another couple of minutes to remove the switch, and a few more minutes to change the wires over one at a time. Then 5 more minutes to put it all back together again, and plug it back in, and it just worked. Really simple.
Aaron from Weymouth, MA
Difficulty Level:
Really Easy
Total Repair Time:
Less than 15 mins
Tools:
Screw drivers
6 of 12 peoplefound this instruction helpful.
Was this instruction helpful to you?
Thank you for voting!
one electric burner does not get hot
swap a known good coil around and still did not work. then measured voltage across the switch terminals and found out one leg was opened. Ordered a new switch which looked alike. The new switch could handle more current than the old one. Turned out that all terminals of the new switch were same size while the old one had 1 smaller size. Used the dremer tool to file it to fit the wire terminal. Also the burner knob had different grove type . Just forced it in.
dinh from austin, TX
Difficulty Level:
Easy
Total Repair Time:
15 - 30 mins
Tools:
Screw drivers
5 of 10 peoplefound this instruction helpful.
Was this instruction helpful to you?
Thank you for voting!
Infinite switch replacement.
I followed the instructions as provided. When I finished I noticed the switch was 1/4 turn out from the off position mark on the stove. So I pulled the stove back out and took the back panel off again pulled the knobs back off took out the screws that held the switches in place and rotated the switch 1/4 turn counter clockwise. Then I replaced all the screws and knobs . Then I replaced the panel and shoved the stove back in place. One of the burners was an eight inch and the switch doesn't work as well as it could. However there was not a direct replacement for the eight inch burner.
William from Kerens, TX
Difficulty Level:
A Bit Difficult
Total Repair Time:
1- 2 hours
Tools:
Pliers, Screw drivers
1 personfound this instruction helpful.
Was this instruction helpful to you?
Thank you for voting!
< Prev
1
Next >
Customer Reviews
Average Rating:
★★★★★
★★★★★
6 Reviews
3.8
Filter By Rating:
5 Stars
3
4 Stars
1
3 Stars
1
2 Stars
0
1 Star
1
< Prev
1
Next >
Sort by:
Search filter:
Clear Filter
Your search term must have 3 or more characters.
Keep searches simple. Use keywords, e.g. "leaking", "pump", "broken" or "fit".
Sorry, we couldn't find any existing reviews that matched. Try using some different or simpler keywords.
★★★★★
★★★★★
WILLIAM D - August 12, 2022
Verified Purchase
not great
since replacing switch on rear left burner (large) it does not seem to heat up as high as before.
★★★★★
★★★★★
William H - June 12, 2020
Verified Purchase
The repair was easy enough.
The part I received was fine for the six inch burner. However the eight inch does not heat as it used to . Also I had to turn the part 1/4 turn to make the off mark on the stove line up. That meant doing the job almost twice.
★★★★★
★★★★★
Brian C - November 16, 2018
Verified Purchase
Wrong Fix - Excellent service.
The switch was in 1st class condition and very well packed for shipping. The installation video was useful, however, the installed switch was OK - it was the burner that was broken, and as far as I know, there is no way to fix that.
★★★★★
★★★★★
Randy B - April 12, 2018
Verified Purchase
Infinite switch
Part arrived ahead of schedule. However, the newer revisions of this part dont operate like the original part. The burner does not seem to function at any setting other than Hi.
★★★★★
★★★★★
James M - March 8, 2018
Verified Purchase
piece of cake
Thank you the part was the correct one. It came quick. Thank you partselect.
The Fix App makes it easy to manage all your stuff in one place. Just snap a photo and we'll find and store your user manuals, receipts, and product information in one easy-to-find place!
"Like magic. I took a picture of the model number on my refrigerator, and the app identified it right away … Very convenient. I'm impressed." ★★★★★ - Clever Jeff