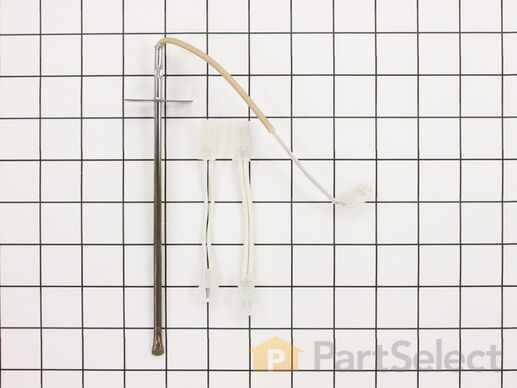
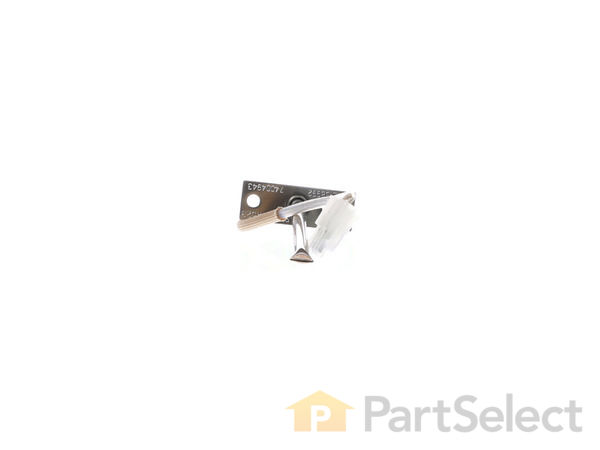
This long oven sensor is also commonly known as a temperature sensor. It is designed for use with ovens and ranges. It is similar to a thermostat; it measures and regulates the internal temperature of your oven cavity. There is an adapter at one end, a probe at the other, and they are connected by an insulated wire. The probe is approximately 7 inches long. You can test the sensor with a multi-meter for functionality. You need to check the model-specific manual to determine what the proper resistance is for your specific appliance. This oven sensor comes with two wire harness adapters and a set of instructions.
How Buying OEM Parts Can Save You Time and Money
Part Videos
Replacing your Maytag Range Long Oven Sensor
Troubleshooting
This part fixes the following symptoms:
Little to no heat when baking | Oven is too hot | Oven not heating evenly | Will Not Start
Keep searches simple. Use keywords, e.g. "leaking", "pump", "broken" or "fit".
Sorry, we couldn't find any existing reviews that matched. Try using some different or simpler keywords.
★★★★★
★★★★★
Clarissa S - June 1, 2023
Verified Purchase
Fixed the problem
The oven is now heating more evenly, hitting the correct temperature and remaining there, rather than fluctuating.
★★★★★
★★★★★
Ruth B - May 20, 2023
Verified Purchase
The part was the right one they suggested online easy to install and works great
I got the sensor and the hot relay which nobody else had cuz I broke the wire on it and thank goodness they had an inventory so part select is the only place I go to a car repair parts yippee
★★★★★
★★★★★
Robert C - April 23, 2023
Verified Purchase
Easy
Product worked well and resolved the problem
However, I had asked for info on parts and how they are mounted( silver plates on both sides of oven where hinges dive into oven body) but got no answer..
Look up previous email.
★★★★★
★★★★★
Michael T - March 31, 2023
Verified Purchase
Easy Repair
The part was delivered when promised but it didn’t fix my issue even though it stated it fixed the problem 71 percent of the time for ovens with no heat or low heat. I even purchase a new heating element which had the next highest probability and it still didn’t work. Lost faith in your troubleshooting application
April 1, 2023
Hi Michael,
Thank you for your review. Please accept our apologies for this situation. We will be in touch with you shortly regarding your order.
★★★★★
★★★★★
George R - January 6, 2023
Verified Purchase
Easy repair
The problem was not due to the sensor, so the problem was not fixed. It was a relatively inexpensive part so worth the try. The membrane switch and relay were at fault.
★★★★★
★★★★★
Tony G - August 14, 2022
Verified Purchase
Most excellent part
There are not enough words to say thank you for your wonderful salesperson whom I spoke with on the phone to purchase the replacement part. I had been advised by a repairman that I paid to diagnose the overheating issue with my double wall Maytag oven, that I needed a "new oven" I read reviews on your web site, and I decided to take a chance after speaking to the, most wonderful salesperson, after I received the part, I watched your video to learn what and how to do removal and replacement. I have to say "THANK YOU" once again, the oven works as it should after installing new long oven sensor, I saved myself thousands of dollars, the cost of replacing a double wall oven, Thank you once again
★★★★★
★★★★★
KATHY S - April 24, 2022
Verified Purchase
Easy repair
The thermostat for my larger large oven on the bottom.
★★★★★
★★★★★
Russell H - March 7, 2022
Verified Purchase
Easy to replace
It fits our Jenn Air Oven and it only took 15 minutes to replace
★★★★★
★★★★★
Brett S - April 14, 2021
Verified Purchase
worked fine again
This part keeps burning out so I'm a regular customer
★★★★★
★★★★★
J WAYNE D - April 1, 2021
Verified Purchase
No clue what was wrong
I did not know what was wrong with my oven , it is only five years old when I turned it on , we could never get the temp higher than 225 .
The element looked like new so I ordered this item thinking it must be the problem. It shipped in a few days and the install was easy. The oven still does not work. I ordered the element and it arrived in a few days as well . The install was easy . The oven works great ,
< Prev
1
2
3
Next >
Customer Repair Stories
Average Repair Rating: 3.7 / 5.0, 53 reviews.
What's this?
Sort by:
< Prev
1
2
3
Next >
Search filter:
Clear Filter
Your search term must have 3 or more characters.
Keep searches simple. Use keywords, e.g. "leaking", "pump", "broken" or "fit".
Sorry, we couldn't find any existing installation instruction that matched.
Oven sensor caused cooling fan to run continuously. Had to flip breaker to get it to turn off..
Left oven off. Located sensor in pdf manual. Unscrewed mount, pulled sensor out to access connector. Disconnected old sensor, checked continuity(resistance) on ohms with multimeter. No continuity; connected new sensor, screwed mount back into place, turned on oven and baked cookies to check operation & it worked perfectly.
Aubrey from EADS, TN
Difficulty Level:
Really Easy
Total Repair Time:
Less than 15 mins
Tools:
Screw drivers
2 of 2 peoplefound this instruction helpful.
Was this instruction helpful to you?
Thank you for voting!
my oven would not heat to proper temp
I slide the range out and unplugged it from the outlet. I removed the back of the oven ( 8 screws ) using a cordless drill and phillips bit then with a phillips screwdriver I removed the oven sensor (2 screws) then I installed the new sensor , reinstalled the oven back , plugged the range in , slide it back into place and that was it. T
... Read morehis repair took about 10 mins and the oven works perfectly. Thanks !
Read less
mark from CHAMBERLAIN, SD
Difficulty Level:
Very Easy
Total Repair Time:
Less than 15 mins
Tools:
Screw drivers
5 of 5 peoplefound this instruction helpful.
Was this instruction helpful to you?
Thank you for voting!
Cooling fan runs fault code displayed
Removed the two screws holding the sensor to the rear oven wall. pulled out sensor wire. It was caught on other wires behind the oven. removed the three screws holding the 8" inspection plate in the center of the rear panel. Carefully move the insulation and reach in to grasp the back end of the sensor wire. Once free from the snag it eas
... Read moreily pulls out with the sensor just as stated in the video. using the appropriate adaptor it was easy to re-asseble and and attach to the oven wall. Replace the rear panel with the three screws and it was done
Read less
FRANK from CLARENCE CTR, NY
Difficulty Level:
Easy
Total Repair Time:
30 - 60 mins
Tools:
Screw drivers
1 personfound this instruction helpful.
Was this instruction helpful to you?
Thank you for voting!
"F3" error message and no oven heat
Unplugged the range, removed screws holding the old sensor. When I pulled it out, the wire connecting to the sensor was completely broken through,therefore I could not just pull the wire to get to the connector. Unscrewed one side of back panel to access the connector. Pushed the connector and wire of the new sensor through the hole ( and
... Read more behind the insulation), disconnected the old sensor and connected the new one. Re screwed the new connector in place plus rescrewed the back panel. Plugged the range in and - Viola! Everything now works like a charm and I have my oven back. Easy-Peasy. Oh - I am an older female with very limited DYI experience. I just saved myself $650.00!
Read less
Pat from PAYSON, AZ
Difficulty Level:
Very Easy
Total Repair Time:
15 - 30 mins
Tools:
Screw drivers
1 personfound this instruction helpful.
Was this instruction helpful to you?
Thank you for voting!
Oven would over heat and produce a F2 error code on the display. It would not turn off or cool down until I switched the circuit breaker off.
I switched the oven sensor easily enough, but it did not remedy the problem, so we are in the process of replacing the oven since it's about 20 yrs. old.
richard from SAINT MARYS, KS
Difficulty Level:
Very Easy
Total Repair Time:
Less than 15 mins
Tools:
Screw drivers
1 personfound this instruction helpful.
Was this instruction helpful to you?
Thank you for voting!
No problem installing the sensor
I removed the two mounting screws and pulled the harness through the opening unsnapped the sensor from the harness and installed the new sensor i didn't have to used the adapters the new sensor fitted
tommy from FAYETTEVILLE, NC
Difficulty Level:
Very Easy
Total Repair Time:
Less than 15 mins
Tools:
Screw drivers
1 personfound this instruction helpful.
Was this instruction helpful to you?
Thank you for voting!
Oven would not hold temperature, not turn on, and would shut off during use.
Extremely simple repair to make. Move stove away from wall and disconnect power. Remove the oven racks. Remove the rear sheet metal panel covering the wiring harnesses. Caution: Sharp edges and corners on sheet metal.Sensor is located in upper left corner on rear oven wall. Using a long-shafted #2 Philips screwdriver, remove the two Phili
... Read moreps head screws and gently pull the sensor 1" away from the oven wall. At this point, it will help to have an assist from someone while you are behind the range. Have the assistant gently tug on the sensor while you watch for wires moving on the rear of the range. After locating the sensor wires, gently disconnect the plastic connector clip. Note: plastic connectors become brittle with age and exposure to heat Move to front of range and gently remove sensor from rear wall by pulling the wiring through the oven wall. Before inserting the new sensor wire through the oven wall, "dry fit" the wiring connectors to see that the new sensor is a correct connection. Make connection, and secure the sensor to the rear oven wall with the two screws. Install racks, reinstall rear sheet metal panel, and connect the power. Set the oven baking temperature to a moderately low temp, 300 - 350 deg. to test the new sensor.
Read less
John from Arvada, CO
Difficulty Level:
Very Easy
Total Repair Time:
Less than 15 mins
Tools:
Nutdriver, Screw drivers
1 personfound this instruction helpful.
Was this instruction helpful to you?
Thank you for voting!
Oven temperature fluctuates
Replaced the thermostat according to existing videos and had to adjust the thermostat using instuctions in the user manual for model CWE4800ACB.
Larry from SOLON, IA
Difficulty Level:
Easy
Total Repair Time:
30 - 60 mins
Tools:
Screw drivers
1 personfound this instruction helpful.
Was this instruction helpful to you?
Thank you for voting!
Oven erratic, not heating correctly, timer beeper sounding
The video indicating •unscrew old sensor, •pull wiring, •unplug old sensor, and •plug in replacement was good until I pulled the old one and saw wire nuts behind the small square hole! After some research, I learned that the nuts COULD come through that small hole with use of needle nose pliers. One of the wire nuts had the edges pinched
... Read more off (chipped) in the process. Then I learned about ceramic wire nuts, which I'd never previously encountered. Very important if you don't want to melt your nuts! I cut and stripped the end of a disconnect plug to the stove wiring and now I have a plug in place; which, hopefully, I'll never need to use.
Read less
Dave from SANTA BARBARA, CA
Difficulty Level:
A Bit Difficult
Total Repair Time:
30 - 60 mins
Tools:
Pliers, Screw drivers
2 of 2 peoplefound this instruction helpful.
Was this instruction helpful to you?
Thank you for voting!
F5 fault code kept appearing
I installed the new oven sensor but the problem continued. So I ordered a new relay board and installed it. Still no luck. So I pulled the new board back out and started trouble shooting it using my electronic background. I discovered the new board was using a pin for L2 that had no exit on the backplane, so I removed it and installed
... Read more it where I believed it should go. Reinstalled the power relay board and presto. My oven is working lie a champ. Louis
Read less
Louis Rodriguez from Granbury, TX
Difficulty Level:
Very Difficult
Total Repair Time:
More than 2 hours
Tools:
Nutdriver, Screw drivers
1 personfound this instruction helpful.
Was this instruction helpful to you?
Thank you for voting!
< Prev
1
2
3
Next >
Questions and Answers
We're sorry, but our Q&A experts are temporarily unavailable.
Please check back later if you still haven't found the answer you need.
79 questions answered by our experts.
Sort by:
< Prev
1
2
3
Next >
Search filter:
Clear Filter
Your search term must have 3 or more characters.
Keep searches simple. Use keywords, e.g. "leaking", "pump", "broken" or "fit".
Sorry, we couldn't find any existing answers that matched.Try using some different or simpler keywords, or submit your new question by using the "Ask a Question" button above!
Keith
September 9, 2017
While cooking, i received a f-3 code, hit cancel couple of times and got f-7, hit cancel again and oven shut down. I then reset temp to 400 and in a few minutes received f-3 again, from what i see it is the oven temperature sensor. How do i know which one it is i don't see any part numbers in my manual.
For model number CWE4800ACB
Hello Keith, thank you for contacting us. The "F3" fault code is indicating an oven temperature sensor failure or a temperature sensor circuit failure. The oven temperature sensor could be open or shorted. It will need to be disconnected and tested with an ohm meter. At normal room temperature, the oven temperature sensor should have a resistance of 1050-1100 ohms. If it is not close to this it would need to be replaced. The f7 error code usually indicates a problem with the main control board. You may just want to try the oven sensor first, the main control board for your model has been discontinued. Hope this helps!
30 people found this helpful.
Was this helpful?
Thank you for voting!
Matt
December 26, 2017
The upper oven bake element did not heat up. I replaced the element and I still have the same problem. What other items can I troubleshoot for?
For model number MER6751AAW
Hi Matt,
Thank you for your question. There are only a few parts that could cause an issue like this. The element itself (which you have already checked), the oven sensor, or the electronic control board. You can test your oven sensor with a multi meter to make sure that it is working. It should read 1000 - 1100 ohms of resistance when testing it at room temperature. I hope that helps. Good luck with your repair.
21 people found this helpful.
Was this helpful?
Thank you for voting!
Dale
August 29, 2017
Broiler starts on its own on lower oven then overheats f2 code is this just the sensor or another part that causes this
For model number JJW9630AAW
Hi Dale,
Thank you for the great question. With the F2 Error code it is recommended the Sensor to be replaced. Before you order it is a good idea to make sure the harness on the sensor is securely attached,if it comes lose it can cause this error as well.
Hope this helps!
15 people found this helpful.
Was this helpful?
Thank you for voting!
Richard
January 2, 2018
The lower oven isn't preheating or holding an oven temperature properly. It begins to heat, even to the point of red-hot, but loses it around 200 degrees. I can set the broiler to bring the temp up, switch to bake and see that the temp reads correctly, then it drops off. I haven't seen any error codes at all.
For model number jdr8895aas
Hello Richard, Thank you for your inquiry. We would recommend checking the following parts to fix your issue: the long oven sensor, the temperature sensor, the bake element, and the terminal block. You can test the parts with a multimeter. If you are unfamiliar with how a multimeter functions, there are YouTube videos available to assist you. Hope this helps!
9 people found this helpful.
Was this helpful?
Thank you for voting!
Karl Rock
August 30, 2017
Cant set the clock on oven, red number and letter show up 5a6
For model number GGE350LWS00
Hello Karl, thank you for contacting us. Your oven is actually showing the error code SAB which is for sabbath mode. You can hold the clock button for 5-10 seconds and it should take it out of sabbath mode, if not you may have to wait 72 hours for it to go off by itself. Hope this helps!
7 people found this helpful.
Was this helpful?
Thank you for voting!
Liz Berard
January 28, 2019
My over takes extremely long to preheat and does not go higher then 225 degrees. What do i need to check?
For model number GY397LXUS
Hello Liz, Thank you for your question! I suggest checking the following parts: PS1570174 Long Oven Sensor and PS11752540 Bake Element. You can test this parts with a multimeter. If you are unfamiliar with the function of a multimeter we do have information on our website to assist you. Good luck with your repair! Have a nice day.
7 people found this helpful.
Was this helpful?
Thank you for voting!
Robert
July 23, 2017
Oven won't heat at all broil setting won't work either
For model number Cwe4800acb
Hi Robert,
Sorry to hear the oven is not heating. Sometimes the issue can be caused by either the bake or broil elements or it may be the long oven sensor. One way to check is with an Ohms/Multi Meter. I hope this helps. Have a great day!
5 people found this helpful.
Was this helpful?
Thank you for voting!
Fred
November 19, 2018
Every thing works but when using upper or lower oven temp. Readings do not light up on screen.
For model number MER6772BAW
Hi Fred,
Thank you for your question. If the oven is not heating correctly, then the issue is likely with the oven sensor, sometimes called the oven thermostat, and you will need to check it with a multimeter. When testing the sensor with a multimeter, the sensor should be tested at room temperature and it should be unplugged from the oven. You will need to measure the resistance between the two prongs at the end of the sensor connector. Replace the oven sensor if the reading is less than 900 Ohms or more than 1200 Ohms. If this part turns out to be fine, you will need to check the electronic control board, the elements and the wiring between them to see which parts are causing the issue. I hope this helps. Thank you and have a great day!
5 people found this helpful.
Was this helpful?
Thank you for voting!
Oven Themkeith Sisk
February 28, 2018
Oven temp is actually lower than the display setting by a marginal amount. I’m assuming i have a bad temp sensor, just wondering which sensor i needed. Also if u could me the resistance reading at room temp for the sensor. I saw it is supposed to be around 1082
For model number Mer6772bas
Hello Keith, thank you for your question. The upper oven sensor is part number WP7430P044-60 and the lower oven sensor is part number 12001656. At normal room temperature, the oven temperature sensor should have a resistance of 1050-1100 ohms. If it is not close to this it would need to be replaced. I hope this helps!
4 people found this helpful.
Was this helpful?
Thank you for voting!
Jeff
November 20, 2017
Maytag electric oven. When baking, oven will periodically shut off. Have to reset temperature control and clock.I was thinking may be temperature sensor?
For model number cre9800ccb
Hi Jeff,
Thank you for your inquiry. If the oven is not shutting off, you will need to check the long oven sensor, the electronic control board to see which one is causing the issue. To do this you will need a multimeter. I hope this helps. Thank you and have a great day!