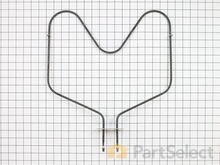
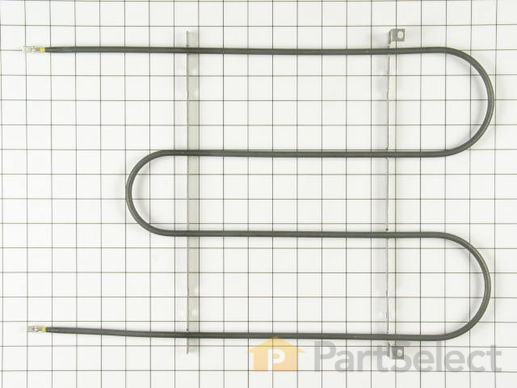
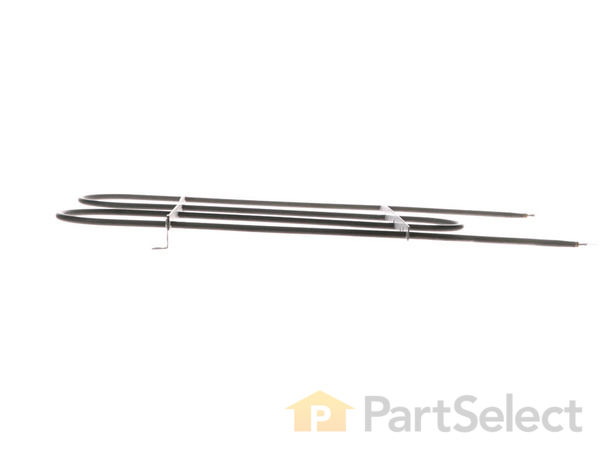
Broil Element - 240V
$
87.92
In Stock


Get this part fast! Average delivery time for in-stock parts via standard shipping: 1.8 days.
PartSelect Number PS11743368
Manufacturer Part Number WP660579
Manufactured by
Whirlpool
You May Also Need?
Product Description
Broil Element - 240V Specifications
This broil element is found on the roof of the oven and has push-on terminals.

How Buying OEM Parts Can Save You Time and Money
Troubleshooting
This part fixes the following symptoms:
Little to no heat when broiling | Element will not heat | Little to no heat when baking | Oven not heating evenly
This part works with the following products:
Range, Wall Oven, Microwave Oven Combo.
This part works with the following products:
Whirlpool, KitchenAid, Roper, Kenmore.
Part# WP660579 replaces these:
AP6010191, 308129, 311713, 311714, 311715, 311716, 3148040, 660578, 660579, 661420
Questions and Answers
Ask our experts a question about this part and we'll get back to you as soon as possible!
Search filter:
Clear Filter
Your search term must have 3 or more characters.
Keep searches simple. Use keywords, e.g. "leaking", "pump", "broken" or "fit".
Sorry, we couldn't find any existing answers that matched.Try using some different or simpler keywords, or submit your new question by using the "Ask a Question" button above!
Brenda
February 15, 2020
I am trying to locate part number for element for broiler for Whirlpool electric stove.
For model number RS630PXYH

Hello and thank you for writing.
The broil element PS11743368 is in the list of compatible parts for your model. We hope this helps. Please contact us anytime if you require further assistance.
2 people found this helpful.
Was this helpful?
Thank you for voting!
Related Parts:
Bob
December 28, 2017
My broil element is about 16 inches long from the back to the front. How much of the element shown is behind the back of the oven?
For model number RB770PXBB0

Hello Bob,
Thanks for your question. Only the wire ends should be behind the back, which are approximately one inch in length.
I hope this helps.
1 person found this helpful.
Was this helpful?
Thank you for voting!
Marilyn
October 6, 2021
Can this item be returned if it does not fit?
For model number Rs660bxk

Hello Marilyn, Thank you for the question. Fix offers 365-day returns on all parts that have not been installed. Use our self-service feature to complete your return online.
Please allow 7-10 business days after the part has been received in our warehouse for your refund to appear on your credit card.
Please note we can only accept returns on items that have not been installed. We hope this helps!
Was this helpful?
Thank you for voting!
✖
Ask a Question
Ask our experts a question on this part and we'll respond as soon as we can.
Something went wrong. Please try again later.
Your Question Has Been Submitted!
Our experts will send you an email as soon as your question has been answered.
Customer Repair Stories
Average Repair Rating: 4.2 / 5.0, 13 reviews.
What's this?
Search filter:
Clear Filter
Your search term must have 3 or more characters.
Keep searches simple. Use keywords, e.g. "leaking", "pump", "broken" or "fit".
Sorry, we couldn't find any existing installation instruction that matched.
Bake Element Burned Out
Replacement was relatively easy. Oven door was pulled off hinges after removing 2 mounting screws nearest the hinges. After shutting off power at the breaker, screws (2 each) holding elements were removed. Elements were pulled into oven ~ 4 inches exposing wiring and clips. The clips pulled free with just a little wiggling by hand and were easily pushed back on by hand. Then reverse to finish.
Other Parts Used:
-
Robert from Baton Rouge, LA
-
Difficulty Level:Easy
-
Total Repair Time:15 - 30 mins
-
Tools:Screw drivers
45 of 48 people
found this instruction helpful.
Was this instruction helpful to you?
Thank you for voting!
Burnt out broiler element
Turned off power to range because I was scared. Unscrewed broiler element, pulled part forward and pulled off wires that were attached to the back, attached wires to new element, pushed it back in place, screwed it back on to oven. Cooked my bruchette!
-
Starla from Vashon, WA
-
Difficulty Level:Really Easy
-
Total Repair Time:Less than 15 mins
-
Tools:Screw drivers
19 of 20 people
found this instruction helpful.
Was this instruction helpful to you?
Thank you for voting!
Both heating elements would not work.
After shutting off the power, I removed the door and oven racks. Then, by using a screwdriver, I removed each element one at a time and replaced with the new element. Each element pulled away from the back wall and was connected electrically by Sta-Kon connectors. All went well, and the unit was operational in about 30 minutes. I still have to remove the oven from the wall to replaced the two door springs.
Other Parts Used:
-
Lee from Austin, TX
-
Difficulty Level:Easy
-
Total Repair Time:15 - 30 mins
-
Tools:Screw drivers
9 of 9 people
found this instruction helpful.
Was this instruction helpful to you?
Thank you for voting!
Broil Element Was Burned Out
1. Move oven out from wall 2. Remove back panel of oven, 8 screws 3. Remove 3 screws inside oven holding element 4. Pulled wire connections off of element 5. Reverse procedure to install new element
-
DAVID from COTTAGE GROVE, WI
-
Difficulty Level:Really Easy
-
Total Repair Time:15 - 30 mins
-
Tools:Nutdriver
9 of 14 people
found this instruction helpful.
Was this instruction helpful to you?
Thank you for voting!
Broiler wouldn't heat
First I removed the ovem door, then I removed the 4 screws, unplugged element and plugged in the new one, then replace the screws and door. It should have been a 10 min job but I'm old and a bit fat...slowed me down.
-
Diane from Mill Valley, CA
-
Difficulty Level:Really Easy
-
Total Repair Time:15 - 30 mins
-
Tools:Screw drivers
7 of 7 people
found this instruction helpful.
Was this instruction helpful to you?
Thank you for voting!
The upper broiler element had burnt and broken into.
I must compliment PartSelect on their quick responce and delivery of the item ordered. It arrived a day after I had ordered it. Trust me, the $40.00 I spent on the item was way cheaper than having a repair service fix it or having the entire oven replaced. I would highly recomend anyone to utilize PartSelect.
-
William from Manteno, IL
-
Difficulty Level:Really Easy
-
Total Repair Time:15 - 30 mins
-
Tools:Wrench (Adjustable)
5 of 7 people
found this instruction helpful.
Was this instruction helpful to you?
Thank you for voting!
The heating elments were getting old kicking breaker
took out the old heating elments and cleaned the bottom & top of oven with out the elments in, which made it alot easier then put new ones in. They were very easy to do, just make sure you watch how you took old ones out and don't loose the screws cause you use them to put new ones in.
Other Parts Used:
-
Pamela from Portland, NY
-
Difficulty Level:Really Easy
-
Total Repair Time:15 - 30 mins
-
Tools:Screw drivers
4 of 6 people
found this instruction helpful.
Was this instruction helpful to you?
Thank you for voting!
Broken broiler top element
SUPER EASY! The part arrived very quickly. I turned off the circuit breaker, unscrewed the few nuts, pulled out the element and reversed the process. 'works beautifully! Thanks so much.
-
Julie from Corunna, MI
-
Difficulty Level:Really Easy
-
Total Repair Time:Less than 15 mins
-
Tools:Screw drivers
4 of 6 people
found this instruction helpful.
Was this instruction helpful to you?
Thank you for voting!
Broiler unit would not heat
The broiler unit had disintegrated at both connections. I removed the two screws in the top of the oven holder the unit, pulled out the unit, measured and ordered a replacement.
To replace the element, I pulled out the stove, removed the rear panel, located the connections for the broiler unit, remove parts of the old unit. I then attached the new unit to the top of the oven with the two screws, went around back and pushed in the two connections, replaced the back cover and replace the stove. It took about 30 minutes because I cleaned everything and sprayed bug spay (another plus for doing the repair myself).
-
Robert from Atlanta, GA
-
Difficulty Level:Easy
-
Total Repair Time:15 - 30 mins
-
Tools:Pliers, Screw drivers
3 of 4 people
found this instruction helpful.
Was this instruction helpful to you?
Thank you for voting!
Oven would not reach selected temperature
First, shut off the power at the breaker panel. Next, I simply unscrewed the screws holding in each element, disconnected the leads, reconnected the leads to the new elements, positioned each element & reinserted the screws. A suggestion: Before loosening the screws, a light shot of PB Blaster or similar might help.
Other Parts Used:
-
Howard from BRYAN, TX
-
Difficulty Level:Really Easy
-
Total Repair Time:30 - 60 mins
-
Tools:Screw drivers
2 of 2 people
found this instruction helpful.
Was this instruction helpful to you?
Thank you for voting!
Customer Reviews
Filter By Rating:
Search filter:
Clear Filter
Your search term must have 3 or more characters.
Keep searches simple. Use keywords, e.g. "leaking", "pump", "broken" or "fit".
Sorry, we couldn't find any existing reviews that matched. Try using some different or simpler keywords.
James F - 28 days ago

Worked as expected
Was exact replacement part. No surprises
Debra F - August 13, 2020

This was such an easy repair. I watched a you tube first, ordered the part, then replaced my burned out element. Easy!
Perfect condition upon arrival. Very quick shipping...2 days.
Nabil A - May 21, 2019

Great part
The part was in great condition
Robert C - April 1, 2019

Part arrived promptly and worked fine
This repair turned out more involved as when I pulled out old broiler element connecting wires remained behind oven wall so could not access. I had to call in appliance repairman as pulling oven out from wall is beyond my DIY skills. He had a special cart purchased from Whirlpool for that purpose! Broiler is now working fine again and great to be able to get a factory part for an oven built in 1989!
Paul S - January 11, 2019

Easy 15 minute job
This was a broiler replacement. Knock the power off at the breaker. Make sure you keep the old rear wall brackets as you reuse them. After removing all four screws be gentle when pulling the element out. One of my connectors caught on the frame and came off. Easily retrieved with long nose pliers so all was well.
Slide the old rear wall brackets onto the new element (keep them on the same side), connect the two leads, slide back in until the two roof brackets are aligned. Screw those in then slide and attache the rear wall brackets and you’re done.
Julie C - October 31, 2018

Speedy Delivery. Easy installation
No problems! I wish I would have ordered another oven rack too.
Suzanne B - October 16, 2018

Broiler element
They sent the wrong part. I have an old oven. They didn't tell me the part was not available. Someone should have said you cant get that part
Paula M - October 2, 2018

Difficult repair, but the part was excellent
The difficult part was getting the screws out of the top of the 26 year old oven. We ended up cutting them out, rotating the brackets 180° and drilling new holes. Had to remove the oven from the wall cabinet (It's heavy!) to make sure the other connections at the back were good. I've changed the bottom element myself but the broiler element was a lot more complicated. I wish the design of the broiler element was like the bottom element--plug and play!
Gilbert B - July 25, 2018

broil element
Quick on time and cheaper than other sites
Robert B - March 8, 2018

Right part and easy to install
Wasn't the element but was the ground wire problem. Happy with the purchase
Model Cross Reference
This part works with the following models:
PartSelect Number: PS11743368
Manufacturer Part Number: WP660579
Brand
Model Number
Description
Kenmore
2274238591
Range
- Kenmore Range/Stove/Oven Model 227.4238591 (2274238591, 227 4238591) Parts
Kenmore
6644428914
Range
- Kenmore Range/Stove/Oven Model 664.4428914 (6644428914, 664 4428914) Parts