The defrost heater keeps the cooling coils from frosting over.
How Buying OEM Parts Can Save You Time and Money
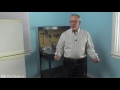
Part Videos
Replacing your Whirlpool Refrigerator Defrost Heater
Troubleshooting
This part fixes the following symptoms:
Leaking | Freezer not defrosting | Fridge too warm | Frost buildup
This part works with the following products:
Refrigerator, Freezer.
This part works with the following products:
Whirlpool, Kenmore, KitchenAid, Roper.
Part# WP2315530 replaces these:
AP6007245, 2166124, 2315530
Customer Repair Stories
Average Repair Rating: 2.7 / 5.0, 2 reviews.
What's this?
Sort by:
< Prev
1
Next >
Search filter:
Clear Filter
Your search term must have 3 or more characters.
Keep searches simple. Use keywords, e.g. "leaking", "pump", "broken" or "fit".
Sorry, we couldn't find any existing installation instruction that matched.
water leaking in fridge and ice buildup
replacement went easy most of the time was spent removing the ice build up
Darrell from VALPARAISO, IN
Difficulty Level:
Easy
Total Repair Time:
30 - 60 mins
Tools:
Nutdriver, Pliers
2 of 2 peoplefound this instruction helpful.
Was this instruction helpful to you?
Thank you for voting!
We were getting ice forming in the freezer compartment and water in the frig compartment
A. remove food from freezer and store in cooler etc. B. turn off frig with dial in main compartment, then pull frig out away from wall and unplug and remove the cover ( It is located at the bottom of the frig and may be cardboard and contains a handfull of 1/4" screws) exposing the compressor and drain tube (this is a good time to
... Read more vacume the compressor and coil area) c. Take false back off from freezer by removing two 1/4 inch screws. Next, 1. we made sure that the drain tube that runs down to a drain pan near the evaporator coil was clear, we did this by using a small aount of rock salt to speed up the melting of the ice then poured small amounts of hot water (boiling into the drain hole and soon the water flowed down the tube and into the pan below. 2. We then pushed a #12 standed electrical wire (with its end stripped back 1-1/2" then folding the strands back to create a broom) down the tube to the pan to push out any debree that may be present i.e. tin foil plastic bag particles, food chunks etc. Making sure that this drain tube is clear is the first thing that could be causing the ice build up and water in the lower compartment! However, I performed this several times and didn't change the problem so I chose to change the parts associated with defrost: 1. defrost heater, which is very easy to change. it is mostly plug and play but does require a pair of needle nose pliers to open a couple of metal fins to remove heater from its mounts, just be gentle with the process.
2. defrost thermostat, which is also very easy to change (Simply pull it off of a copper tube) but requires you to cut two wires near the old part and wire nut the new part wires to the remaining original wires, I added some anti oxident to the wires inside the wire nut to prevent a bad connection from developing do to moisture in this area (You can buy wire nuts with this already inside them, do this)and I taped the wire nut with a few inches of ELECTRICAL TAPE CLOSING OFF THE OPENING OF THE WIRE NUT. You can then put his cabinet back together! 3. I also decided to change the defrost timer which is located inside a cover where the frig temperture setting dial is located. It is held to this cover by two phillips screws the cover is held in place by one 1/4" screw. once you have the cover off and the defrost timer unscrewed you must remove a plug from the timer! Now if you got the exact part you simply reinstall the defrost timer plug in the same postion on the new timer and screw the timer back onto its mount etc. However you may need to determine if the new timer is in the "DEFROST" position and you will need to take it out of that position by I assume rotating the timer mechanism (Ask a tech person about this)!!!!!!!!! Then with all that done plug your frig vack in reposition it turn it on and be proud of yourself.
Now, if you recieved the timer I did it may look the same as the old one, but it may contain a black wire!!! You will need to know which type of defrost timer application you frig uses: 1. Continuous run 2. version 1 Cumulative compressor run. or 3. version 2 Cumulative compressor run. I found a wiring diagram folded up and stored in the grill in the bottom of the front of the frig that helped me determine this. you will need to be able to read a wiring diagram but I found this situation to be simply a matter of matching examples of pictures (line diagrams). It is important though as you must determine which timer application your frig has because the black wire must be placed on a certain terminal for proper operation.
I replaced a three parts and may have, through trouble shooting, been able to save some money by not replacing all these parts. However , I found that when I went for guidance on trouble shooting that i.e. with the heater that ohmic values of the old part may be near the new part that it may still not be conclusive!? so for a hundred bucks my frig may last 5-10
Ask our experts a question about this part and we'll get back to you as soon as possible!
8 questions answered by our experts.
Sort by:
< Prev
1
Next >
Search filter:
Clear Filter
Your search term must have 3 or more characters.
Keep searches simple. Use keywords, e.g. "leaking", "pump", "broken" or "fit".
Sorry, we couldn't find any existing answers that matched.Try using some different or simpler keywords, or submit your new question by using the "Ask a Question" button above!
Ernest
August 14, 2017
Can a problem in the circuit board cause a no defrost issue?
For model number 10671209100
Hello Ernest, that is a great question. Yes, the adaptive defrost control board PS11740238 could cause the issue, but before that I would test the defrost thermostat PS11742474 and the defrost heater PS11740357 as they can cause the same issues. These parts can be tested with a multi-meter. Hope this helps!
5 people found this helpful.
Was this helpful?
Thank you for voting!
Gaylon Horn
March 25, 2019
My defrost drain is freezing up, therefore the water freezes up under the bottom of freezer.
For model number KTRS21KFWH00
Hello Gaylon, thank you for inquiring. For this symptom, there are a few parts that may provide a fix. You may want to try replacing the Defrost Timer part PS11723171; the Bimetal Defrost Thermostat part PS11742474; or the Defrost Heater part PS11740357. We hope this helps.
3 people found this helpful.
Was this helpful?
Thank you for voting!
Larry
November 4, 2019
My refrigerator is cooling only in the freezer the fresh food section at the bottom is not cooling I was told that the heater was not working
For model number WP231530
Hi Larry,
Thank you for your question. If the refrigerator section is too warm, there are some parts that you will need to check to see which one is causing the issue. Here is a link from our website that you may reference on what parts to check, https://www.partselect.com/AdvancedModelSymptoms.aspx?ModelNum=10667067791&mfgModelNum=&fkMfgID=3&ModelMasterID=43205&PID=10. I hope this helps. Thank you and have a great day!
1 person found this helpful.
Was this helpful?
Thank you for voting!
Frederick
April 13, 2018
My defrost coil shows continuity yet when the 110 vac is applied during the defrost cycle it does not heat up. Is the defrost coil bad or there another item i should check?
For model number ET1MHKXMQ01
Hi Frederick,
Thank you for your question. Your defrost coils would not heat up actually. It would be the defrost heater that would heat up. That part is controlled mainly by the defrost thermostat. I could suggest maybe testing those two parts specifically to see if they are working correctly. I hope that helps. Good luck with your repair.
1 person found this helpful.
Was this helpful?
Thank you for voting!
Lambros
October 30, 2019
Freezer was not defrosting. Ice was accumulating all over the cover-evap. I changed the thermostat and there is no more ice forming on the cover, but ice has started forming at the bottom of the air tower and water is dripping into the fridge. Any ideas on how to prevent the ice from forming at the bottom of the air tower and to stop the water from dripping
For model number GR2SHKXMS01
Hello Lambrose, thank you for your question. We would recommend testing the defrost heater PartSelect Number: PS1174035, and the defrost board Part #: PS11740238. I hope this helps!
Was this helpful?
Thank you for voting!
Jonathan
March 2, 2018
My freezer is frosting up, and the fridge part is not keeping as cool as normal. There is ice buildup with the occasional drip in the bridge area near the top. I changed out the defrost timer, but that does not seem to make a difference and the unit never seems to stop blowing air even when the dial is turned to warmer. I am thinking it is either a thermostat issue or maybe a problem with the defrost heating element. Any thoughts?
For model number KTRS22MJBL00
Hello Jonathan,
Thanks for your question. This type of situation could arise from a faulty evaporator fan motor. You may wish to test that along with the thermostat and defrost heating element with a multimeter for electrical continuity. Replace any that do not show continuity.
I hope this helps.
Model10672206201 the video in your page to replace the defrost heater for this model is not correct its suppose to be for a fridge and you have a video of a washer changing a valve
Hi Omar, Thank you for the question. Thank you for letting us know of the error on the site! I have sent this off to be fixed and in the mean time here is a link tot he correct video. Hope this helps!
https://www.youtube.com/watch?v=DTDJYrvrQjs
Was this helpful?
Thank you for voting!
John
May 18, 2023
Does this work with whirlpool gr9fkxps00
For model number gr9fkxps00
Hi John,
Thank you for your question. This would not be the correct defrost heater for your refrigerator. The part number for the defrost heater is PS11740358. We hope this helps!