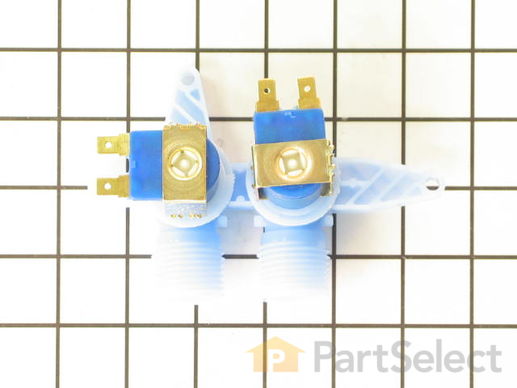
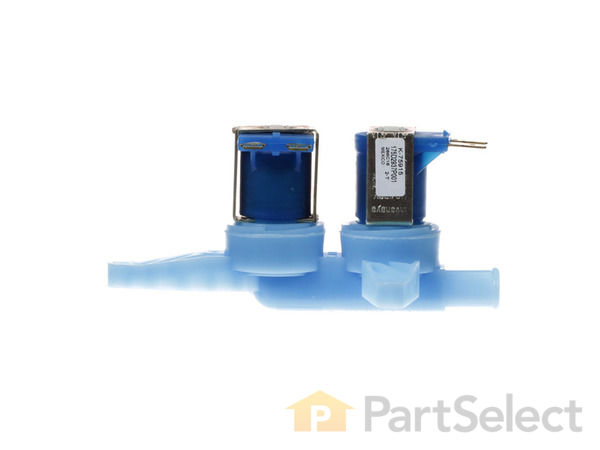
Dual Water Inlet Valve
$
59.82
In Stock


Get this part fast. Average delivery time via standard shipping: 1.8 days.
PartSelect Number PS1155105
Manufacturer Part Number WH13X10024
Manufactured by
GE
Product Description
Dual Water Inlet Valve Specifications
This water inlet valve attaches the water lines to the back of your appliance. The attaching solenoids on the valve open and close according to the desired temperature, or amount of water needed.
How Buying OEM Parts Can Save You Time and Money
Troubleshooting
This part fixes the following symptoms:
Will not stop filling with water | Leaking | No hot or cold water | Will not fill with water
This part works with the following products:
Washer.
This part works with the following products:
General Electric, Hotpoint.
Part# WH13X10024 replaces these:
AP3861119, 1159233, WH13X10024, WH13X0086, WH13X0087, WH13X10004, WH13X10019, WH13X86, WH13X87
Questions and Answers
We're sorry, but our Q&A experts are temporarily unavailable.
Please check back later if you still haven't found the answer you need.
Sort by:
Search filter:
Clear Filter
Your search term must have 3 or more characters.
Keep searches simple. Use keywords, e.g. "leaking", "pump", "broken" or "fit".
Sorry, we couldn't find any existing answers that matched.Try using some different or simpler keywords, or submit your new question by using the "Ask a Question" button above!
Dan
August 31, 2017
GE washing machine mode wprb8050. Need to replace dual water value inlet. The picture shows the wire connections pointing to the the left and to the top (west/north), but my value has the connections pointing to the left and right (east/west). Do you have this part with the connections pointing east and west
For model number WPRB8050

Hi Dan,
Thank you for your inquiry. The water valve you have listed should work for your appliance. There is a video on our website that shows how to install the part. You may need to reference that to see how to install the wires. I hope this helps. Thank you and have a great day!
5 people found this helpful.
Was this helpful?
Thank you for voting!
Richard
October 13, 2017
Can you tell me which contact on the washer goes to hot water side of the valve? I may have switched them. One contact is clear plastic and has two purple wires. The other contact is red and has a pink wire and a white/pink wire. Thanks
For model number part no. WH13x10024

Hi Richard,
Thank you for your inquiry. For information on the contacts you will need to check your owners manual or contact the manufacturer. I hope this helps. Thank you and have a great day!
2 people found this helpful.
Was this helpful?
Thank you for voting!
Robert
January 5, 2018
I have replaced the three items listed on your site to stop overfilling, and the machine keeps filling until i stop it. What is the next step?
For model number wwre6260d1ww

Hello Robert, Thank you for your inquiry. I would check the drain pump and motor assembly as well as the main control board. You can test the parts with a multimeter. If you are unfamiliar with how a multimeter functions, there are YouTube videos available to assist you. Hope this helps!
2 people found this helpful.
Was this helpful?
Thank you for voting!
Lynne
February 22, 2018
I have cold water, but no hot water coming into the machine. I have checked and the water is getting to the machine, but not in. From looking here, it seems that i need to replace the water inlet valve, but if it needs replacing, should both hot and cold water not be working or can only one side of the valve stop working? Thank you for your help.
For model number WJSR4160DAWW

Hello Lynne, thank you for your question. If there is water coming to the valve from the house, and the cold water port is working you would want to replace the Dual Water Inlet Valve WH13X10024. Only one side of the valve can stop working sometimes. Good luck with your repair!
1 person found this helpful.
Was this helpful?
Thank you for voting!
Chad Jewell
April 24, 2018
Cold water only fills if i relieve the pressure by shutting off the cold water and turning it back on. May have to repeat several times to get full water flow. Happens sometimes at start and most of the time at rinse cycle. What part should i replace. Dribble fills if left unattended. (i have checked the white cap filters and they are clean)
For model number General Electric Washer S1070A1WW

Hello Chad, thank you for your question. Any water flow issues are usually in relation to the water valve. Since you have checked the filters, and they are clean, the problem will be with the valve. I would recommend replacing the Water Inlet Valve WH13X10024. I hope this helps!
1 person found this helpful.
Was this helpful?
Thank you for voting!
M
January 8, 2019
What is the typical lifespan for a dual water inlet valve?
For model number WHSE5240D1WW

Hello, Thank you for the question. Very sorry but we do not have the life span of the valves. For more specialized assistance or to speak with someone about this, I would suggest calling the manufacturer of the appliance directly. Hope this helps!
1 person found this helpful.
Was this helpful?
Thank you for voting!
Les
September 30, 2019
Water very slowly seeping from the bottom of the rear panel ( in the area of the inlet hoses) probably about 6 oz. For the entire cycle.
For model number S2100E1WW

Hello Les, Thank you for contacting us. I have researched the model you have provided and have found the part you are looking for is PartSelect Number PS1155105. Hope this helps!
1 person found this helpful.
Was this helpful?
Thank you for voting!
John
February 10, 2020
Where do you find model no. Need to replace water value

Hello and thank you for writing.
The model number on washers are usually on a label on the back of your unit. We hope this helps. Please contact us anytime if you require further assistance.
Here is our link to finding your model number:
https://www.partselect.com/Find-Your-Appliance-Model-Number.aspx
1 person found this helpful.
Was this helpful?
Thank you for voting!
Glen
November 8, 2018
The washing machine fills fine when started but almost completely stops filling on the rinse cycle.
For model number WBSE3120B2WW

Hello Glen, Thank you for the question. This is mostly likley caused by a defective Timer/Control Board, Part Number: PS756537 that is not going through the cycles. Hope this helps, good luck with this repair!
Was this helpful?
Thank you for voting!
Part Videos
Replacing your General Electric Washer Dual Water Inlet Valve
Customer Repair Stories
Average Repair Rating: 4.4 / 5.0, 38 reviews.
What's this?
Search filter:
Clear Filter
Your search term must have 3 or more characters.
Keep searches simple. Use keywords, e.g. "leaking", "pump", "broken" or "fit".
Sorry, we couldn't find any existing installation instruction that matched.
washer was overfilling
Removed the water level pressure switch and the water inlet valve to test parts for proper operation with an ohm meter. Electrically, the switches seemed to work fine so I thought it was probably a mechanical water valve problem. I ordered and replaced both parts anyway just to be sure and potentially save time.
-
Matthew from Alexandria, VA
-
Difficulty Level:Easy
-
Total Repair Time:30 - 60 mins
-
Tools:Screw drivers
-
191 of 215 people
found this instruction helpful.
Was this instruction helpful to you?
Thank you for voting!
Washer wasn't filling with cold water.
I think finding the tools to do the repair took longer than the actual repair!
After unplugging the machine, turning off the water and disconnecting the hoses~ All I had to do was remove the top front panel~ I think that was 3 screws; remove the old part~ 2 screws, disconnecting a hose, and unplugging the 2 connections; put in the new part~ reconnecting the hose, 2 screws, plugging in the two connections; put the front panel back on~ 3 screws; reconnect the hoses, turn the water back on, plug the machine back in then tested it and it worked perfectly!
When the kids got home from school and I told them I fixed it they high fived me and said, "Way to go Mom!"
-
Mary from Hellertown, PA
-
Difficulty Level:Really Easy
-
Total Repair Time:15 - 30 mins
-
Tools:Screw drivers
-
Parts Used:WH13X10024
45 of 48 people
found this instruction helpful.
Was this instruction helpful to you?
Thank you for voting!
Valve was dripping cold water when washing machine was not running.
Took 4 screws off of face plate, exposed valve, unplugged power supply, removed wire harnesses to hot cold valves, removed hot and cold water hoses from back of washing machine, removed two screws holding valve body to washer,put new valve in and reversed procedure. ta da!!!!!!!!!!
-
Jerry from Rogers, TX
-
Difficulty Level:Really Easy
-
Total Repair Time:15 - 30 mins
-
Tools:Nutdriver, Screw drivers
-
Parts Used:WH13X10024
38 of 40 people
found this instruction helpful.
Was this instruction helpful to you?
Thank you for voting!
The washer would overfill intermittenly.
I replaced the water valve that the hot and cold hoses hook up to, and the pressure switch which regulates the amount of water that fills the tub. Both parts are located in the top plastic section of the washer where the controls are. The repair was easy, just a matter of taking out two screws in the back, lifting off the control face, unscrewing the water hoses, unscrewing each part, disconnecting and reconnecting the electrical plugs, and reassembling. No problems since.
-
George from Prescott Valley, AZ
-
Difficulty Level:Easy
-
Total Repair Time:Less than 15 mins
-
Tools:Screw drivers
-
29 of 46 people
found this instruction helpful.
Was this instruction helpful to you?
Thank you for voting!
Intermittant overfill during fill & rinse cycles
1. Unplugged unit
2. Disconnected water hoses
3. Removed 4 top panel screws
4. Folded panel forward to access components
5. Disconnected connectors from solenoids on water valves, marked with tape
6. Removed 2 hex screws to water valve
7. Loosened clamp and removed water hose connection from water valve
8. Installed new water valve, hose assembly, and reset clamp
9. For water level switch, disconnected connectors and water hose
10. Pushed down metal tab on backer plate and rotated old switch until it loosed and was removed
11. Installed new switch in reverse order.
Runs like new
-
Christopher from Sarasota, FL
-
Difficulty Level:Really Easy
-
Total Repair Time:30 - 60 mins
-
Tools:Nutdriver, Screw drivers
-
19 of 23 people
found this instruction helpful.
Was this instruction helpful to you?
Thank you for voting!
water coming out of bottom of washing machine
was a toss up between the water inlet valve OR the hose pressure switch....why spend more time...I invested in both the water inlet valve and the hose pressure switch and replaced them both....I have the machine torn apart....I spend $45 more dollars...now it's ALL done....and works like a charm...if I were to isolate the problem...I would say, now, the hose pressure switch...but, I am happy and machine probably has 5 plus, more years left...and life is good.
-
Jim from Marietta, GA
-
Difficulty Level:Really Easy
-
Total Repair Time:30 - 60 mins
-
Tools:Nutdriver, Screw drivers, Socket set
-
16 of 23 people
found this instruction helpful.
Was this instruction helpful to you?
Thank you for voting!
water not shutting off
Removed the screws for the control panel and replaced the load switch and valve body in about 20 minutes. Simple fix and it's working perfectly!
-
Stephen from erie, PA
-
Difficulty Level:Really Easy
-
Total Repair Time:15 - 30 mins
-
Tools:Pliers, Screw drivers
-
Parts Used:WH13X10024
14 of 17 people
found this instruction helpful.
Was this instruction helpful to you?
Thank you for voting!
Washer machine didn't get water.
I remove three screws on top of the washer, moved the cover of the machine in order to get access to the water valve, and then desconnected the two solenoid of the valve,and removed two screws that hold the valve with the frame and installed the new valve in same order a took the old one.
-
Eduardo from Borrego Springs, CA
-
Difficulty Level:Really Easy
-
Total Repair Time:Less than 15 mins
-
Tools:Screw drivers
-
Parts Used:WH13X10024
11 of 11 people
found this instruction helpful.
Was this instruction helpful to you?
Thank you for voting!
There was no hot water coming out, I had already checked the screens
First I removed the old part (2 screws)
Pulled off 4 wires (maybe the wrong word, I'm not a professional!
Put the new part in-turned the water on and had a stream of HOT water-yay
I had been putting this off because no one in my family had noticed (except me) and with my husband out of work it seemed like a low priority, but when my daughters came home for Christmas, they said "There's no hot water in the washing machine" so I took the plunge--I cannot believe I waited that long!
It literally took me seven minutes!
-
Tricia from Glen Allen, VA
-
Difficulty Level:Really Easy
-
Total Repair Time:Less than 15 mins
-
Tools:Screw drivers, Wrench (Adjustable), Wrench set
-
Parts Used:WH13X10024
11 of 11 people
found this instruction helpful.
Was this instruction helpful to you?
Thank you for voting!
Overflowing washer
Unplugged the washer and unscrewed the hot and cold filler hoses from the back of the machine. Removed the 6 screws holding the top together. Unscrewed the 2 water valve mounting screws. Pulled off the electrical wires from the leads. Unclipped the water feed hose clip. Reattached everything to the new water valve in reverse order. Put the screws holding the top panel in place back in.
For good measure, I also replaced the drain hose since I had noticed a little leakage there. Two screws and a little twisting and pushing was all that took.
Then I hooked everything back up and it worked like a charm. Finally, I went out to dinner with my wife on the money I saved!
For good measure, I also replaced the drain hose since I had noticed a little leakage there. Two screws and a little twisting and pushing was all that took.
Then I hooked everything back up and it worked like a charm. Finally, I went out to dinner with my wife on the money I saved!
-
Paul from Perrysburg, OH
-
Difficulty Level:Really Easy
-
Total Repair Time:15 - 30 mins
-
Tools:Nutdriver, Pliers, Screw drivers
-
11 of 15 people
found this instruction helpful.
Was this instruction helpful to you?
Thank you for voting!
Customer Reviews
Filter By Rating:
Search filter:
Clear Filter
Your search term must have 3 or more characters.
Keep searches simple. Use keywords, e.g. "leaking", "pump", "broken" or "fit".
Sorry, we couldn't find any existing reviews that matched. Try using some different or simpler keywords.
Peter S - Today

Washing machine water inlet
Part was delivered part fit perfect definitely be using your compony in the future
KELLY B - November 10, 2020

Fixed the leak
Fit perfect. Easy to install. Fixed my leak issue
Reinaldo G - July 30, 2020

Easy repair
The part was in great condition. The video provided by Parts Select was also very helpful. Thereby making the installation smooth and seamless.
All in all it was a great experience.
Thank you,
Reinaldo Gonzalez
Alan S - September 16, 2019

Worked perfect
Replacing a water inlet valve is pretty easy. If the hot water works but the cold water does not, or vice versa, then the inlet valve is probably the problem. I ordered the part, it arrived quickly and I installed easily and it works. Perfect. Thanks
Edmund B - September 12, 2019

worked as expected
fairly easy install, will get parts from this company in future.
Edmund H - June 21, 2019

It was the correct part
Easy install, no problems
Lawrence S - June 10, 2019

Just what I needed
Only 4 stars because it came very slow.
William I - June 6, 2019

Worked as it should
Received the part quickly and took 20 minutes to install. No more water dripping into washer tub when machine turns off.
David H - May 30, 2019

The right part
The part arrived in a damaged box probably by the delivery company but it was the right part and fixed the problem. Price was cheaper than competitors'.
Denise A - October 19, 2018

Easy repair, great part and shipping
The part was exactly as ordered, easy to replace and fixed our washer up fine! Glad we found Part Select online!
Model Cross Reference
This part works with the following models:
PartSelect Number: PS1155105
Manufacturer Part Number: WH13X10024
Brand
Model Number
Description