


Models
>
Y25
Y25 Yard Machines - Overview
Models starting with Y25
Click on the best match to narrow your results.
- Y25 Yard Machines Trimmer (Yard Machines String Trimmer Model Y25 Parts)
- Y2500 Yard Machines Trimmer (Yard Machines String Trimmer Model Y2500 Parts)
- Y2510 ( 41AD110G900 ) Yard Machines Trimmer (String Trimmer)
- Y2530 (41AD130G900) Yard Machines Trimmer (Gas String Trimmer)
- Y2550EC Yard Machines Trimmer (Yard Machines String Trimmer Model Y2550EC Parts)
- Y2560 ( 41AD160G900 ) Yard Machines Trimmer (String Trimmer)
- Y2580 (41AD180G900) Yard Machines Trimmer (Gas String Trimmer)
- Y25BT (41AD25BT900) Yard Machines Leaf Blower / Vacuum (Gas Blower)
Keep searches simple, eg. "belt" or "pump".

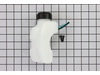
Fuel Tank Assembly
PartSelect #: PS10009586
Manufacturer #: 753-06183
This fuel tank assembly is supplied by the original manufacturer for use in trimmers. It is responsible for storing and transferring fuel to the engine for combustion. The assembly consists of a plast...
$13.07
In Stock

Carburetor
PartSelect #: PS9119300
Manufacturer #: 753-06190
It is an authentic manufacturer-sourced replacement part that i supplied for Craftsman trimmers. The function of a carburetor is to mix the air and the gas into a highly combustible mix before it goes...
$34.03
In Stock

Bump Head Knob Assembly
PartSelect #: PS9306452
Manufacturer #: 791-153066B
This genuine bump head knob assembly, sometimes known simply as the bump head, is black and approximately 2 inches long. Sold individually, this plastic part releases the cutting line. Over time, this...
$13.64
In Stock


Line Trimmer Spool
PartSelect #: PS9119496
Manufacturer #: 753-1155
This spool is for line trimmers.
Spool houses the cutting line and fits inside the cutting head to cut grass and weeds.
Wear work gloves to protect your hands when installing this part.
$23.15
In Stock

Impeller Assembly
PartSelect #: PS16429077
Manufacturer #: 753-08491
This is an impeller assembly kit designed for use with various models of leaf blower and comes with all the hardware necessary to replace it, including the impeller, the securing nut and 1 washer for ...
$7.50
In Stock


Retainer
PartSelect #: PS10014652
Manufacturer #: 791-610660
This retainer clip is a metal piece used to secure components and provide stability inside trimmers. It is an authentic manufacturer replacement clip which is positioned on the trimmer hub and designe...
$4.99
In Stock
Common Symptoms of models starting with Y25
[Viewing 1 of 1]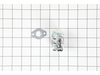
Keep searches simple. Use keywords, e.g. "leaking", "pump", "broken" or "fit".
Fuel line broke
Removed the two screws holding the fuel tank to the main unit. Removed the two fuel lines and any stuck on rubber. Installed and installed two screws to mount the new tank. Slid fuel lines on their respective connectors. Done.
Parts Used:

-
Erik from ROBERTSDALE, AL
-
Difficulty Level:Really Easy
-
Total Repair Time:15 - 30 mins
-
Tools:Screw drivers
12 of 14 people
found this instruction helpful.
Was this instruction helpful to you?
Thank you for voting!
Super Easy Install
The fuel tank is held in place by 2 screws. Simply take the screws off and pull off the fuel lines.
Take the new fuel tank. Put it in place and screw the 2 screws in to hold the fuel tank.
Connect the fuel lines and you're done.
This is the easiest repair I have ever done on any of my lawn equipment.
Take the new fuel tank. Put it in place and screw the 2 screws in to hold the fuel tank.
Connect the fuel lines and you're done.
This is the easiest repair I have ever done on any of my lawn equipment.
Parts Used:
-
Michael from GLENN HEIGHTS, TX
-
Difficulty Level:Really Easy
-
Total Repair Time:Less than 15 mins
-
Tools:Screw drivers
3 of 3 people
found this instruction helpful.
Was this instruction helpful to you?
Thank you for voting!
Broken lower drive shaft cable (engine runs fine, trimmer string head doesn't spin).
Remove lower shaft housing alignment set screw, and bolt clamp that connects the lower and upper drive shaft housing. Then remove the 6 star head screws that hold split housing for the drive gears, and carefully split and separate the housing. Remove the broken drive shaft cable. Grease the replacement drive shaft cable full length (ver
... Read more
y important), and re-grease the drive gears before reassembly. Very quick and easy repair. Just be sure to grease the cable heavily full length, and the coupler that connects the upper and lower cables.
Read less
Parts Used:

-
CV from Shasta Lake, CA
-
Difficulty Level:Very Easy
-
Total Repair Time:15 - 30 mins
-
Tools:Screw drivers, Socket set
1 person
found this instruction helpful.
Was this instruction helpful to you?
Thank you for voting!