Models > SFF1002CLN0

SFF1002CLN0 Whirlpool - Overview

Sections of the SFF1002CLN0

[Viewing 5 of 5]
Keep searches simple, eg. "belt" or "pump".
Thermostat, Internal-Bias – Part Number: WP8577274
Thermostat, Internal-Bias
★★★★★
★★★★★
(30)
PartSelect #: PS11746740
Manufacturer #: WP8577274
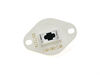
The internal-bias thermistor (Thermistor, Dryer Thermister, Dryer Thermistor) prevents the dryer from overheating by monitoring and controlling the temperature of the inside of the dryer drum. It is l...
$47.74
  In Stock
Door Catch – Part Number: WP3389441
Door Catch
★★★★★
★★★★★
(3)
PartSelect #: PS11741434
Manufacturer #: WP3389441
This white female door catch is attached to the dryer door.
$9.76
  In Stock
Single Hex Head Screw – Part Number: WP489069
Single Hex Head Screw
PartSelect #: PS11742731
Manufacturer #: WP489069
Sold individually. The size of this screw is 1/4" hex head and 10-12 x 1/2".
$5.42
  In Stock
Door Strike – Part Number: W10295405
Door Strike
★★★★★
★★★★★
(1)
PartSelect #: PS2373322
Manufacturer #: W10295405
This strike attaches to the front panel. Sold individually.
$67.77
  In Stock
Screw – Part Number: WP4449746
Screw
PartSelect #: PS11742548
Manufacturer #: WP4449746
Sold individually.
$7.74
  In Stock
SCREW – Part Number: W11230114
SCREW
PartSelect #: PS12349663
Manufacturer #: W11230114
$14.09
  In Stock
NAMEPLATE – Part Number: W11178521
NAMEPLATE
★★★★★
★★★★★
(1)
PartSelect #: PS12348533
Manufacturer #: W11178521
$42.82
  In Stock
Screw – Part Number: WP8533842
Screw
PartSelect #: PS11746161
Manufacturer #: WP8533842
  No Longer Available
PUMP – Part Number: W10526557
PUMP
PartSelect #: PS10059771
Manufacturer #: W10526557
  No Longer Available
CLIP – Part Number: W10579393
CLIP
PartSelect #: PS10056662
Manufacturer #: W10579393
$16.31
  Special Order
RESERVOIR – Part Number: W10649747
RESERVOIR
PartSelect #: PS10056874
Manufacturer #: W10649747
$127.64
  Special Order
PANEL – Part Number: W10526496
PANEL
PartSelect #: PS10061839
Manufacturer #: W10526496
$95.53
  Special Order

Questions And Answers for SFF1002CLN0

Be the first to ask our experts a question about this model!

Common Symptoms of the SFF1002CLN0

[Viewing 6 of 6]
Door won’t close
Fixed by
these parts
Fixing Fixing
Show All
Too hot
Fixed by
these parts
Fixing
Show All
Not Heating
Fixed by
these parts
Fixing
Show All
Touchpad does not respond
Fixed by
these parts
Fixing
Show All
Won’t Start
Fixed by
these parts
Fixing
Show All
Door Pops Open
Fixed by
these parts
Fixing
Show All
Keep searches simple. Use keywords, e.g. "leaking", "pump", "broken" or "fit".
Top door catch assembly had broken
It was so easy, that my wife did it the day we got the part before I got home from work. She wedged it out with a flat head screw driver and then pushed the new door catch assembly in with her thumb. Pretty simple, thanks for having parts like this available to the public!
Parts Used:
Door Catch
  • tony from prineville, OR
  • Difficulty Level:
    Easy
  • Total Repair Time:
    Less than 15 mins
  • Tools:
    Screw drivers
29 of 31 people found this instruction helpful.
Was this instruction helpful to you?
Thank you for voting!
Unit would shut down in the middle of cycle and flash E1 trouble code
Had to remove the back of unit to access the area of subject part by removeing 12 to 14 screws also the gas line had to be removed. Two screws held the part in place. Unit now runs normal.Saved alot on repair costs!!!!!
Parts Used:
Thermostat, Internal-Bias
  • Jim from Tucson, AZ
  • Difficulty Level:
    A Bit Difficult
  • Total Repair Time:
    15 - 30 mins
  • Tools:
    Nutdriver, Screw drivers, Socket set
30 of 40 people found this instruction helpful.
Was this instruction helpful to you?
Thank you for voting!
Dryer turns off after 1-2 minutes
I tried to follow directions followed by others on this site after diagnosing the problem via suggestions provided by users. I have a Whirlpool Duet dryer from 2002. We've had problems since moving about 3 years ago. I removed the front panel (lower) by unscrewing the two bottom screws (1/4" sheet metal screws). Then I took out the lint screen and the metal tube/contraption immediately beneath to get access to the area where thermistor is located. See the drawing/chart to help you locate this. It's really easier than it seems. Make sure you have the chart/drawing for your model - it makes difference! The thermistor came out pretty easily with a nutdriver that has a swivel offset shaft. Ask your hardware store tool dept. about that one. Put everything back in reverse order of course and test either with/without the front panel re-attached. In my case it fixed at least part of the problem. I was able to get clothes almost dry with most settings but I have yet to install the moisture sensor to see if that helps in addition to the internal-bias thermistor. I am the kind of person that does one thing at a time so at least I now know the thermistor was bad. Good luck and hang in there with your own repair. It's a lot cheaper even if it takes you longer to do than a pro.
Parts Used:
Thermostat, Internal-Bias
  • Dixon from Santa Fe, NM
  • Difficulty Level:
    Easy
  • Total Repair Time:
    30 - 60 mins
  • Tools:
    Nutdriver
19 of 21 people found this instruction helpful.
Was this instruction helpful to you?
Thank you for voting!