Models > PFSS2MIYCSS > Symptoms > Leaking

Parts That Fix General Electric Refrigerator PFSS2MIYCSS Leaking

Leaking is a commonly reported symptom for the PFSS2MIYCSS General Electric Refrigerator, and we have put together a full guide on how to fix this. This advice is based on feedback from people who own this exact appliance. We have listed the most common parts for your PFSS2MIYCSS General Electric Refrigerator that will fix Leaking. We have included repair instructions, and helpful step-by-step video tutorials. If you are experiencing this issue, not to worry, DIYers just like you have fixed this, and shared their experience to help you!

Fixes Symptom 57% of time
★★★★★
★★★★★
80 Reviews

Rated by 112 customers 


Really Easy 

15 - 30 mins 

Ratings submitted by customers like you who bought this part.   

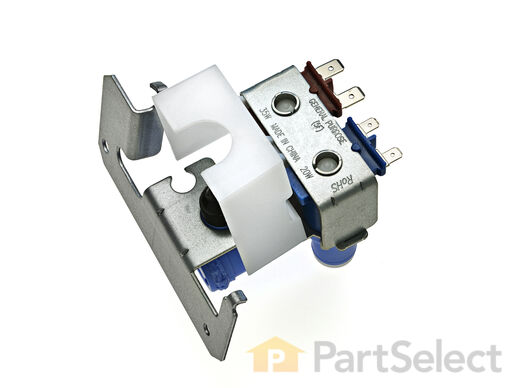
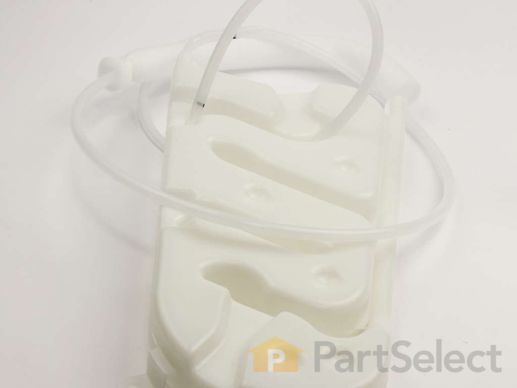
This water inlet valve (Refrigerator Water Inlet Valve Assembly) supplies water to the ice maker and the water dispenser in your refrigerator. It is located at the back of the fridge, beneath the bottom panel. It is connected directly to 2 water supplies, a wiring harness, and your inlet water tube. This part is located at the back of the fridge, beneath the bottom panel. It is connected directly to 2 water supplies, a wiring harness, and your inlet water tube. Minerals and sediments can build up over time and cause a blockage in your inlet valve. They can also cause the valve to stick open, leading to an overflow of water. If this part is malfunctioning, water flow to your appliance could be compromised. Check for small ice cubes or a lack of ice cubes/water, as this is an obvious sign the part is damaged. The water inlet valve must be replaced if the solenoids no longer have continuity or the valve has internal blockage. Test your water inlet valve with a multimeter. You can test both the water dispenser side and the ice maker side. The part measures approximately 3 inches long and 2.75 inches wide and is constructed of plastic and metal. This replacement part features 1 dual inlet water valve with quick connections. It also has 1/4 and 5/16 John Guest fittings for the outlet lines and a 1/4 compression fitting for the inlet line.

$ 93.82
  In Stock
PartSelect Number PS16226572
Manufacturer Part Number WR57X33326

Replacing your General Electric Refrigerator WATER VALVE WITH GUARD

Replacing your WATER VALVE WITH GUARD

Customer Repair Stories

Water dispenser not operating

Model includes filtered ice maker and water dispenser from front of unit. Water maker just suddenly stopped working but ice maker continued to work fine. After some phone calls to trouble shoot at a high level, I figured it was worth a try to buy the replacement part of the most likely culprit and see if it did the trick. Would have cost maybe $150 or more for service tech to make house call, provide the part and do the switch. Buying the part was only $40 and replacement was easy. Remove access panel from behind fridge and identify valve. It has intake water from the filter then has two outbound lines. One to ice maker, one to water dispenser. All function is in one part, but each outbound line has its own functioning valve. Unplug fridge, turn off water supply, disconnect all connections from old valve and reattach to new valve. When re-hooked, be patient in allowing water to re-fill line before coming out of dispenser in front. Likely to doubt it works, but surprised how long it took for water to fill line resevoir.
  • michael from pennsburg, PA
  • Difficulty Level:
    Easy
  • Total Repair Time:
    30 - 60 mins
  • Tools:
    Wrench set
192 of 228 people found this instruction helpful.
Was this instruction helpful to you?
Thank you for voting!

Refrigertor water dispenser not working BUT ice machine is working

The very first symptom here is important! The door water dispenser is not working but the ice macine is working. You may only have a frozen water tube in the door so do the following before diagnosing that your solenoid valve is bad: 1) the tube usually runs under the front of the refrigerator and usually has a quick disconnect. Undo the connection and press the dispenser. If water comes out of the tube you have a frozen or blocked tube in the door. 2) Immediately adjust the temperature in the freezer and warm the freezer compartment as much as you can without destroying the freezer contents. Wait 24 hours. This will usually unfreeze the line. Do not waste your time with a hair dryer. NOW, if this doesn't work and you are convinced you need to order and replace the solenoid, follow these steps. Assemble your tools first. I needed a good ratchet set and a screwdriver. A shop towel is helpful for spilled water. A light is handy. Pull out the refreigerator to gain access to the rear of the unit. Unplug the power and close the water valve (older homes, you may need to actually shut the house water supply). Remove the screws which hold the cover over the lower half of the refrigerator. On the left you will see the solenoid. It's always good to see that your new part matches the one you feel needs replaced. They may not match perfectly due to changing design but they should be very similar. One screw holds this part in place and access is very simple. Now simply unplug the electrical connections. In my case, one blue "blade" type connection (powering the water) and one red "blade" type connection powering the ice maker. They are not the same size and this coupled with the coloring means you will not accidently switch them. pull the tubes clear of the solenoid. This is simple and needs no explantion. Grab your new solenoid and reattach both the electrical and water lines (two, remember, ice maker and drink dispencer). Replace the single screw. Re-attach the rear, lower refrigerator cover and go to the front of the unit to check the water. You can listen carefully and hear the power engage from the new part bringing you water. Clean up, replace the refrigerator back to its place and look really tired when your wife sees that you worked "so hard"! You probably saved at least $50-$80 from a service call which can now be used to take the family to dinner after your "exhausting" 15 minute workout of removing about 10 screws and wheeling the unit in and out of place. Writing this article took longer! My 4 year old worked harder holding the flash light!
  • ralph from bristow, VA
  • Difficulty Level:
    Really Easy
  • Total Repair Time:
    Less than 15 mins
  • Tools:
    Nutdriver, Screw drivers, Socket set
1022 of 1134 people found this instruction helpful.
Was this instruction helpful to you?
Thank you for voting!
Fixes Symptom 32% of time
★★★★★
★★★★★
10 Reviews

Rated by 30 customers 


Easy 

30 - 60 mins 

Ratings submitted by customers like you who bought this part.   

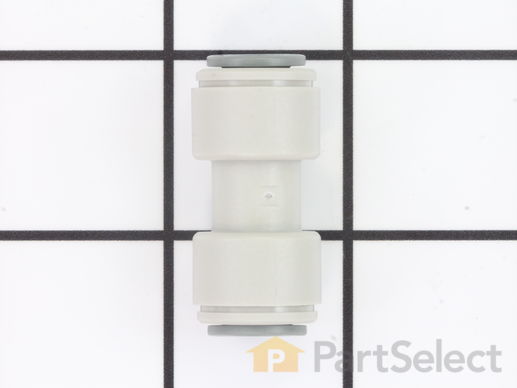
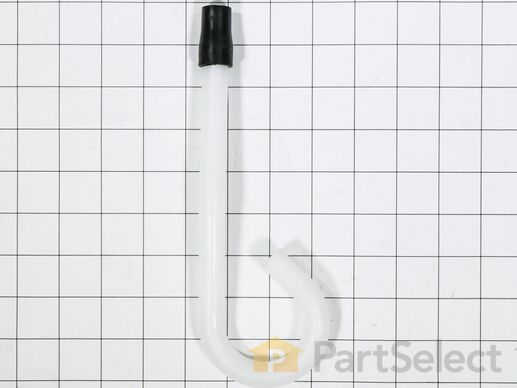
Quick connector for plastic water line - 5/16" to 5/16"

$ 9.03
  In Stock
PartSelect Number PS758446
Manufacturer Part Number WR02X11330

Replacing your General Electric Refrigerator Union Connector - 5/16 Inch to 5/16 Inch

Replacing your Union Connector - 5/16 Inch to 5/16 Inch

Customer Repair Stories

Moving the refrigerator into my new (very old) house we had to remove the doors which resulted in a crimped hose and union

Remove lower front panel, disconnect damaged union from water hose under freezer door, replace with new union, tighten and reattach front panel. No more water coming from under the unit. Ice maker and dispenser features returned to working order!
  • Laura from Manchester, NH
  • Difficulty Level:
    Really Easy
  • Total Repair Time:
    15 - 30 mins
  • Tools:
    Screw drivers
16 of 28 people found this instruction helpful.
Was this instruction helpful to you?
Thank you for voting!

My 13 yr grandson assisted me on this

We couldn't get the other connector loose from one end of the tubing so he said just cut it and so we did and attached the connector. I now have water again in my fridge and took the sticky note down "don't use the water" as it had leaked for a year...... Thanks!
  • Sherry from Auburn Hills, MI
  • Difficulty Level:
    Really Easy
  • Total Repair Time:
    Less than 15 mins
15 of 17 people found this instruction helpful.
Was this instruction helpful to you?
Thank you for voting!
Fixes Symptom 5% of time
★★★★★
★★★★★
77 Reviews

Rated by 77 customers 


Easy 

15 - 30 mins 

Ratings submitted by customers like you who bought this part.   

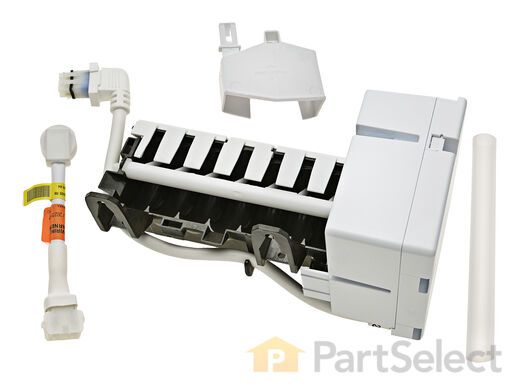
This 10 by 5 inch ice maker (Electromechanical Icemaker Kit, Ice Maker Assembly) produces ice. This particular model will produce seven crescent shaped cubes every cycle. It is constructed of plastic and metal, and comes in black/white. This kit includes a set of installation instructions, a 4-pin round plug-in connector, 6 post plug-in connectors, tube and fill cup. The ideal temperature of a freezer is zero degrees Fahrenheit. If the temperature in your freezer is at an appropriate level yet ice is still not being made, it could be an issue with the water inlet valve or your ice maker assembly. If you determine it is the ice maker, this is the replacement you need. The ice maker can break from normal wear and accidental damage. Ice makers will need to be replaced every 3-10 years depending on the frequency of usage and water quality. This model is mounted on the freezer wall.

$ 216.23
  In Stock
PartSelect Number PS1993870
Manufacturer Part Number WR30X10093

Replacing your General Electric Refrigerator Ice Maker

Replacing your Ice Maker

Customer Repair Stories

Ice maker stopped working

I unplugged the electrical connection. Then I removed the 2 screws holding the icemaker in place. I lifted out the old icemaker unit and put the new one in place. Then put the 2 screws back in and plugged in the new unit.

The icemaker started making ice very soon after turning the unit on.
  • Dan from West Bloomfield, MI
  • Difficulty Level:
    Really Easy
  • Total Repair Time:
    Less than 15 mins
  • Tools:
    Nutdriver
82 of 109 people found this instruction helpful.
Was this instruction helpful to you?
Thank you for voting!

ice stalactites were drooling out of the icemaker and gumming up the cubes in the receiving tray.

I first shut off water flow to the fridge. Examination of the package (which was not exact in appearance to the original) demonstrated that the electrical connectors were well-insulated so I arrogantly and successfully proceded without disconnecting the power. My fridge is old enough that the model doesn't appear exactly on anyone's list so I wasn't alarmed that it took an extra 10 minutes or so to noodle out how to adapt the slightly different inlet cowling and electrical cord with extension, but the device is pretty simple.
Soon I loosened the two mounting screws with a nut driver, used a screwdriver to pry away the plastic snap-in housing over the electrical socket on the fridge inner wall and pulled away the electrical plug. The original water fill tube remained in its cavity, ready for re-use.
The new unit's mounting points matched the original screw locations perfectly, as did the fill cowling - which on the replacement icemaker has two possible attachment points. The new unit's electrical connector required an extension pigtail to adapt to my socket, but it was included in the package. The extra cable posed a minor cosmetic issue because it hangs in the collection basket a bit, but that will soon be remedied with a tie wrap.
After the water was restored and an anxious wait of a few hours, we had well-formed ice cubes that weren't all stuck together and the stalactites haven't reappeared.
  • Gerald from Benicia, CA
  • Difficulty Level:
    Easy
  • Total Repair Time:
    15 - 30 mins
  • Tools:
    Nutdriver, Screw drivers
89 of 122 people found this instruction helpful.
Was this instruction helpful to you?
Thank you for voting!
Fixes Symptom 3% of time
★★★★★
★★★★★
76 Reviews

Rated by 62 customers 


Really Easy 

15 - 30 mins 

Ratings submitted by customers like you who bought this part.   

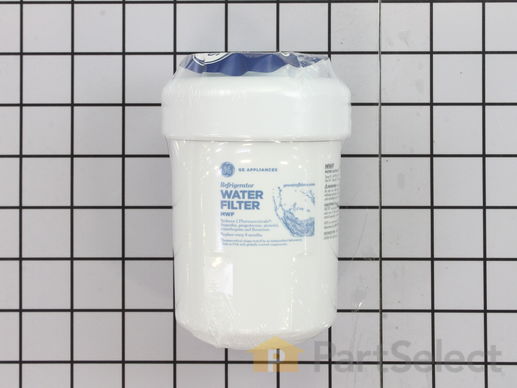
This OEM ice and water filter fits side-by-side and bottom-freezer GE models. The most common reason you would need to change this part is if you have never updated your model and it is no longer filtering your water. This also may lead to your refrigerator not dispensing water or ice properly. Manufacturers recommend you change your filter every six months to ensure it properly filters impurities. Depending on the model, a red light might also indicate that the filter is due for a replacement. Note: As per the manufacturer, this is an updated water filter. If you have never installed the updated part or your old model was made by Culligan, you may need the adapter to install the filter. See related parts. This filter is located inside the refrigerators upper right corner. It is common for water to drip from the dispenser when being changed so place a cloth underneath before you begin this repair. To remove the filter, turn it to the left until it releases without pulling down. Fill the new filter with tap water to prepare it. Position the new filter into the holder taking note of the arrows. The arrow on the front should be facing out. Gently push up on the filter and turn it to the right to secure it. Do not over-tighten. To release air in the system run 1-1/2 gallons of water through it. If your model has a reset button, press and hold this for a few seconds to reset it.

$ 73.07
  In Stock
PartSelect Number PS8746144
Manufacturer Part Number MWFP

Replacing your General Electric Refrigerator Refrigerator Ice and Water Filter

Replacing your Refrigerator Ice and Water Filter

Customer Repair Stories

water running slow

unscrewed old filter by hand, installed new filter.
  • David from Tacoma, WA
  • Difficulty Level:
    Really Easy
  • Total Repair Time:
    Less than 15 mins
35 of 57 people found this instruction helpful.
Was this instruction helpful to you?
Thank you for voting!

Replace water filter

Unscrew old filter and remove(counterclockwise). Line up arrow on new filter with arrow on connection housing. Turn clockwise till resistance met. Do not overtighten. Follow directions. Simple.
  • Alfred from Novato, CA
  • Difficulty Level:
    Really Easy
  • Total Repair Time:
    Less than 15 mins
224 of 338 people found this instruction helpful.
Was this instruction helpful to you?
Thank you for voting!
Fixes Symptom 1% of time
★★★★★
★★★★★
1 Review

$ 54.76
  In Stock
PartSelect Number PS2577882
Manufacturer Part Number WR17X12793
Fixes Symptom 1% of time
★★★★★
★★★★★
2 Reviews

$ 10.63
  In Stock
PartSelect Number PS758523
Manufacturer Part Number WR02X11426
Fixes Symptom 1% of time
★★★★★
★★★★★
9 Reviews

Rated by 8 customers 


Really Easy 

Less than 15 mins 

Ratings submitted by customers like you who bought this part.   

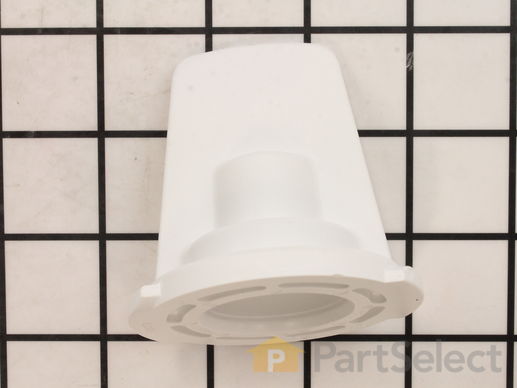
This part is a replacement filter bypass cap for your refrigerator. If you intend to use an external water filtration system for your refrigerator, the bypass cap will allow you to do so. To use a filter bypass cap, simply screw it in where you would normally screw in the regular water filter. If you have a bypass system installed and your ice maker doesn’t make ice, your water dispenser doesn’t make water, or if there is water dripping inside your refrigerator, you may need to replace the bypass filter cap. This part is made of white plastic and is sold individually.

$ 12.75
  In Stock
PartSelect Number PS12727272
Manufacturer Part Number WR17X22070

Customer Repair Stories

GE Profile Refrigerator Plug for Water Filter

Called partselect and gave my model number for the frig. I wanted a filter plug because we did not need a frig filter. We have a whole house filter. They looked up the part, took my info, and sent it to me by UPS. It arrived fairly quickly and fit the frig perfectly. I screwed it into place immediately. It was the simplest order I have ever placed and the salesman was very pleasant and proficient. If I have more issues with my frig, I will call partselect again. Just remember to turn off the water before you start.
  • Linda from Liberty, NC
  • Difficulty Level:
    Really Easy
  • Total Repair Time:
    Less than 15 mins
33 of 53 people found this instruction helpful.
Was this instruction helpful to you?
Thank you for voting!

Water if refigerator door is really slow. Ice making is really slow.

Used by pass filter and problem disappeared. Of course wayer is now unfiltered. This is a GE design flaw. Also replacement filters are outrageously expensive and do not last long. We have good water here and I'll stick with the bypass.
  • Fred from Edgartown, MA
  • Difficulty Level:
    Really Easy
  • Total Repair Time:
    Less than 15 mins
41 of 59 people found this instruction helpful.
Was this instruction helpful to you?
Thank you for voting!
Fixes Symptom less than 1% of time
★★★★★
★★★★★
18 Reviews

Rated by 103 customers 


Easy 

30 - 60 mins 

Ratings submitted by customers like you who bought this part.   

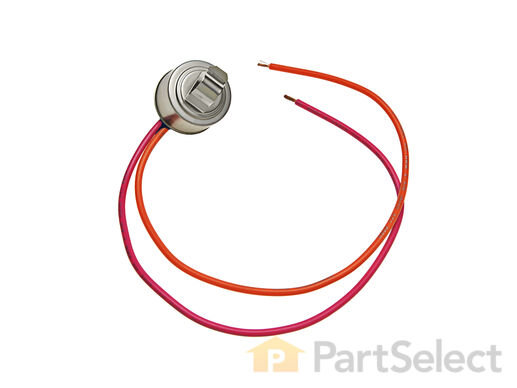
This defrost termination thermostat (Defrost Limiter Thermostat, High Limit Thermostat, Refrigerator Defrost Bi-Metal Thermostat) acts as a safety device to stop the evaporator coil from overheating, by turning off the defrost heater at the end of the defrost cycle. This part attaches to the tubing of the evaporator coil in the freezer. A faulty defrost termination thermostat may result in the defrost heater never heating and a solid frost buildup on the evaporator coil, which results in too warm temperatures. The thermostat contacts are normally closed and have continuity until it reaches 140 degrees. If this high limit thermostat is open at room temperature or colder, it is defective. This limit thermostat has an attached mounting clip and comes with pink and amber wire leads. The thermostat is 1 inch in diameter and 1/2 inch thick, the 2 wire leads are 10 inches long.

$ 29.26
  In Stock
PartSelect Number PS1017716
Manufacturer Part Number WR50X10068

Replacing your General Electric Refrigerator Defrost Thermostat

Replacing your Defrost Thermostat

Customer Repair Stories

freezer was freezing up.

took the back off and defrosted with a hairdryer. disconected the part pulled the part out cut the wires. put the other part on and instaled it. put it back together and it seems to be working just fine. thank you
  • doyle from kingston, WA
  • Difficulty Level:
    Really Easy
  • Total Repair Time:
    15 - 30 mins
  • Tools:
    Nutdriver, Socket set
3 of 3 people found this instruction helpful.
Was this instruction helpful to you?
Thank you for voting!

Ice cubes froze in the tray and frost was all underneath

I read stories from the website how others did it so I figured I would give it a try. I put all the frozen stuff in the refrigerator piled up. Took out the shelves. Took out 2 screws with a socket extension ( nut driver will work fine.) Remove the light bulb. lifted up on the back panel...it came right out. Saw the coils and on top the sensor. Took it off, cut the wires, spliced in the color coded new one ( pink to pink, orange to orange) Stuck it in the top coil in the original position and crossed my fingers! I put all the pieces back easily, restocked the freezer and waited. HOORAY!! My ice cubes are all separate and free. NO frost inside. A very easy fix for $20.

Note: If there is a large amount of ice build up on your coils a hair dryer works great. The drain is on the bottom anyway. Also , you may want to seal around the wire nuts to keep moisture out. I did
  • Michael from Sylva, NC
  • Difficulty Level:
    Easy
  • Total Repair Time:
    30 - 60 mins
  • Tools:
    Socket set
5 of 6 people found this instruction helpful.
Was this instruction helpful to you?
Thank you for voting!