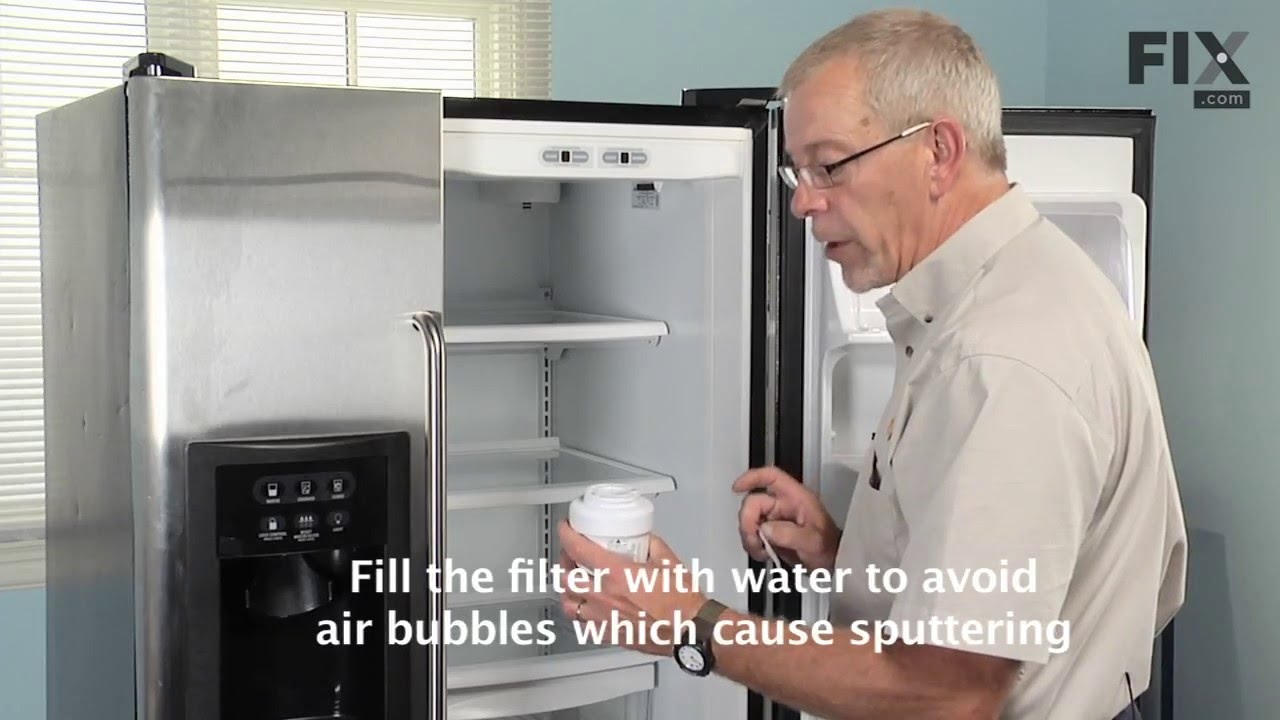
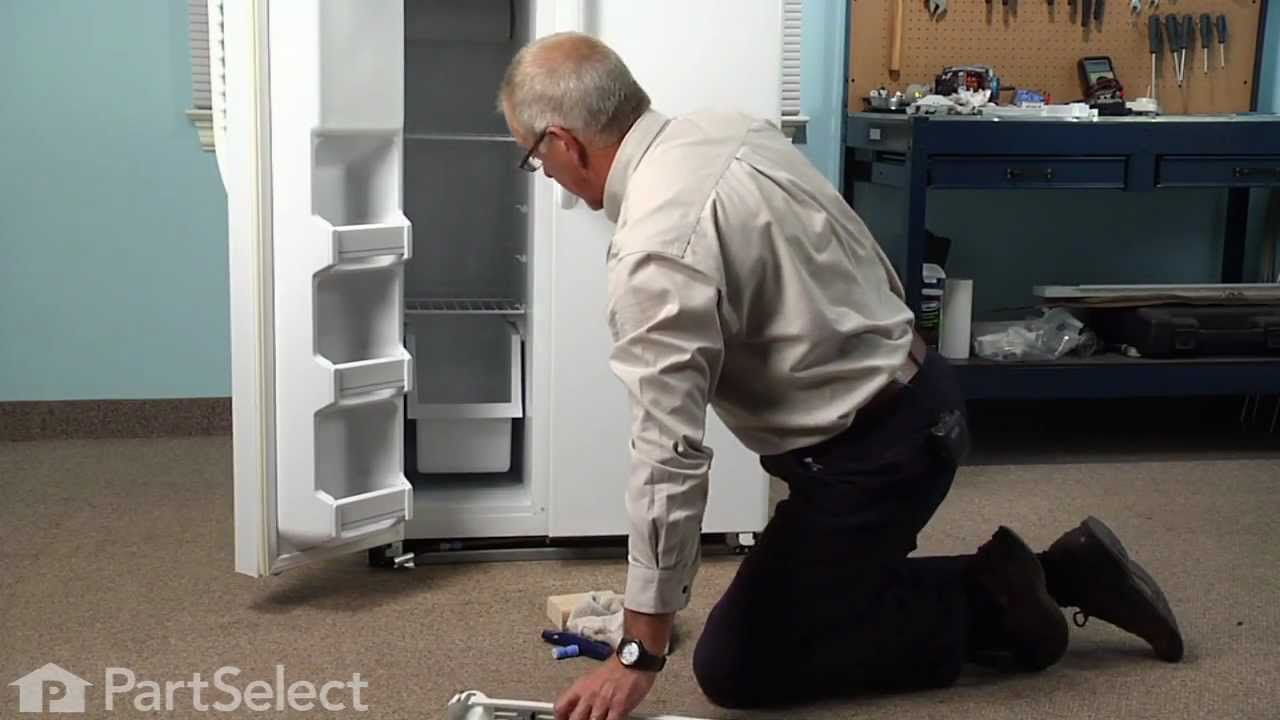
This ice and water filter helps reduce impurities in select side by side and bottom freezer refrigerators. Replace it about every six months, or when water flow slows, ice production drops, or the filter light turns red. Some older filter setups may need an adapter. Place a cloth under the filter before removal. Check the exact refrigerator model before ordering.
This sensor (Temperature Sensor, Thermistor, Refrigerator Temperature Sensor) sends the temperature reading of the compartment to the control board. If you notice your refrigerator is too warm, too cold, or not defrosting properly, then there may be a problem with your sensor. The temperature sensor can break from material fatigue or thro...Read moreugh normal use, and should be replaced. It is attached to the evaporator and control housing in your appliance. It measures approximately 1.25 inches long with 18 inch wire leads, and is constructed out of plastic. This part comes in white, beige. It includes the sensor, with wire leads.
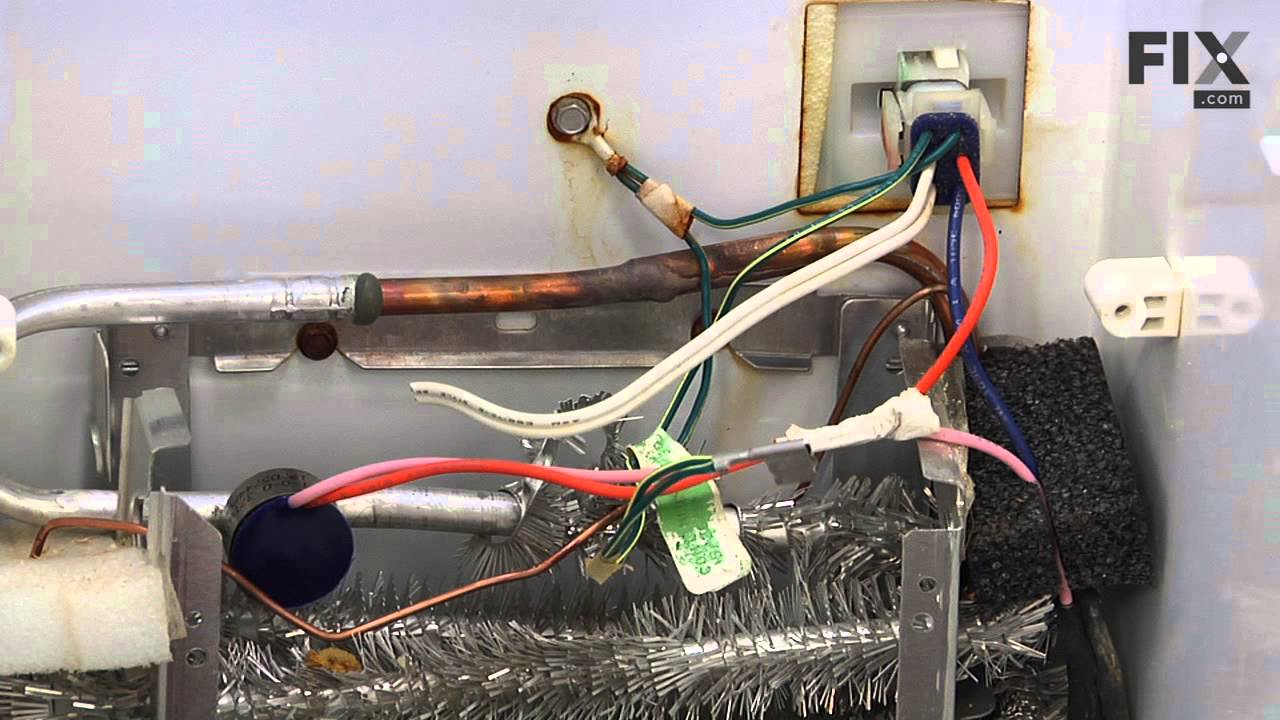
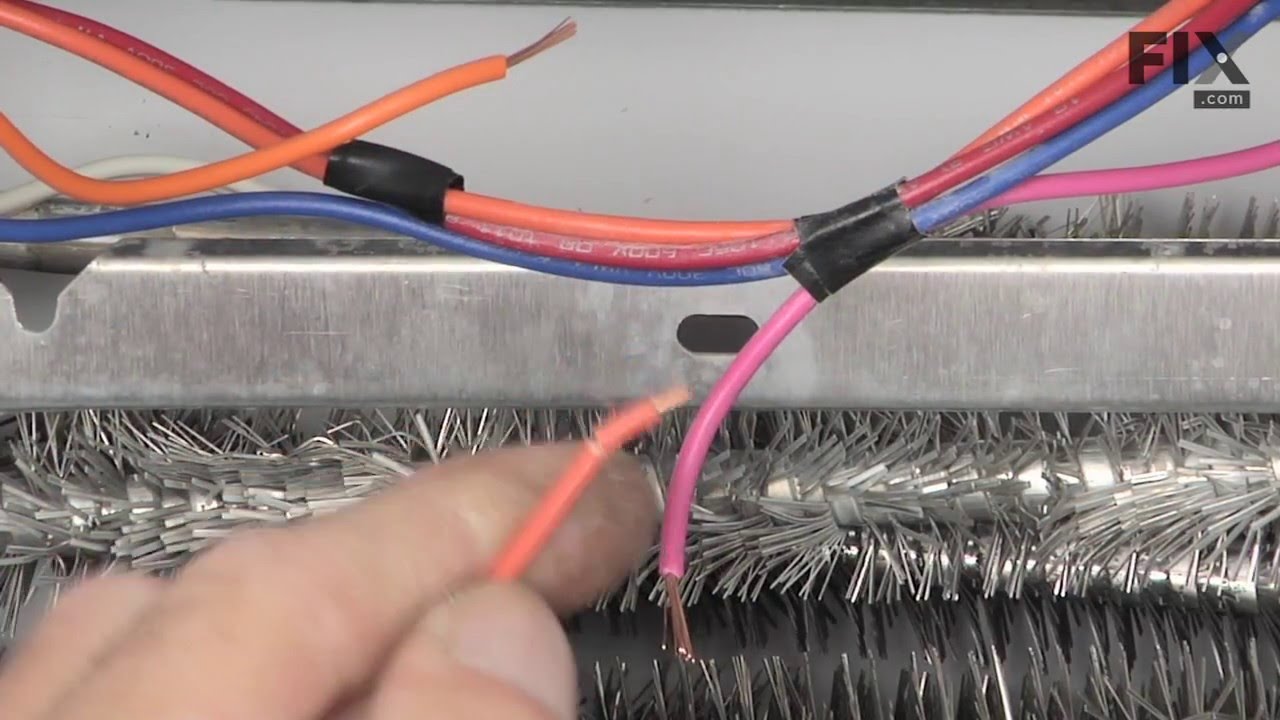
This defrost termination thermostat (Defrost Limiter Thermostat, High Limit Thermostat, Refrigerator Defrost Bi-Metal Thermostat) acts as a safety device to stop the evaporator coil from overheating, by turning off the defrost heater at the end of the defrost cycle. This part attaches to the tubing of the evaporator coil in the freezer. A...Read more faulty defrost termination thermostat may result in the defrost heater never heating and a solid frost buildup on the evaporator coil, which results in too warm temperatures. The thermostat contacts are normally closed and have continuity until it reaches 140 degrees. If this high limit thermostat is open at room temperature or colder, it is defective. This limit thermostat has an attached mounting clip and comes with pink and amber wire leads. The thermostat is 1 inch in diameter and 1/2 inch thick, the 2 wire leads are 10 inches long.
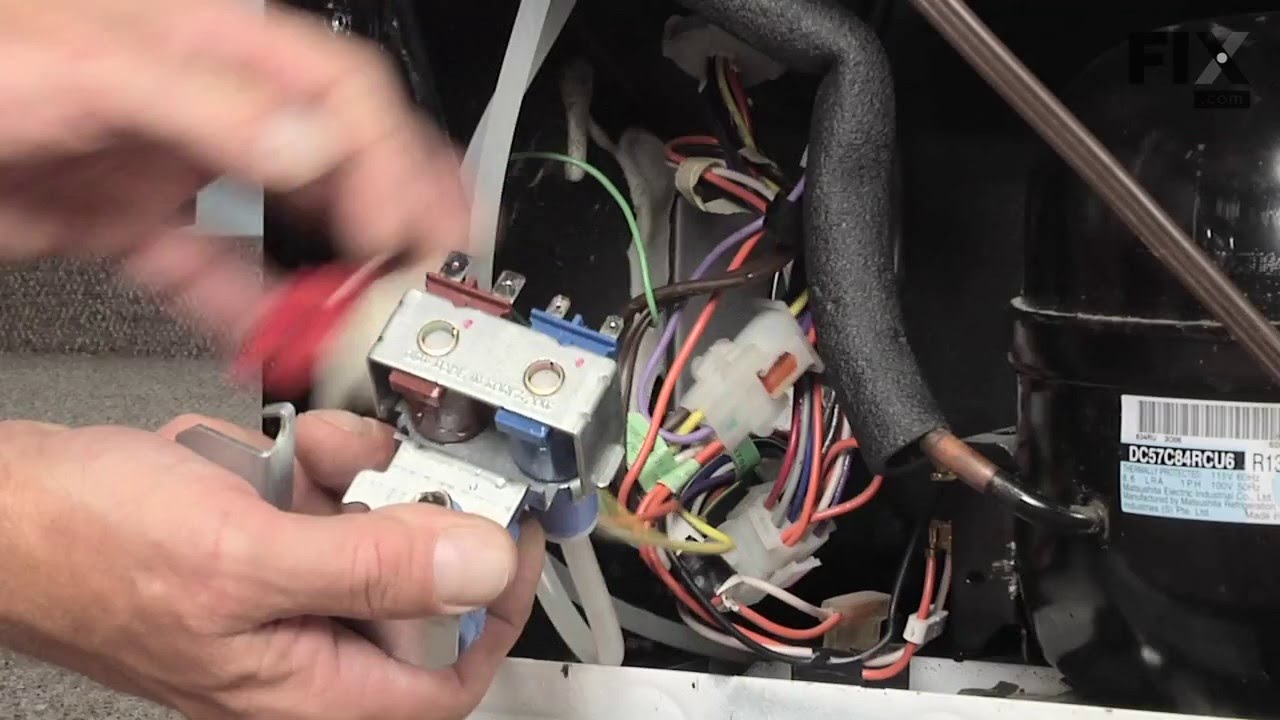
This water inlet valve (Refrigerator Water Inlet Valve Assembly) supplies water to the ice maker and the water dispenser in your refrigerator. It is located at the back of the fridge, beneath the bottom panel. It is connected directly to 2 water supplies, a wiring harness, and your inlet water tube. This part is located at the back of the...Read more fridge, beneath the bottom panel. It is connected directly to 2 water supplies, a wiring harness, and your inlet water tube. Minerals and sediments can build up over time and cause a blockage in your inlet valve. They can also cause the valve to stick open, leading to an overflow of water. If this part is malfunctioning, water flow to your appliance could be compromised. Check for small ice cubes or a lack of ice cubes/water, as this is an obvious sign the part is damaged. The water inlet valve must be replaced if the solenoids no longer have continuity or the valve has internal blockage. Test your water inlet valve with a multimeter. You can test both the water dispenser side and the ice maker side. The part measures approximately 3 inches long and 2.75 inches wide and is constructed of plastic and metal. This replacement part features 1 dual inlet water valve with quick connections. It also has 1/4 and 5/16 John Guest fittings for the outlet lines and a 1/4 compression fitting for the inlet line.
This 10 by 5 inch ice maker (Electromechanical Icemaker Kit, Ice Maker Assembly) produces ice. This particular model will produce seven crescent shaped cubes every cycle. It is constructed of plastic and metal, and comes in black/white. This kit includes a set of installation instructions, a 4-pin round plug-in connector, 6 post plug-in c...Read moreonnectors, tube and fill cup. The ideal temperature of a freezer is zero degrees Fahrenheit. If the temperature in your freezer is at an appropriate level yet ice is still not being made, it could be an issue with the water inlet valve or your ice maker assembly. If you determine it is the ice maker, this is the replacement you need. The ice maker can break from normal wear and accidental damage. Ice makers will need to be replaced every 3-10 years depending on the frequency of usage and water quality. This model is mounted on the freezer wall.
This 40-Watt light bulb is sold individually.
It is specially designed to withstand extreme temperatures, so this bulb is compatible with a variety of appliance types including refrigerators, ranges, microwaves, and dryers. It features a frosted glass bulb with a standard metal socket base, which allows you to easily unscrew the burnt-out light and twist the new bulb into place.
The interior light of your refrigerator is controlled by a switch that is activated when the door is opened and closed. If your refrigerator light will not turn on, there could be an issue with the switch. The switch is spring loaded and is a generally closed type of switch meaning there should be no continuity when the button is depresse...Read mored, and continuity through the switch when the button is not depressed. This plastic, white, OEM switch is sourced directly from the manufacturer, is sold individually and is easy to replace. The repair usually takes less than 15 minutes and requires a flat blade screwdriver and needle nose pliers.
This compression ring is meant to hold the evaporator fan motor in place in the freezer compartment of your refrigerator. This is is a genuine OEM part. The tools needed to complete this repair are a Phillips screw driver and small flat blade screw driver. Be sure to turn off your refrigerator before removing the evaporator fan cover so t...Read morehe fan does not turn on during repair. It is recommended to check the grommets, evaporator fan, and fan blades during repair in case they also need replacning. The compression ring may need replacing if the fan is noisy, or the refrigerator compartments are too warm. This part is sold individually.
The lid bumper or evaporator fan motor bumper in your refrigerator prevents the fan motor from scraping against the side bracket. If your refrigerator/freezer is noisy, the bumper could be worn down or missing, and the sound could be a result of the motor scraping the side bracket. You will find it between the fan motor and the side brack...Read moreet on the evaporator fan motor assembly. To access the bumper, you will need to remove the evaporator fan motor assembly from the freezer. This part is made of orange rubber and is less than half an inch in diameter. It has a rounded top and a slightly pointed bottom, and is sold individually.
This evaporator fan blade is for your refrigerator, and it circulates air so that the temperature of the fridge is regulated. This model has 3 blades, and is a little more than 4 inches in diameter. It is made of white plastic and is sold individually. If your refrigerator is noisy and you hear a clicking sound, it is a good indication th...Read moreat the evaporator fan blade is warped or damaged. If the fridge or freezer sections become too warm, the fan could be to blame as well.
This part is a replacement filter bypass cap for your refrigerator. If you intend to use an external water filtration system for your refrigerator, the bypass cap will allow you to do so. To use a filter bypass cap, simply screw it in where you would normally screw in the regular water filter. If you have a bypass system installed and you...Read morer ice maker doesn’t make ice, your water dispenser doesn’t make water, or if there is water dripping inside your refrigerator, you may need to replace the bypass filter cap. This part is made of white plastic and is sold individually.
Ask our experts a question about this model and we'll get back to you as soon as possible!
We may have answered a similar question already! Search questions and answers left by others using simple keywords like "fit", "broken", "easy", or "quality" to find questions that match.
Search filter:
Clear Filter
Your search term must have 3 or more characters.
Sort by:
Prev
1
2
3
Next
Sorry, we couldn't find any existing answers that matched.Try using some different or simpler keywords, or submit your new question by using the "Ask a Question" button above!
Allan - For model number PFSS2MIYCSS
February 22, 2020
When using the internal water dispenser, there is a vibration/thumping noise.
Hello Allan,
Thank you for your question We have done an investigation into your model PFSS2MIYCSS, we have discovered that the Dual Inlet Water Valve would be the most accurate cause of your symptoms. It is available under part number PS304374. If the valve has a blockage or unsecured, it can cause the noise you are experiencing. We hope this helps you.
2 peoplefound this instruction helpful.
Was this helpful?
Thank you for voting!
Adrian - For model number PFSS2MIYCSS
December 26, 2024
My ice tray keeps falling down. The right “arm” which the tray side slides back and forth on seems a bit loose and moves a bit… I see one screw to tighten but not sure if that is all or I am missing a piece or broke a piece because after tightening that screw it still moves a bit.
Hello Adrian, thank you for your question. Check the GLIDE Left Hand WR72X10301 to see if the hole that the screw goes is enlarged. And, if not, you may need a new Screw WR01X10606. We hope this helps.
Is this fridge a non-coated stainless steel? We got a scratch in it, and bought a rejuvenate stainless steel scratch eraser kit but it said to make sure it is not coated. Can you please confirm? Thanks, janice
Hi Janice. We cannot confirm if it is coated or not. We recommend contacting the manufacturer directly for assistance. Thank you for your question and good luck with your repair!
Was this helpful?
Thank you for voting!
Mark - For model number PFSS2MIYCSS
April 22, 2024
I don't see a replacement water line that goes from part 800 (Water valve with guard) to the area by part 775 (Cover water line). My line has gotten brittle and I was wondering if I could buy some generic line and connect it with a valve of some sort. Is there anything you have that would solve this?
Thanks,
Hi Mark, thank you for contacting us. The water line installation kits for your model are part number PS311502, and PS311504. We hope that helps!
Hello,
We have constant ice build up at the bottom of our freezer.. If you watch this video.. this is the same fridge and problem I'm having.
https://www.youtube.com/watch?v=mwJ9_YW4SAY
He talks about a defective frost system.
Anyway looking for advice on how to fix this and what part needs to be replaced.
Hi Shawn, thank you for reaching out. We would suggest making sure the door is sealed properly before moving towards any part repair or replacement. A damaged door seal causes moisture to enter the freezer. If the issue remains, the first thing to test is the temperature sensor, part number PS304103. We hope this solves your problem!
See how others fixed this model. Time, tools, difficulty, and steps that lead to victory!View More
Search repair tips from other customers using simple keywords like "replace", "fit", "remove", "inspect". DIY doesn't mean you have to do it alone!
Search filter:
Clear Filter
Your search term must have 3 or more characters.
Refrigertor water dispenser not working BUT ice machine is working
1038 of 1163 peoplefound this instruction helpful.
ralph from bristow, VA
Really Easy
Less than 15 mins
Nutdriver, Screw drivers, Socket set
The very first symptom here is important! The door water dispenser is not working but the ice macine is working. You may only have a frozen water tube in the door so do the following before diagnosing that your solenoid valve is bad: 1) the tube usually runs under the front of the refrigerator and usually has a quick disconnect. Undo t
... Read morehe connection and press the dispenser. If water comes out of the tube you have a frozen or blocked tube in the door. 2) Immediately adjust the temperature in the freezer and warm the freezer compartment as much as you can without destroying the freezer contents. Wait 24 hours. This will usually unfreeze the line. Do not waste your time with a hair dryer. NOW, if this doesn't work and you are convinced you need to order and replace the solenoid, follow these steps. Assemble your tools first. I needed a good ratchet set and a screwdriver. A shop towel is helpful for spilled water. A light is handy. Pull out the refreigerator to gain access to the rear of the unit. Unplug the power and close the water valve (older homes, you may need to actually shut the house water supply). Remove the screws which hold the cover over the lower half of the refrigerator. On the left you will see the solenoid. It's always good to see that your new part matches the one you feel needs replaced. They may not match perfectly due to changing design but they should be very similar. One screw holds this part in place and access is very simple. Now simply unplug the electrical connections. In my case, one blue "blade" type connection (powering the water) and one red "blade" type connection powering the ice maker. They are not the same size and this coupled with the coloring means you will not accidently switch them. pull the tubes clear of the solenoid. This is simple and needs no explantion. Grab your new solenoid and reattach both the electrical and water lines (two, remember, ice maker and drink dispencer). Replace the single screw. Re-attach the rear, lower refrigerator cover and go to the front of the unit to check the water. You can listen carefully and hear the power engage from the new part bringing you water. Clean up, replace the refrigerator back to its place and look really tired when your wife sees that you worked "so hard"! You probably saved at least $50-$80 from a service call which can now be used to take the family to dinner after your "exhausting" 15 minute workout of removing about 10 screws and wheeling the unit in and out of place. Writing this article took longer! My 4 year old worked harder holding the flash light!
Read less
Was this helpful?
Thank you for voting!
Freezer wouldn't maintain temperature ... got warm.
297 of 353 peoplefound this instruction helpful.
Mike from Scottsdale, AZ
Easy
15 - 30 mins
Nutdriver, Screw drivers
The freezer in my side-by-side kept warming up -- often 20 degrees or more, which of course caused the fresh food side to warm up also. I do a lot of jump-in-with-both-feet home repairs, but never on a large appliance. Not having an ohmmeter, which cost about $100 for a reliable one, I took the symptoms to the internet. Countless self-hel
... Read morep sites and U-Tube videos later, I was positive it was one of two possible problems, either the defrost thermostat was broken and the defroster wasn't coming out of its cycle or the temperature sensor wasn't reading the correct temp and thus kicking in the fan motor when needed. Fortunately I found both parts easily on PartSelect.com and the total cost for both, including shipping, was $30, less than 1/3 of the cost of an ohmmeter. Not knowing for sure which part it was that was bad, I ordered both, figuring, since I had to pull out the panel anyway, I might just as well replace them both ... the price was right. (In retrospect I should have order 4 Temperature Sensors as my fridge has two in both the freezer side and the Fresh Food side. Any one of them being bad could have caused the same problem. Fortunately, I was lucky because it was either ONLY the Defrost Thermostat or I just happened to pick the right Sensor, but the repair worked.)
The repair was easy: Unplug the power. A Nut Driver removed the four screws holding on the panel in the back of the freezer. A screw driver removes the one screw holding the lamp cover in place. Remove the light bulbs, pull off the panel and right above the freezer coils you'll see both parts -- plain as day. (If your coils are clogged with ice, you will probably need de-ice first.) Cut the wires to both parts as close to the parts as you can to leave as much wire exposed as possible. Strip the ends of all four wires about 1/2 inch and also on the new parts. Match up the wires in the fridge to the wires on the parts and twist the ends together (Note: both wires on the Sensor are white so they match up either way, but the two wire on the thermostat will need to match up orange to orange and pink to pink.) I used silicone filled wire nuts, which you can buy at any hardware store or use your own wing nuts and fill them with silicone or shoe goo which works just as well ... anything to keep the moisture out and prevent the wires ends from corroding. Tuck the wires up and replace the panel, light bulbs and light cover That's it. Very easy. By far the hardest part was wedging my wide body into the narrow freezer compartment. Some one-handed work added a little extra time to the project.
In my case the freezer fan didn't kick in for about twenty minutes after I plugged it back in, but I assume that it either begins in the defrost mode or it takes that long for it to reset itself ... either way the repair worked great.
my refigerator was warm but the freezer was cold and working correcttly
305 of 404 peoplefound this instruction helpful.
michele from North Smithfield, RI
Really Easy
15 - 30 mins
Pliers
I went to a GE repair center to explain my problem, the service center reccomended that I have a techinician come out o look at it. $75.00 for the visit and what ever labor and materials wuld cost.
I went on line to see if there were others having this same problem and found that there were many with the same problem.
... Read more />After reading some of the ways that people found out what was wrong ...it became a matter of three components, the timer, heater or thermostat.
I tried the most common component and the less expensive one first , the thermostat switch I installed it very easily snipping two wires and attaching the news using wire nuts I used the diagram on this website to pinpoint the component and there has not been a problem since.



 My Orders