Parts That Fix General Electric Refrigerator PFS22SISBSS Ice maker not making ice
Ice maker not making ice is a commonly reported symptom for the PFS22SISBSS General Electric Refrigerator, and we have put together a full guide on how to fix this. This advice is based on feedback from people who own this exact appliance. We have listed the most common parts for your PFS22SISBSS General Electric Refrigerator that will fix Ice maker not making ice. We have included repair instructions, and helpful step-by-step video tutorials. If you are experiencing this issue, not to worry, DIYers just like you have fixed this, and shared their experience to help you!
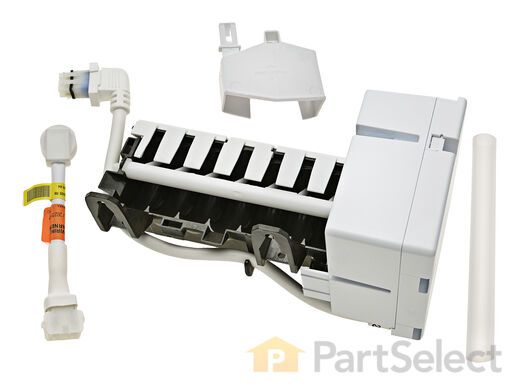
This 10 by 5 inch ice maker (Electromechanical Icemaker Kit, Ice Maker Assembly) produces ice. This particular model will produce seven crescent shaped cubes every cycle. It is constructed of plastic and metal, and comes in black/white. This kit includes a set of installation instructions, a 4-pin round plug-in connector, 6 post plug-in connectors, tube and fill cup. The ideal temperature of a freezer is zero degrees Fahrenheit. If the temperature in your freezer is at an appropriate level yet ice is still not being made, it could be an issue with the water inlet valve or your ice maker assembly. If you determine it is the ice maker, this is the replacement you need. The ice maker can break from normal wear and accidental damage. Ice makers will need to be replaced every 3-10 years depending on the frequency of usage and water quality. This model is mounted on the freezer wall.
Replacing your General Electric Refrigerator Ice Maker

Customer Repair Stories
Ice maker stopped working
The icemaker started making ice very soon after turning the unit on.
-
Dan from West Bloomfield, MI
-
Difficulty Level:Really Easy
-
Total Repair Time:Less than 15 mins
-
Tools:Nutdriver
ice stalactites were drooling out of the icemaker and gumming up the cubes in the receiving tray.
Soon I loosened the two mounting screws with a nut driver, used a screwdriver to pry away the plastic snap-in housing over the electrical socket on the fridge inner wall and pulled away the electrical plug. The original water fill tube remained in its cavity, ready for re-use.
The new unit's mounting points matched the original screw locations perfectly, as did the fill cowling - which on the replacement icemaker has two possible attachment points. The new unit's electrical connector required an extension pigtail to adapt to my socket, but it was included in the package. The extra cable posed a minor cosmetic issue because it hangs in the collection basket a bit, but that will soon be remedied with a tie wrap.
After the water was restored and an anxious wait of a few hours, we had well-formed ice cubes that weren't all stuck together and the stalactites haven't reappeared.
-
Gerald from Benicia, CA
-
Difficulty Level:Easy
-
Total Repair Time:15 - 30 mins
-
Tools:Nutdriver, Screw drivers
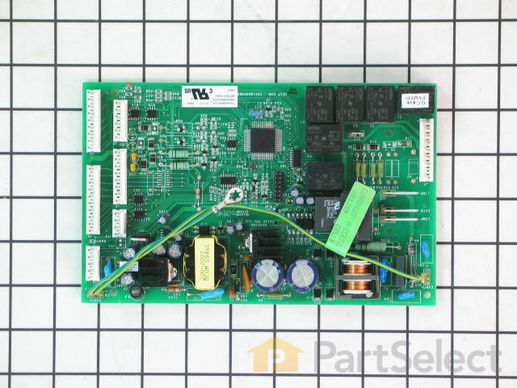
This electronic board (Main Control Board Assembly, Control Board, Motherboard) controls the temperature and defrost functions of the unit. This control board is located on the back of the refrigerator, and measures 8 inches by 5 inches. It’s constructed of metal and plastic, and comes in green. This kit includes one main control board with built in defrost controls. If broken due to electrical surges or normal use, your fridge may experience temperatures that are too warm or too cold, or inconsistent defrost cycles. If this happens, the part should be replaced.
Replacing your General Electric Refrigerator Main Electronic Control Board

Customer Repair Stories
Refrigerator wouldn't cool, constant clicking noise
-
Alejandro from New York, NY
-
Difficulty Level:Really Easy
-
Total Repair Time:Less than 15 mins
-
Tools:Screw drivers
The refrigerator made continous "whooing" sounds that increased and decreased in pitch. Sounded like a ghost. Would keep us up at night. Also noticed that the heater was not heating under the evaporator coils.
Took off thr ... Read more ee nuts around the board at the back of the unit. Removed the input wires and you have to push in the plastic tabs holding the board in. Then just put the new board in place and push till the tabs click. Re-install the wires and put the cover back on.
Really simple task,
It is now a week since doing this and the unit is working perfectly. No soulds and good nights sleep. The ghost has moved on.
-
John from Holly Springs, NC
-
Difficulty Level:Really Easy
-
Total Repair Time:Less than 15 mins
-
Tools:Nutdriver
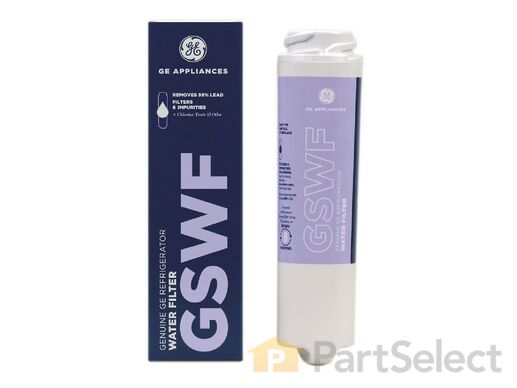
This OEM filter is sold individually. Change your filter every 6 months for the best results. This filter is found in top-freezer and bottom-freezer refrigerators located in the back upper right corner. It measures 4.75-Inches deep, 9.5-Inches high, and 5.25-Inches wide. It is certified to reduce particles, chlorine-resistant cysts, lead and five other impurities. The pressure requirement is 40-120 PSI (if yours exceeds this, you?ll need to install a pressure-timing valve), and the operating temperature needs to be 33-100 degrees Fahrenheit. It filters down to 0.5-1 microns. The installation is simple and does not require any tools or mess. To remove the old cartridge, turn it to the left and pull down carefully. Some water might drip, so keep a cloth handy. To install the new filter, place it into the cartridge holder and turn to the right until it will no longer turn. If you have a top-freezer model it should be situated vertically, and if it is a bottom-freezer model, it should be placed horizontally. Be careful not to over-tighten. If your model has a replacement indicator light, reset it by pushing and holding it down for three seconds. If your model has a dispenser, run water through it for approximately 3 minutes to clear the system. Please note that this filter will not work in Kenmore brand models.
Customer Repair Stories
Water filter light came on in my refrigerator.
-
Barbara from KILMARNOCK, VA
-
Difficulty Level:Very Easy
-
Total Repair Time:Less than 15 mins
-
Tools:Pliers
I have weak thumbs
-
Lois from Green Valley, AZ
-
Difficulty Level:Easy
-
Total Repair Time:30 - 60 mins
-
Tools:Pliers, Screw drivers
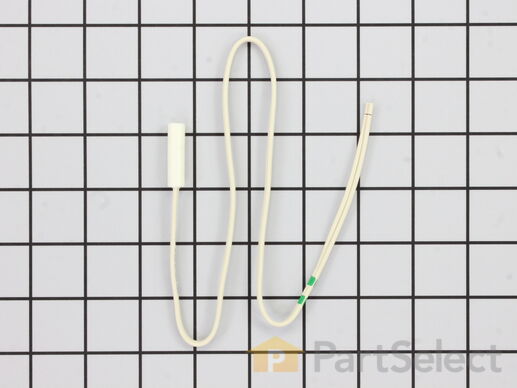
This sensor (Temperature Sensor, Thermistor, Refrigerator Temperature Sensor) sends the temperature reading of the compartment to the control board. If you notice your refrigerator is too warm, too cold, or not defrosting properly, then there may be a problem with your sensor. The temperature sensor can break from material fatigue or through normal use, and should be replaced. It is attached to the evaporator and control housing in your appliance. It measures approximately 1.25 inches long with 18 inch wire leads, and is constructed out of plastic. This part comes in white, beige. It includes the sensor, with wire leads.
Replacing your General Electric Refrigerator Temperature Sensor

Replacing your General Electric Refrigerator Temperature Sensor

Customer Repair Stories
refrigerator was getting too cold
-
Larry from Menomonie, WI
-
Difficulty Level:A Bit Difficult
-
Total Repair Time:15 - 30 mins
my refigerator was warm but the freezer was cold and working correcttly
I went on line to see if there were others having this same problem and found that there were many with the same problem.
I tried the most common component and the less expensive one first , the thermostat switch I installed it very easily snipping two wires and attaching the news using wire nuts I used the diagram on this website to pinpoint the component and there has not been a problem since.
-
michele from North Smithfield, RI
-
Difficulty Level:Really Easy
-
Total Repair Time:15 - 30 mins
-
Tools:Pliers
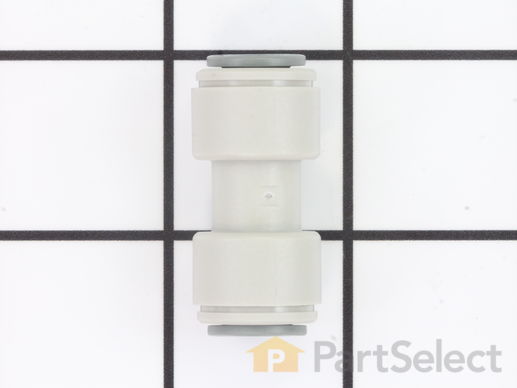
Quick connector for plastic water line - 5/16" to 5/16"
Replacing your General Electric Refrigerator Union Connector - 5/16 Inch to 5/16 Inch

Customer Repair Stories
Moving the refrigerator into my new (very old) house we had to remove the doors which resulted in a crimped hose and union
-
Laura from Manchester, NH
-
Difficulty Level:Really Easy
-
Total Repair Time:15 - 30 mins
-
Tools:Screw drivers
My 13 yr grandson assisted me on this
-
Sherry from Auburn Hills, MI
-
Difficulty Level:Really Easy
-
Total Repair Time:Less than 15 mins


