Models > MZD2766GES > Symptoms > Fridge too warm

Parts That Fix Maytag Refrigerator MZD2766GES Fridge too warm

Fridge too warm is a commonly reported symptom for the MZD2766GES Maytag Refrigerator, and we have put together a full guide on how to fix this. This advice is based on feedback from people who own this exact appliance. We have listed the most common parts for your MZD2766GES Maytag Refrigerator that will fix Fridge too warm. We have included repair instructions, and helpful step-by-step video tutorials. If you are experiencing this issue, not to worry, DIYers just like you have fixed this, and shared their experience to help you!

Fixes Symptom 56% of time
★★★★★
★★★★★
4 Reviews

Rated by 99 customers 


Easy 

30 - 60 mins 

Ratings submitted by customers like you who bought this part.   

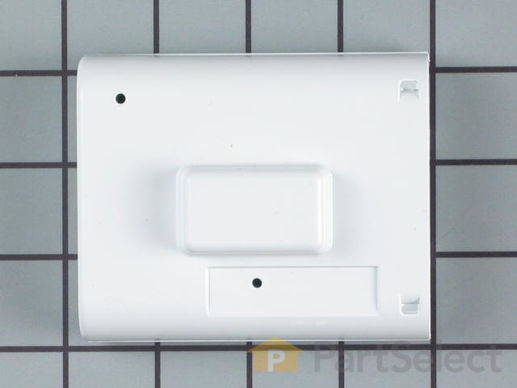
This part allows the refrigerator to go into defrost mode only when required.

$ 99.92
  In Stock
PartSelect Number PS2061226
Manufacturer Part Number 61005988

Replacing your Jenn-Air Refrigerator Adaptive Defrost Board

Replacing your Adaptive Defrost Board

Customer Repair Stories

Refrigerator compartment not cooling; Freezer compartment icing up on back wall

Well, off course, I started with the refrigerator UNPLUGGED :)
The hardest part of this repair was removing the plastic cover in the ceiling of the refrigerator compartment to get to the board. The screws all were easy to find (2 on either side of the temperature slide control; 2 on either side of the bulbs; and two in the underside of the compartment that houses the board in the far back right corner) and came out easily, however the 2 little plastic "tab locks" at the rear of the cover made things a little difficult. The right combination of pressure on the tabs and outward pulling of the cover took me quite a few tries to get right; but once the cover was off the rest of the repair was simple! The replacement part is a little different from the original in that it is now encased in a plastic housing, whereas the original was just a bare board. But it fit in perfectly - I snapped off the old wiring assembly and snapped in the new one, and we were off to the races. The cover proved to go back on a little easier than it had come off and in about 3 hours I heard the first piece of ice drop and the refrigerator compartment was down to 30 with the temperature setting set in the middle at 5. (I've sinced lowered it a little to bring the temp to about 36) - This was a really easy repair that saved me about $200; a break I really needed. And if you don't believe that it's easy and that you can do it yourself, this should really motivate you.................................. I AM A GIRL!!!! :) lol.
Good luck!!!
  • Michele from Port St. Lucie, FL
  • Difficulty Level:
    Easy
  • Total Repair Time:
    15 - 30 mins
  • Tools:
    Nutdriver, Screw drivers
45 of 45 people found this instruction helpful.
Was this instruction helpful to you?
Thank you for voting!

Fridge Side Warm Freezer Fine

Removed the Hex head small screw at the middle back of the Back wall of the fridge above the top shelf. Removed the 2 small Hex Head screws that go into the of the Plastic cover upwards into the top roof of the fridge.
I ended up with an extra screw so I dont know what I did...
The hard part is pushing up on the two tabs, one on each side in the extreme back on the bottom of that white plastic cover. You have to pull the coverwhile releasing the tab (locks) by pushing UP. The Right side was easier, I got that side to release and drop down. But the left side took some pressure on the tab with a fat screwdriver.
Then you have to kinda of Bend the cover to get it to slide out...

Then take out the 2 phillips screws above the light bulbs. the left side one is tricky, need long skinny driver.

Drop assembly down and on the back right is the ADP board. Mine was a bare board but the replacements are enclosed in white plastic that fit in place just fine.

Pry connector off of the board carefully and drop new plastic circuit board case in and replace.

Put a thermometer in a glass of water. unplug fridge for 10 minutes and then plug it in. Give it a few hours..
Everything seems fine.
A steady 39 degrees with the Fridge control at a few ticks right of middle.
I have no idea what it was before my troubles...
But 36 - 41 seems to be what you need.
  • james from livermore, CA
  • Difficulty Level:
    Easy
  • Total Repair Time:
    Less than 15 mins
  • Tools:
    Nutdriver, Screw drivers
177 of 187 people found this instruction helpful.
Was this instruction helpful to you?
Thank you for voting!
Fixes Symptom 27% of time
★★★★★
★★★★★
5 Reviews

Rated by 31 customers 


Easy 

30 - 60 mins 

Ratings submitted by customers like you who bought this part.   

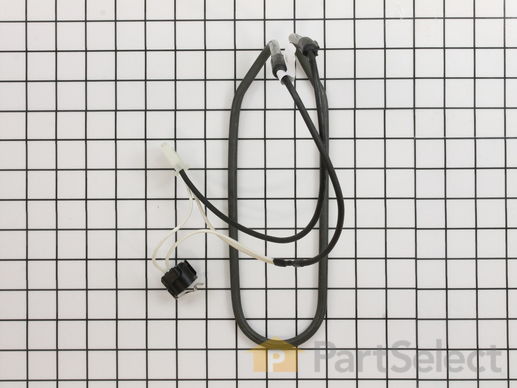
This part assembly has 2 functions: The defrost heater keeps the cooling coils from frosting over and the thermostat senses that the heat near the cooling coils has reached the desired temperature.

$ 71.20
  In Stock
PartSelect Number PS11743281
Manufacturer Part Number WP61006199

Replacing your Jenn-Air Refrigerator Defrost Heater and Thermostat Assembly

Replacing your Defrost Heater and Thermostat Assembly

Customer Repair Stories

Freezer was overfrosting and not defrosting. Frig. was not getting cold.

This was very easy. I removed all the shelves in the freezer compartment. I removed two nutscrews to remove the back wall. Then I removed the little radiator looking part by removing two more nutscrews. I unplugged the old thermostat assembly and installed the new one exactly like I removed it, then I reversed the procedure to put it all back together. Very easy my wife could have done it. ThANKS!! to Parts Select for the help of all the blogs I read before doing the job.
  • Daniel O. from Gilroy, CA
  • Difficulty Level:
    Really Easy
  • Total Repair Time:
    30 - 60 mins
  • Tools:
    Nutdriver
9 of 9 people found this instruction helpful.
Was this instruction helpful to you?
Thank you for voting!

Refrigerator warmed up and freezer became colder

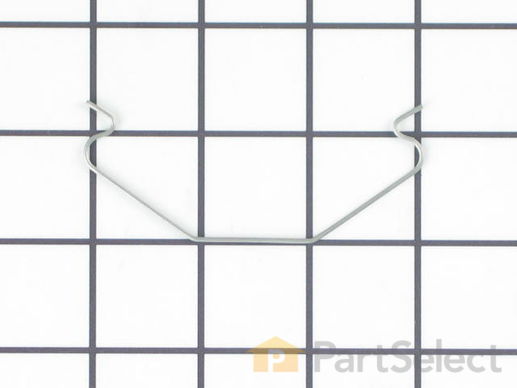
After removing all shelves, I removed the 2 screws holding the 2 panels in front of the evaporator and heater. The heater is located at the bottom of the evaporator coils and is held on by a simple wire clip. After removing the heater and thermostat, is very easy to replace the new unit and reconnect the wire harness.
  • John from Cambria, CA
  • Difficulty Level:
    Really Easy
  • Total Repair Time:
    Less than 15 mins
  • Tools:
    Nutdriver
27 of 28 people found this instruction helpful.
Was this instruction helpful to you?
Thank you for voting!
Fixes Symptom 11% of time
★★★★★
★★★★★
5 Reviews

Rated by 24 customers 


Easy 

30 - 60 mins 

Ratings submitted by customers like you who bought this part.   

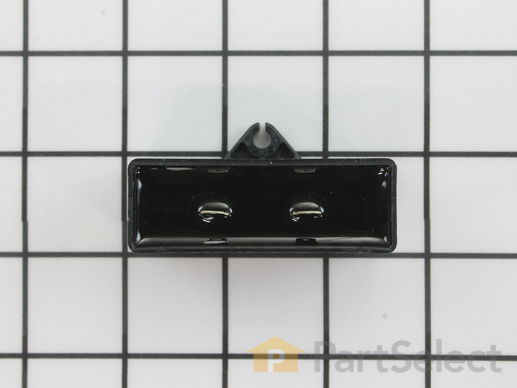
This part helps the compressor kick on and off while maintaining a constant temperature to keep things frozen in your freezer. If you are noticing temperature issues with your refrigerator or freezer, the run capacitor may need replacing. This repair is fairly easy to complete, and the only tools you will require are a 1/4 inch nut driver, and a 1/4 inch socket with a small ratchet. The run capacitor is located in the back of the fridge, so you will need to make sure you have room to work on this repair. Make sure to unplug the fridge prior to beginning the repair.

$ 66.72
  In Stock
PartSelect Number PS11743364
Manufacturer Part Number WP65889-4

Replacing your Amana Refrigerator Run Capacitor

Replacing your Run Capacitor

Customer Repair Stories

Refrig began to trip the GFI circuit in the garage. When plugged into a house interior circuit the lights and fan ran but no cooling in either the freezer or frig.

First of all I want to thank Michael from Carlisle,PA and this site for publishing Michael's info on the wiring specifics on the new 3 connector Start Relay ( WP2262185 ). The original relay only has 2 connectors The 2 orange wires which are combined to one female connector need to be clipped and separated each to its own connector. Refer to Michael's blog as to which wire goes to which connector on the Start Relay. I replaced the Run Capacitor, Start Relay and Overload just to be safe. The Start Relay was the actual culprit.Thank you for an excellent website!
  • riley from CAVE CREEK, AZ
  • Difficulty Level:
    Really Easy
  • Total Repair Time:
    15 - 30 mins
  • Tools:
    Pliers, Socket set
3 of 3 people found this instruction helpful.
Was this instruction helpful to you?
Thank you for voting!

Fridge stopped working

I called a repair man from a pretty large name to come out and take a look. He found out in about 10 minutes that it was a bad capacitor. The quote he gave me was $75 for the part and $175 labor. I tried my best not to laugh and tell him no thank you. He did have to charge me for him to show up, which was only $98.
So I used what he told(minus the "scrap it") and opened it back up. Although he had left wires everywhere and the broken pieces laying inside, I thought it was enough for me to order the part. PartSelect was very easy to navigate and ordering was a breeze. Took about 4 days to get the part and I ordered in the X-mas craze. Fixed it in about 15 minutes.
  • Dan from Sumner, WA
  • Difficulty Level:
    Easy
  • Total Repair Time:
    15 - 30 mins
  • Tools:
    Nutdriver
10 of 11 people found this instruction helpful.
Was this instruction helpful to you?
Thank you for voting!
Fixes Symptom 2% of time

Rated by 26 customers 


Really Easy 

15 - 30 mins 

Ratings submitted by customers like you who bought this part.   

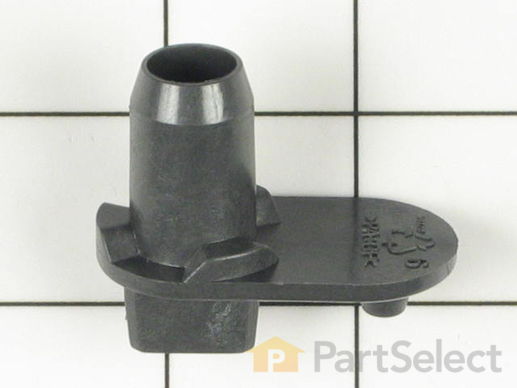
This lower hinge pin is almost two inches long. It is made entirely of plastic and it is all black in color.

  No Longer Available
PartSelect Number PS2058840
Manufacturer Part Number 61003174

Customer Repair Stories

Door dragging causing it not to seal complete

First I removed the three screws in the top hinge that hold the upper right corner of the door to the body of the unit. Then I just lifted the door off of the refrigerator. I proped the door up just long enough to pull out the old pin (plastic) and put the new one in place. Next I picked up the door and set it on the new hinge, and last I put the three screws back into place. It has taken me about as long to type this out as it did to actually make the repair. The part was also very reasonably priced so I purchased two since this items has been replaced previously.
  • dana from winston-salem, NC
  • Difficulty Level:
    Really Easy
  • Total Repair Time:
    Less than 15 mins
  • Tools:
    Socket set
1 of 2 people found this instruction helpful.
Was this instruction helpful to you?
Thank you for voting!

Lower hinge broke, causing the door to jump when open

It is the model with the french door. I unplugged it, removed two screws at the bottom of the door, while holding the door from sliding down. Removed the door and put it on its side. Removed one screw that was holding the hinge, removed the hinge and replaced it with the new one. Put the door back on (do not forget to reinstall the shims).
Did the same thing on the other door. After putting the door back on readjusted the height to level the door, using height adjustment screw. Lock the door in place. It now works better then new
  • Vadim from Flanders, NJ
  • Difficulty Level:
    Easy
  • Total Repair Time:
    15 - 30 mins
  • Tools:
    Nutdriver, Screw drivers
2 of 2 people found this instruction helpful.
Was this instruction helpful to you?
Thank you for voting!
Fixes Symptom 2% of time

Rated by 2 customers 


Really Easy 

30 - 60 mins 

Ratings submitted by customers like you who bought this part.   

$ 130.36
  In Stock
PartSelect Number PS2004069
Manufacturer Part Number 12002794

Customer Repair Stories

Frig stopped working, Lights & fan was on. Not cooling both Frig & Freezer

After I priced A New refrigerator, Then I Called A Friend to see if he had any idea of the issue. He lead me to the Overload Relay. I Went on-line & read everyone elses comments. I'm Happy to have recieved the Correct part & repaired the refrigerator myself. Great service from the PartSelect person. Note# Maytag has a Recall on the Relay, depending on the Model number. The new part will not look just like the old part. Which tells me they have been having trouble with the part.
  • Eddie from Sikeston, MO
  • Difficulty Level:
    Really Easy
  • Total Repair Time:
    30 - 60 mins
  • Tools:
    Nutdriver
Was this instruction helpful to you?
Thank you for voting!

Freezer was no longer working

Installed part directly to compressor and placed new protective housing. Monitored temperatures for 3 days and verified proper function. Very easy install, part is not a one for one swap and as mentioned by others taking a little perceptive understanding to install.
  • Anna from Gainesville, VA
  • Difficulty Level:
    Easy
  • Total Repair Time:
    15 - 30 mins
  • Tools:
    Nutdriver
Was this instruction helpful to you?
Thank you for voting!
Fixes Symptom 1% of time

Rated by 6 customers 


Easy 

30 - 60 mins 

Ratings submitted by customers like you who bought this part.   

$ 9.40
  In Stock
PartSelect Number PS11743628
Manufacturer Part Number WP67005457
Fixes Symptom 1% of time
★★★★★
★★★★★
1 Review

Rated by 4 customers 


Easy 

15 - 30 mins 

Ratings submitted by customers like you who bought this part.   

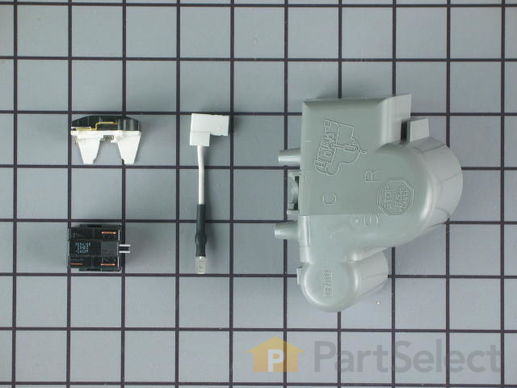
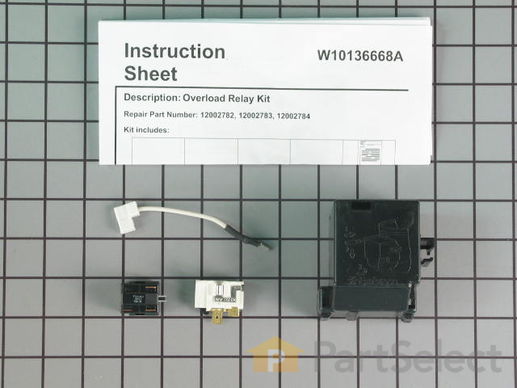
This part helps protect the motor from overheating.

$ 112.08
  Special Order
PartSelect Number PS2004059
Manufacturer Part Number 12002784

Customer Repair Stories

frig got warm, compressor would not turn on, heard clicking noise

googled for answer, deduced relay/switch problem. googled again for parts, found partselect.com, ordered part. 2 days later & $70 lighter, my 8yr old Maytag was working again! Parts were good fit, instructions were decent enough. Not for inexperienced tinkerer though.
  • Jeff from Cherry Hill, NJ
  • Difficulty Level:
    A Bit Difficult
  • Total Repair Time:
    30 - 60 mins
  • Tools:
    Screw drivers, Socket set
7 of 9 people found this instruction helpful.
Was this instruction helpful to you?
Thank you for voting!

The relay had burnt up.

I Removed the two wires from the old relay. I Then pulled the old relay off the compressor. Next, I had to get the overload seperated from the old burnt relay, which took some care not to break. The old relay and overload is in a plastic compartment. Then I followed the directions that came with the new relay. The only confusion came with getting the two wires back onto the terminals of the new relay, mainly because the old relay was burnt so badly I didn't have any idea how it was originally wired. I crossed the two wires on the terminals of the relay. The compressor would click off and on, but would not start blowing cold air. I swapped the wires on the terminals and it started working immediately.
  • Jacob from Glennville, GA
  • Difficulty Level:
    A Bit Difficult
  • Total Repair Time:
    15 - 30 mins
  • Tools:
    Nutdriver, Pliers
9 of 10 people found this instruction helpful.
Was this instruction helpful to you?
Thank you for voting!
Fixes Symptom 1% of time

Rated by 5 customers 


A Bit Difficult 

30 - 60 mins 

Ratings submitted by customers like you who bought this part.   

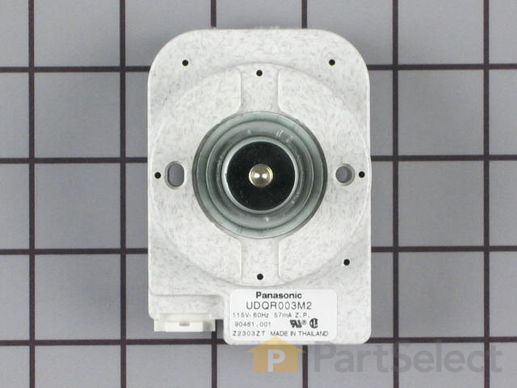
This fan motor is most times used with frost-free refrigerators with a condenser coil. When the compressor runs, so does this fan, circulating air through the refrigerator grille, cooling the compressor and condenser coils. This fan motor also helps to evaporate excess water in the drain pan.

  No Longer Available
PartSelect Number PS2060678
Manufacturer Part Number 61005323

Customer Repair Stories

Sides and door frames of the refrigerator warm to the touch.

Confirmed the condenser fan was the problem when I noted it was not running when the compressor was on. Removed 3 mounting screws, unpluggede the fan. Removed and replaced the mounted flange(3 screws) and remounted. Plugged in fan and it started running.

Thanks for the diagrams and quick delivery. This is the second repair on appliances I have made with your parts and probably saved $300-400 in service calls.
  • Dave from Bedford, IN
  • Difficulty Level:
    A Bit Difficult
  • Total Repair Time:
    15 - 30 mins
  • Tools:
    Nutdriver
10 of 12 people found this instruction helpful.
Was this instruction helpful to you?
Thank you for voting!

I pulled the fridge out to vacuum the coils and noticed the fan was not working

First I removed the cardboard cover, which was held in place by 7 screws. Actually first I unplugged the fridge, next using a nut driver I removed the 3 screws holding the supports to the motor. The motor with fan just pulls right out. Next was to disconnect the wire harness or plug, which required squeezing together the plastic plug and moving it side to side while gently pulling.
With motor in hand using a pair of pliers remove the poor excuse for a nut of the fan motor shaft holding on the fan. Slide the fan off the shaft -note direction of blades!!!! Using a nut driver remove 2 srews holding on the plastic motor support . This slides right off the back. To assemble follow the reverse . Just check to see that the fan spins freely before plugging back in your fridge.
  • Gray from Gilead, ME
  • Difficulty Level:
    Really Easy
  • Total Repair Time:
    Less than 15 mins
  • Tools:
    Nutdriver, Screw drivers
21 of 21 people found this instruction helpful.
Was this instruction helpful to you?
Thank you for voting!