This refrigerator water filter replacement is for 2010 LG refrigerators that have either forward French doors or are the four-door dispensing models. This filter is designed to minimize impurities tha...
This water tube, or plastic tube, is used in refrigerators and freezers. The tube ensures water is directed to parts of the refrigerator that need it, such as the water dispenser and ice maker. If you...
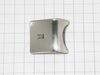
This handle screw, also known as a mounting bolt, is a mounting screw to help secure the door handle to your refrigerator door. If your handle is loose, you may just need to tighten the screw. If your...
Refrigerator door bin AAP73252202 is an original equipment manufacturer (OEM) part that fits some Kenmore Elite bottom-freezer refrigerators in the following series: 7957204, 7957205, 7957209, 7957218...
This door basket assembly is supplied by the original manufacturer to provide storage for various food items in refrigerators. It consists of a white plastic base and a transparent shield, measuring 1...
This is a manufacturer-approved refrigerator door closure for your refrigerator. It is made of white plastic and measures approximately 3 inches by 2 inches. If your old closure is damaged, your refri...
This glass shelf provides storage space in your refrigerator above the crisper. Shelves can crack and chip due to frequent use, and should be replaced immediately if cracks start to appear. This shelf...
NOTE: As per manufacture the secondary (smaller) wire connector has 6 wires in it. If original ice maker has 3 wire connector see part number PS7788172. Please verify connector before ordering.
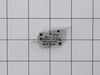
This water dispenser button is a genuine OEM part designed for LG refrigerators. When you push the button, a valve is activated inside the refrigerator, which releases water from the internal water su...
This part must be installed by a licensed and trained LG technician that is able to perform a software update, which is required for the installation of this compressor. Part number CJT30000002 is nee...
Ask our experts a question about this model and we'll get back to you as soon as possible!
4 questions answered by our experts.
Sort by:
< Prev
1
Next >
Search filter:
Clear Filter
Your search term must have 3 or more characters.
Keep searches simple. Use keywords, e.g. "leaking", "pump", "broken" or "fit".
Sorry, we couldn't find any existing answers that matched.Try using some different or simpler keywords, or submit your new question by using the "Ask a Question" button above!
Tim
December 3, 2019
My refrigerator working is not cooling what can be
For model number LFX31925ST
Hello Tim,
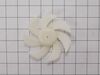
Thank you for your question. Our sources suggest replacing the fan motor under part PS7321745 for your model to fix the issue. Hope this helps!
Hello Harry, Thank you for the question. We suggest checking the Drain Tube. Water is normal during the defrost cycle, however it should drain into the pan below the appliance and evaporate. If the water is not draining you may have clogged Drain Tube. If you need help placing an order, customer service is open 7 days a week. Please feel free to give us a call. We look forward to hearing from you!
My ice maker leaks when being filled can parts be gotten
For model number LFX31925ST
Hi Tom,
Thank you for your question. The ice maker is sold as one unit for your model. If your ice maker is leaking, we recommend making sure that the water lines connected to it are fastened correctly and if the fill cup is out of alignment, make sure it is positioned correctly. If the refrigerator is not level, this may cause water to leak from the ice maker. If there are any ice jams, remove them. If it has been more than 6 months since you replaced the water filter, replace it. If you have any questions, please let us know. We look forward to hearing from you!
Was this helpful?
Thank you for voting!
David
November 20, 2023
In bottom freezer the back cover has a lot of ice build up on top right corner I unplugged empty what was in freezer and put it in my upright freezer I removed the bottom drawer and all pull out shelves I took a hair dryer and melted the ice build up it looks like it all melted could the heater be bad or is the sensor bad causing ice to build up I checked door gasket seams to be good what is wrong
For model number LFX31925ST
Hello David, thank you for your inquiry. Based on our understanding of the issue, we would suggest you checking the control board, part number PS8737451. You may need to replace it to fix the issue. Glad to be of help!
I suggest turning off the water valve and power to the refrig before starting work. If this is not done the water dispenser will probably spray water down the front of the refrig. The whole icemaker assembly must be pulled out from the front. It is a friction fit--just insert fingers in the ice chute and pull out. The entire piece will pu
... Read morell out from the door. The control panel cover is held in by 8 screws that extend through the circuit board to the cover. It is a good idea to unplug the wiring to the circuit board when replacing the cover to prevent tension damage to the small guage wires. Once the new control panel cover is attached to the circuit board, the whole assembly can be reinstalled into the door.
Shut off water supply. Disconnect main supply line. Remove rear lower panel on back of refrigerator. Remove all tubing clamps on back. Disconnect leaking tubing from water supply valve. Remove water filter and unscrew/remove water filter housing. Replace tubing - connect to water filter housing then to water supply valve. Reconnect filter
... Read more housing and filter. Reinstall lower panel, then main water supply line, then all tubing clamps. Turn water back on and check for leaks after discarding several glasses of water to fill filter. Job complete!
An easy way to get a refrigerator out from the wall is to use a tow strap or 1/2 to 3/4 in. rope. Throw a loop behind refer while keeping both ends in your hands. Let it settle down to the lower half of unit and pull using both hands. Comes right out. Remove lower panel. Unscrew water valve from cabinet. Remove all tube holders L
... Read moreay some rags down to catch a little water drainage. Turn off water supply valve at wall. Unplug Power. Remove filter and filter holder. (one screw). remove tube from valve by removing plastic C clip. Push plastic ring towards the valve and pull out tube at same time. With the tube free, remove filter, then mount screw to remove the inside filter holder. When it is out, pull the tube doing the same process as the lower end. Pull tube out and replace with new one putting everything back in reverse order. Before placing tube holders back on, turn on water to check for leaks. After turning water back on and plugging in power, push refer back into place. While I was there, I also replaced the hose from the wall to the refer.