


Models
>
LAT8014ABL
LAT8014ABL Maytag Washer - Overview
Sections of the LAT8014ABL
[Viewing 8 of 8]


Keep searches simple, eg. "belt" or "pump".

Screw
PartSelect #: PS12349731
Manufacturer #: W11233072
This is a multi-use and multi-appliance screw. It can be used on a microwave, refrigerator, range/oven, air conditioner, dehumidifier, washer, or dryer. The measurements of this screw are 8 x 1/2 inch...
$20.79
In Stock

Screw, 8/18 x 3/8
PartSelect #: PS11746840
Manufacturer #: WP90767
This screw is sold individually.
$5.42
In Stock

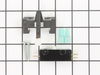
Lid Switch
PartSelect #: PS11723153
Manufacturer #: W10820036
This 3 prong lid switch is used for washing machines that do not have a tub light.
$23.69
In Stock

Washing Machine Lid Hinge Ball
PartSelect #: PS11738871
Manufacturer #: WP211726
This washing machine lid hinge ball is well under an inch in diameter. These hinge balls are sold separately, though two are required per lid. This lid hinge ball is made of plastic and is used for Ma...
$11.14
In Stock

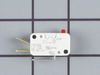
Lid Check Switch
PartSelect #: PS11738787
Manufacturer #: WP207166
This lid switch check is used in washers to detect if the washer lid is open or closed. This prevents a cycle from spinning when the lid is still open and is also used to start your washer once a cert...
$48.41
In Stock

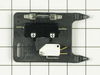
Lid Switch Assembly
PartSelect #: PS11739302
Manufacturer #: WP22001682
This black lid switch assembly comes complete with a bracket, two switches, and a fuse. An open fuse might indicate that the lid switch is bad. The point of the lid switch is for the tub to stop spin...
$42.42
In Stock

Washer Lid Bumper
PartSelect #: PS11738875
Manufacturer #: WP212716
This washing machine lid bumper is just under an inch long. It is all gray in color and is made entirely of rubber.
$7.70
In Stock

Screw
PartSelect #: PS11742733
Manufacturer #: WP489128
This screw is sold individually.
$13.17
In Stock

Lid Switch Actuator Spring
PartSelect #: PS11738886
Manufacturer #: WP213720
This lid switch actuator spring is exactly one inch long. It is made of metal.
$7.59
In Stock

Unbalanced Plunger
PartSelect #: PS11738949
Manufacturer #: WP216255
When this part is used along with the lid switch, it can tell the motor of the washer to stop when a load is uneven. The washer will not start up until the lid is opened and then closed again.
$7.59
In Stock


Questions And Answers for LAT8014ABL
We're sorry, but our Q&A experts are temporarily unavailable.
Please check back later if you still haven't found the answer you need.
Common Symptoms of the LAT8014ABL
[Viewing 5 of 5]Will Not Start
Fixed by
these parts
these parts
Show All
Will not agitate
Fixed by
these parts
these parts
Show All
Will not drain
Fixed by
these parts
these parts
Show All
Lid or door won’t close
Fixed by
these parts
these parts
Show All
Won’t Start
Fixed by
these parts
these parts
Show All


Keep searches simple. Use keywords, e.g. "leaking", "pump", "broken" or "fit".
Washer was dead and would not turn on
Well the washer died and would not turn on in the middle of a wash cycle. Absolutely dead. I disconnected it from power and opened up the front panel on which all the control switches and knobs are mounted. This is removed by unscrewing 4 screws at the top of the washer.
Checked the fuse, and found blown. Replaced the fuse, cl ... Read more osed the panel and plugged it in. Still not working. Checked the Check switches and found the Check Switch really limp. Checked with Digital Multimeter and found no continuity at either position. Unscrewed the check switch. Removal and re inspection with DMM of the check switch confirmed it was bad. Opened up the check switch and found contacts were blown.
Installed a new check switch making sure all the connecting wires go in the right places. The wiring diagram in the washer was very helpful in doing so since u dont want these wires reversed. Adjusted the plunger which operates the check switches when the lid is opened to make sure it is not over or under operating the switches. This is done by loosening the bolt holding down the check switch assembly and slidint the whole assembly forwards or backwards till the plunger has just enough push on the switches. This is done to avoid the plunger from exerting excessive pressure on the check switch and the safety switch in lid open or lid closed position. (both switches are operated by the same plunger according to the lid position)
Closed panel cover and plugged the washer in. There u go, it was alive again!
Read less
Parts Used:

-
Suleman from Canoga Park, CA
-
Difficulty Level:Easy
-
Total Repair Time:15 - 30 mins
-
Tools:Screw drivers, Wrench set
109 of 124 people
found this instruction helpful.
Was this instruction helpful to you?
Thank you for voting!
The washer wouldn't start unless you slammed the lid shut.
I suspected the lid switch right away. Where I went wrong was in thinking that I had to get to it from below. After going to all the trouble of removing the front panel and detaching the top panel, I discovered that it was located inside the control section at the top of the appliance. It only took a few minutes to remove four screws and
... Read more
gain access to the old switch assembly and swap it out with the new one. One thing to note; the new switch assembly has to be set in exactly the right place along a slotted channel in order for both contacts to be activated properly. It's not difficult to find the right spot, but you have to do it consciously.
Read less
Parts Used:

-
Richard from Houston, TX
-
Difficulty Level:A Bit Difficult
-
Total Repair Time:Less than 15 mins
-
Tools:Screw drivers, Socket set
84 of 99 people
found this instruction helpful.
Was this instruction helpful to you?
Thank you for voting!
washing machine lid came off during a move
First, I secured one lid hinge ball in its appropriate position between the lid and the washer. While keeping the first ball in place I placed the other lid hinge ball as close to its intended position as I could get it. Next, I pushed the lid and ball into its position.
Parts Used:

-
David from New Orleans, LA
-
Difficulty Level:Really Easy
-
Total Repair Time:Less than 15 mins
30 of 36 people
found this instruction helpful.
Was this instruction helpful to you?
Thank you for voting!