


Models
>
KE837K-4
KE837K-4 General Electric Range - Overview
Sections of the KE837K-4
[Viewing 4 of 4]


Keep searches simple, eg. "belt" or "pump".


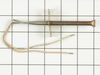
Oven Sensor
PartSelect #: PS235718
Manufacturer #: WB21X158
This sensor offers 16 ohms of resistance at room temperature, though the resistance increases as the temperature increases.
No Longer Available


Questions And Answers for KE837K-4
We're sorry, but our Q&A experts are temporarily unavailable.
Please check back later if you still haven't found the answer you need.
Common Symptoms of the KE837K-4
[Viewing 2 of 2]Little to no heat when baking
Fixed by
these parts
these parts
Show All
Element will not heat
Fixed by
these parts
these parts
Show All
Keep searches simple. Use keywords, e.g. "leaking", "pump", "broken" or "fit".
oven temperature too low
After ordering the proper part with the help of the phone customer service tech, I moved the stove from the wall, unclipped the connector, removed the two screws holding the sensor in place, and removed it. Reversed the above to put it back, and the oven holds perfect temperature.
Parts Used:
-
Ryan from Henderson, NV
-
Difficulty Level:Easy
-
Total Repair Time:Less than 15 mins
-
Tools:Nutdriver
16 of 17 people
found this instruction helpful.
Was this instruction helpful to you?
Thank you for voting!
The gasket needed to be replaced in top oven, it was brittle and broken.
We took out the philips screws on the right and left side of inside of the oven and two hex head screws on the clip on the top of the oven in the front. Then using a slot screw driver pryed the oven liner out enough to remove old gasket and replace the new gasket. We did see in some online directions that we were suppose to remove enti
... Read more
re oven from cabinet and loosen bolts in the back. But, we were able to get enough space to get the old gasket out and new one installed. We did use a 1/4" thick piece of wood on face of oven to prevent any denting of oven when prying out the liner of the oven.
Read less
Parts Used:
-
JoAnn from Auburn, WA
-
Difficulty Level:Easy
-
Total Repair Time:15 - 30 mins
-
Tools:Screw drivers
19 of 27 people
found this instruction helpful.
Was this instruction helpful to you?
Thank you for voting!
oven would not come up to temperature
Removed sensor from back wall of oven by removing 2 screws from flange. I could not pull the wire-nut connections out through the small hole and thought I would have to pull the whole oven out of the wall to acess the connections from the back so instead I clipped the wires close to the old sensor and connected the new sensor with the sma
... Read more
ll wire nuts provided, then enlarged the hole in the oven wall, being careful not to pinch the wires then pushed the wire nuts and extra wire back through the hole and put the screws back in the flange.
Read less
Parts Used:
-
Clarence from Norwich, NY
-
Difficulty Level:Difficult
-
Total Repair Time:30 - 60 mins
-
Tools:Nutdriver, Pliers, Screw drivers
14 of 17 people
found this instruction helpful.
Was this instruction helpful to you?
Thank you for voting!