Models > JNM3163RJ5SS > Symptoms > No heat

Parts That Fix General Electric Microwave JNM3163RJ5SS No heat

No heat is a commonly reported symptom for the JNM3163RJ5SS General Electric Microwave, and we have put together a full guide on how to fix this. This advice is based on feedback from people who own this exact appliance. We have listed the most common parts for your JNM3163RJ5SS General Electric Microwave that will fix No heat. We have included repair instructions, and helpful step-by-step video tutorials. If you are experiencing this issue, not to worry, DIYers just like you have fixed this, and shared their experience to help you!

Fixes Symptom 60% of time
★★★★★
★★★★★
4 Reviews

Rated by 6 customers 


Easy 

30 - 60 mins 

Ratings submitted by customers like you who bought this part.   

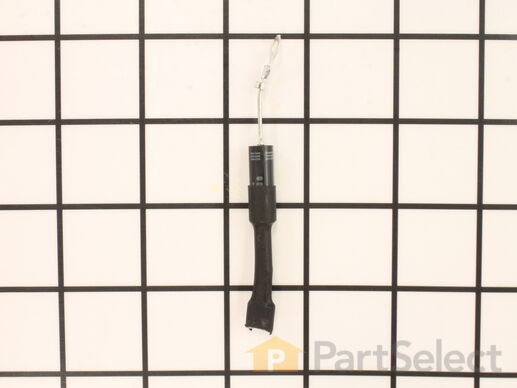
This part is the replacement high-voltage diode for your microwave. It is approximately 3 inches long and is sold individually. The high voltage diode is an electrical current control device inside your microwave. Be sure to disconnect power to the microwave, and use extreme caution when completing this repair, as microwaves can still retain an electrical charge even when unplugged. This part is an authentic OEM part sourced directly from the manufacturer.

$ 8.54
  In Stock
PartSelect Number PS16219547
Manufacturer Part Number WB27X35382

Customer Repair Stories

Microwave not heating.

Followed the instructions on your website and a YouTube video. The diode was at a 90 degree angle which made it a little trickier. Unfortunately the repair did not resolve the problem. I ended up buying a new microwave for temporary use for less than ordering any more parts. We are pleased with your website, instructions, ease of installation though!
  • Seven from MOUNT AIRY, MD
  • Difficulty Level:
    Easy
  • Total Repair Time:
    15 - 30 mins
  • Tools:
    Screw drivers
5 of 5 people found this instruction helpful.
Was this instruction helpful to you?
Thank you for voting!

Microwave made loud buzz noise and did not heat

I followed the generic trouble shooting directions on the web site. It suggested either diode, capacitor and/or magnetron. I test each. All tested OK except diode. It was supposed to measure open in one direction and appox 200k ohms in the other direction. My diode measured open in both directions (tried multiple times, multiple settings). I replaced the diode. The order process was great and it shipped immediately. I knew I was in trouble when I measured the new diode and it too was open in both directions. It was easy to install but unfortunately no joy - did not solve the problem. At this point it is likely cheaper just to buy a new one
  • Gregg from Santa Ana, CA
  • Difficulty Level:
    Really Easy
  • Total Repair Time:
    Less than 15 mins
  • Tools:
    Screw drivers
39 of 66 people found this instruction helpful.
Was this instruction helpful to you?
Thank you for voting!
Fixes Symptom 28% of time
★★★★★
★★★★★
18 Reviews

Rated by 19 customers 


Easy 

30 - 60 mins 

Ratings submitted by customers like you who bought this part.   

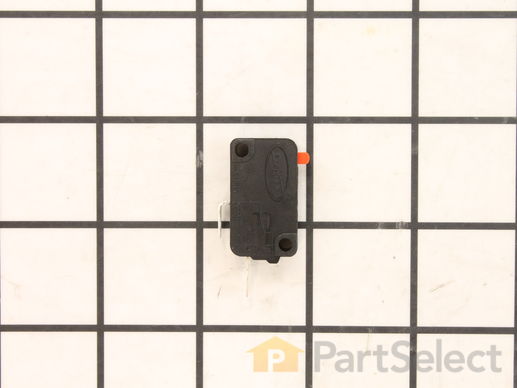
This interlock switch is located in the door latch.

$ 33.44
  In Stock
PartSelect Number PS237015
Manufacturer Part Number WB24X10047

Customer Repair Stories

Microwave would turn on and count down, but not heating and not rotate turntable. Pressing door up would occasionally start heat.

First I disconnected the power and opened the door. Then I removed the top screws holding the top vent louvers, then removed the screw at the top of the touch pad. The touch pad removes by sliding up slightly then tilting top out. I unscrewed two screws holding the door latch assembly. Press the tab to remove and replace switch. Reconnect wires, reseat latch mount by placing top bracket tab in place first, allign and secure with screws. Reseat touch pad by placing bottom tabs in first, tilt forward and press up to seat top tabs, secure with top screw. Secure vent louver screws, plug in and watch your microwave work again.
  • Michael from Ridgefield, CT
  • Difficulty Level:
    Really Easy
  • Total Repair Time:
    Less than 15 mins
  • Tools:
    Screw drivers
37 of 58 people found this instruction helpful.
Was this instruction helpful to you?
Thank you for voting!

Microwave runs with the door open

Remove microwave outer cover. Turn on side & locate the upper & lower door switches. Better to replace in pairs even if one is ok. Remove the wire harness to each switch. Then replace switch and re connect the wire harness. Re attach outer cover
and test to see if that solved the problem. If so then well done!!
  • Thomas from Andover, NJ
  • Difficulty Level:
    Really Easy
  • Total Repair Time:
    15 - 30 mins
  • Tools:
    Pliers, Screw drivers
35 of 50 people found this instruction helpful.
Was this instruction helpful to you?
Thank you for voting!
Fixes Symptom 5% of time
★★★★★
★★★★★
4 Reviews

Rated by 2 customers 


Easy 

1- 2 hours 

Ratings submitted by customers like you who bought this part.   

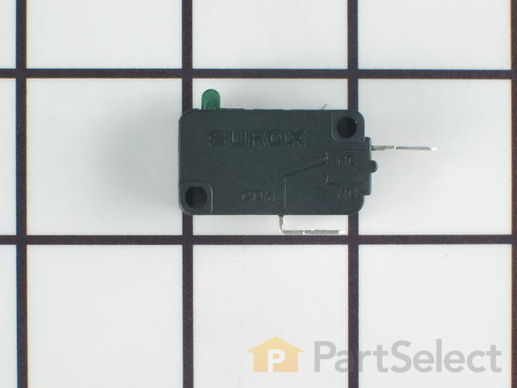
This is the replacement monitor switch for your microwave. It is black in color and measures approximately 1 inch by ¾ of an inch. This switch monitors the door latch position of your microwave and communicates to the electronic control board whether the latch is open or closed. If the switch is damaged, your microwave may not start, even though the door latch is closed. You can check the continuity of the switch by using a multimeter. Be sure to disconnect the microwave from power before you begin this repair.

$ 24.79
  In Stock
PartSelect Number PS11766871
Manufacturer Part Number WB24X25397
Fixes Symptom 4% of time

Rated by 3 customers 


A Bit Difficult 

30 - 60 mins 

Ratings submitted by customers like you who bought this part.   

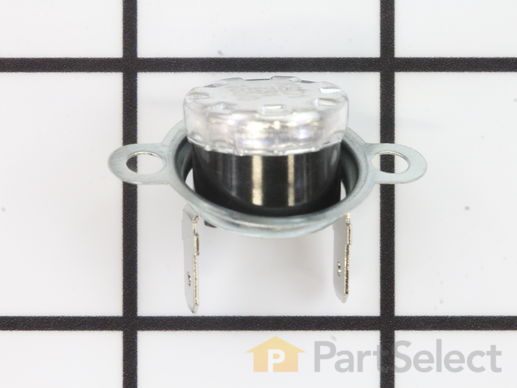
This part will trip once the inside of the cavity overheats and exceeds the recommended temperature.

$ 29.17
  In Stock
PartSelect Number PS2321365
Manufacturer Part Number WB21X10148

Customer Repair Stories

To heat a cup of coffee, user entered "10:00" instead of "1:00". Mess! After cleanup, microwave ran, but would not heat. While running, it made 2 or 3 time the noise volume as before.

I went for the cheap things first. Ohmmeter showed one of the thermostats in the magnetron compartment was open. I ordered and replaced all three thermostats. Still no heat. I took the unit off the wall (aaarrgh!) and checked the oven cavity thermal cutout. It said 7 ohms. I tested by shorting the wires together, but still no heat. So, I ordered the magnetron and diode cable. When replacing the diode cable (be sure to discharge the big cap!) either I broke it, or it was already damaged. It came off in two pieces. The new diode cable was re-enforced with thick heat shrink tubing, to prevent such breaking. You need a very short screwdriver to replace the magnetron. Now, all fixed! ~$150. A new one lists for $2000, installed in the overhead. My wife thinks I am a genius.
  • G. Wayne from GARDNERVILLE, NV
  • Difficulty Level:
    Easy
  • Total Repair Time:
    1- 2 hours
  • Tools:
    Pliers, Screw drivers
1 of 2 people found this instruction helpful.
Was this instruction helpful to you?
Thank you for voting!

No Power

Check with Digital meter all connections.Find a Thermostat open loop.This thermostat is near the Megatron .
  • Florentino from West Palm Beach, FL
  • Difficulty Level:
    A Bit Difficult
  • Total Repair Time:
    15 - 30 mins
  • Tools:
    Screw drivers
6 of 12 people found this instruction helpful.
Was this instruction helpful to you?
Thank you for voting!
Fixes Symptom 4% of time

Rated by 2 customers 


Easy 

More than 2 hours 

Ratings submitted by customers like you who bought this part.   

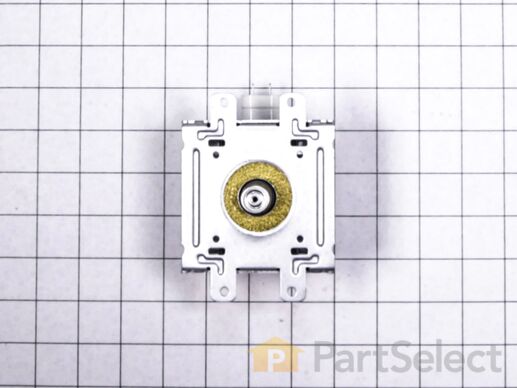
This part is used to generate microwave energy/heat.

$ 195.67
  In Stock
PartSelect Number PS1481236
Manufacturer Part Number WB27X10927

Customer Repair Stories

Very loud noise when cooking

I opened it up, found there is sparks on the diode when cooking, I replaced the diode first, still no heat, I found all the switches and thermal stats were normal, there is 120V AC input to the transformer, so I tried to make a good guess and bought a Magnetron from Partselect, after I installed the new Magnetron, there is heat and the microwave is working.
  • Joseph from SANDY, UT
  • Difficulty Level:
    Difficult
  • Total Repair Time:
    More than 2 hours
  • Tools:
    Pliers, Screw drivers
1 person found this instruction helpful.
Was this instruction helpful to you?
Thank you for voting!

Microwave stopped heating

Using some help, removed the above the range microwave. Took apart parts of the microwave to get to the magnetron. Removed existing magnetron, inserted the new magnetron. Put the microwave back together. Tested the microwave to insure the magnetron was working before reinstalling. It did heat. Then reinstalled it back above the range.
  • Mary from CORRIGAN, TX
  • Difficulty Level:
    Really Easy
  • Total Repair Time:
    1- 2 hours
  • Tools:
    Screw drivers
5 of 6 people found this instruction helpful.
Was this instruction helpful to you?
Thank you for voting!