


Models
>
J795B1
J795B1 General Electric Range - Overview
Sections of the J795B1
[Viewing 1 of 1]
Keep searches simple, eg. "belt" or "pump".

Trim Ring - 6 Inch
PartSelect #: PS244475
Manufacturer #: WB31X5013
This 6 inch high rise burner trim ring is intended for use with detached style low rise tilt lock surface mount burners on ranges.
$8.44
In Stock

Trim Ring - 8 Inch
PartSelect #: PS244479
Manufacturer #: WB31X5014
This 8 inch high rise burner trim ring is intended for use with detached style low rise tilt lock surface mount burners on ranges.
$11.96
In Stock

Bake Element
PartSelect #: PS249483
Manufacturer #: WB44X5099
This closed hinged-style bake element has screw in terminals.
$82.73
In Stock

Tilt Lock Hinge Mounted Surface Burner Kit - 6"
PartSelect #: PS244042
Manufacturer #: WB30X342
This tilt lock hinge mounted surface element kit includes a 6 inch, three wire, 1350 watt surface element, and a terminal block with all three-wire units. These high rise elements do not come with an attached trim ring.
$49.45
In Stock

Tilt Lock Hinge Mounted Surface Burner Kit - 8 Inch
PartSelect #: PS244040
Manufacturer #: WB30X341
This tilt lock hinge mounted surface element kit includes an 8 inch element, three wire, 2450 watt surface element, and a terminal block with all three-wire units. These high rise elements do not come...
$83.46
In Stock

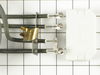
Upper Bake Element
PartSelect #: PS249421
Manufacturer #: WB44X195
The depth of the terminals is 2.5 inches, and the screw-in terminals are 1.5 inches apart.
$96.31
On Order

Silicone Door Gasket
PartSelect #: PS241938
Manufacturer #: WB2X1522
This gasket seals the range/oven door.
$106.66
In Stock

Broil Element
PartSelect #: PS249392
Manufacturer #: WB44X139
This oven broil element has push on terminals.
$106.19
Special Order

Thermostat
PartSelect #: PS235956
Manufacturer #: WB21X5209
The length of this thermostat's capillary is 62 inches.
No Longer Available

8" Multi Temperature Element Kit - 2500W
PartSelect #: PS244052
Manufacturer #: WB30X357
Hardware included.
No Longer Available


Questions And Answers for J795B1
We're sorry, but our Q&A experts are temporarily unavailable.
Please check back later if you still haven't found the answer you need.
Common Symptoms of the J795B1
[Viewing 5 of 5]Little to no heat when baking
Fixed by
these parts
these parts


Show All
Element will not heat
Fixed by
these parts
these parts

Show All
Oven not heating evenly
Fixed by
these parts
these parts
Show All
Will Not Start
Fixed by
these parts
these parts
Show All
Oven is too hot
Fixed by
these parts
these parts
Show All


Keep searches simple. Use keywords, e.g. "leaking", "pump", "broken" or "fit".
The lower bake element burned out.
First I removed the two screws that hold the element in place. I then pulled the element out about 3 inches and disconnected the two wires, reconnected the wires to the new element, reattached it to the oven and voila!
It worked. What was really cool, once I ordered the part, I received it in only two work days!
Goo ... Read more d job folks!
It worked. What was really cool, once I ordered the part, I received it in only two work days!
Goo ... Read more d job folks!
Read less
Parts Used:
-
Carlos from Southaven, MS
-
Difficulty Level:Really Easy
-
Total Repair Time:Less than 15 mins
-
Tools:Nutdriver
67 of 72 people
found this instruction helpful.
Was this instruction helpful to you?
Thank you for voting!
Replaced lower element in GE Spectra range.
Hardest part was getting the wrong element and having to send it back and reordering correct one....too many variables. Two screws inside the oven removed, pull out range and take off back and attach new element to plug ins!
Parts Used:
-
Phillip from Greeneville, TN
-
Difficulty Level:Really Easy
-
Total Repair Time:Less than 15 mins
-
Tools:Nutdriver
22 of 30 people
found this instruction helpful.
Was this instruction helpful to you?
Thank you for voting!
Old element burned through. Sparks were flying!
Turned off power at breaker panel. Removed 2 screws attaching element to stove. Pulled element out a couple of inches and removed 2 wires attached with screws. Installation is reverse order of removal.
Be careful not to twist the terminal ends when tightening screws.
shipping was very fast!
Be careful not to twist the terminal ends when tightening screws.
shipping was very fast!
Parts Used:
-
David from Baton Rouge, LA
-
Difficulty Level:Really Easy
-
Total Repair Time:Less than 15 mins
-
Tools:Screw drivers
18 of 24 people
found this instruction helpful.
Was this instruction helpful to you?
Thank you for voting!