


Models
>
85044
85044 Kenmore - Overview
Models starting with 85044
Click on the best match to narrow your results.
- 8504420000 Kenmore Range (Kenmore Range/Stove/Oven Model 850.4420000 (8504420000, 850 4420000) Parts)
- 8504427890 Kenmore Range (Kenmore Range/Stove/Oven Model 850.4427890 (8504427890, 850 4427890) Parts)
- 8504427891 Kenmore Range (Kenmore Range/Stove/Oven Model 850.4427891 (8504427891, 850 4427891) Parts)
- 8504427893 Kenmore Range (Kenmore Range/Stove/Oven Model 850.4427893 (8504427893, 850 4427893) Parts)
- 8504428190 Kenmore Microwave (KENMORE MICROWAVE COMBINATION BUILT-IN OVEN)
- 8504428191 Kenmore Range (Kenmore Range/Stove/Oven 8504428191)
- 8504428390 Kenmore Microwave (KENMORE MICROWAVE COMBINATION BUILT-IN OVEN)
Exact Part matches for your search term
[Viewing 1 of 1]
Casing
This part number matches the current model number 85044
PartSelect #: PS12281946
Manufacturer #: 85044
No Longer Available
Keep searches simple, eg. "belt" or "pump".

Screw
PartSelect #: PS12349731
Manufacturer #: W11233072
This is a multi-use and multi-appliance screw. It can be used on a microwave, refrigerator, range/oven, air conditioner, dehumidifier, washer, or dryer. The measurements of this screw are 8 x 1/2 inch...
$20.79
In Stock

2 Piece Broiler Pan
PartSelect #: PS971245
Manufacturer #: 4396923
This is cookware designed for use in your range or oven. It is a two-piece dish that is used to grill or cook food while the broil function is on, meaning it can withstand high temperatures. This set ...
$37.51
In Stock

Oven Light Socket
PartSelect #: PS439060
Manufacturer #: 316116400
The oven light socket allows you to screw in a light bulb so that you can see the inside of your oven. The light socket is located in the back of your oven, so you will need to remove the back panel t...
$46.58
In Stock

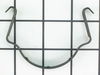
Clamp-Motor
PartSelect #: PS11743369
Manufacturer #: WP660658
This clamp is used to secure the drive motor.
$11.13
In Stock

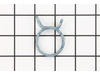
Hose Clamp
PartSelect #: PS11741854
Manufacturer #: WP356138
This clamp helps to prevent leaking by holding the end of water hose in place.
$10.83
In Stock

Bake Element
PartSelect #: PS11740817
Manufacturer #: WP3177420
This bake element is found on the bottom of the oven.
$93.92
In Stock

Washer
PartSelect #: PS11742796
Manufacturer #: WP52185-1
This door hinge washer is less than an inch in diameter. It is all white in color and it is made entirely of plastic.
$7.14
In Stock


Common Symptoms of models starting with 85044
[Viewing 4 of 4]Leaking
Fixed by
these parts
these parts
Show All
Little to no heat when baking
Fixed by
these parts
these parts

Show All
Noisy
Fixed by
these parts
these parts
Show All
Will Not Start
Fixed by
these parts
these parts

Show All


Keep searches simple. Use keywords, e.g. "leaking", "pump", "broken" or "fit".
Oven light receptacle broken - bulb base broke off
Turned power off at electrical panel. Pulled oven away from wall. Removed back cover (6 screws), then unplugged wires from old receptacle. I had to pull the squeeze clips backwards & break them to remove the old receptacle - couldn't squeeze them enough to remove them otherwise. The old receptacle came out through the inside of the oven,
... Read more
and the new one snapped in easily from inside the oven as well. Replaced wiring, installed new bulb, restored power & tested. Replaced back cover. Good time to vacuum under/behind where the oven usually lives before sliding it back to the wall.
Read less
Parts Used:
-
Paul from Spokane Valley, WA
-
Difficulty Level:Easy
-
Total Repair Time:30 - 60 mins
-
Tools:Screw drivers
64 of 93 people
found this instruction helpful.
Was this instruction helpful to you?
Thank you for voting!
Purchased home but stove had no broiler pan.

-
Raymond from BLOOMINGTON, MN
-
Difficulty Level:Very Easy
-
Total Repair Time:Less than 15 mins
14 of 20 people
found this instruction helpful.
Was this instruction helpful to you?
Thank you for voting!
used up elec baking element
Unscrew the old one, pull it out, along with a few inches of wire. Use a couple of clothes pins to keep the wire escaping back behind the oven as you unhook them from the damaged (bad) one. Then reverse the process with the new one. No big deal. Works great now and the wife is happy.
Parts Used:

-
Mark from Santa Maria, CA
-
Difficulty Level:Really Easy
-
Total Repair Time:Less than 15 mins
-
Tools:Screw drivers
7 of 8 people
found this instruction helpful.
Was this instruction helpful to you?
Thank you for voting!