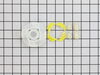
This is an inner cap seal, but may also be known as an O-ring, and it is a part for your washing machine. Some symptoms replacing this part will fix include: leaking from your appliance, uncontrollabl...
$11.10
In Stock
Order within the next 7 hrs and your part ships today!
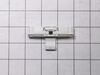
This is a replacement clutch assembly or cam kit for your washer. The clutch assembly is mounted on the drive shaft on the bottom of your washer. You may need to replace the clutch assembly if the spl...
$54.38
In Stock
Order within the next 7 hrs and your part ships today!
This touch-up paint can be used on a wide variety of household appliances. It is most often used on washers, dryer, refrigerators, dishwashers, ranges, freezers, trash compactors, or microwaves. It is...
$8.00
In Stock
Order within the next 7 hrs and your part ships today!
Pulled off the dispenser. Used socket set to remove bolt. Removed entire agitator out of washer. Placed both feet on bottom of agitator and then pulled up on the upper agitator. It took some muscle due to the years of washer use. I used a flat-head screwdriver to weaken the plastic clips holding down the old bearing-driven cam. Once
... Read more I got the upper agitator off, the guts were easy to pull out. Then I just re-assembled with the 3 new parts (the Cam Driven, the Dog Ears, and the Bearing-Driven Cam).
Well, first investigated and found loose nut on drive clutch. First take off the two screws with nut drive then cover off using a screwdriver blade to snap off the cover. Then socket ratchet to take off the nut on drive clutch. take off belt by slowly rotating the drive gear. two screws that hold the electronics to the upper drive clutch
... Read moreand put aside, so you can snap off the cover for drive clutch on upper part with screwdriver and off the parts come and install whole unit back as took it apart. Line up the new upper clutch so that is position as was before. (Using parts diagram helps a lot as www. partsselect.com has for you or Maytag.com.) Then put the electronic part board back on and the gear and nut. Make sure it is tight by several attempts to make sure it's snugged up good and then slowly roll belt back on the pulley and motor drive. Put your cover guard back on with two screws and done.


 Diagram and Parts List for Amana Washer")