


Models
>
1442
1442 - Overview
Models starting with 1442
Click on the best match to narrow your results.
- 1442 Tecumseh Engine (Tecumseh Small Engine Model 1442 Parts)
- 14420-1 General Electric Range
- 144200-144254 ( 0010 - 0016 ) Briggs and Stratton Engine (Gas Engine)
- 1442004 Litton Microwave (Litton Microwave Model 1442.004 (1442004, 1442 004) Parts)
- 144201-0144-99 Briggs and Stratton Engine (Engine)
- 144202-0015-99 Briggs and Stratton Engine (Engine)
- 144202-0110-99 Briggs and Stratton Engine (Engine)
- 144202-0131-99 Briggs and Stratton Engine (Engine)
- 144202-0132-99 Briggs and Stratton Engine (Engine)
- 144202-0133-99 Briggs and Stratton Engine (Engine)
- 144202-0135-99 Briggs and Stratton Engine (Engine)
- 144202-0137-99 Briggs and Stratton Engine (Engine)
- 144202-0138-99 Briggs and Stratton Engine (Engine)
- 144202-0139-99 Briggs and Stratton Engine (Engine)
- 144202-0141-99 Briggs and Stratton Engine (Engine)
- 144202-0142-99 Briggs and Stratton Engine (Engine)
- 144202-0147-99 Briggs and Stratton Engine (Engine)
- 14421-1 General Electric Range
- 144231-0115-99 Briggs and Stratton Engine (Engine)
- 144231-0130-99 Briggs and Stratton Engine (Engine)
- 144231-0140-99 Briggs and Stratton Engine (Engine)
- 144231-0145-99 Briggs and Stratton Engine (Engine)
- 144232-0116-99 Briggs and Stratton Engine (Engine)
- 144232-0134-99 Briggs and Stratton Engine (Engine)
- 144232-0136-99 Briggs and Stratton Engine (Engine)
- 144232-0143-99 Briggs and Stratton Engine (Engine)
- 144251-0120-99 Briggs and Stratton Engine (Engine)
- 144251-0146-99 Briggs and Stratton Engine (Engine)
- 144252-0121-99 Briggs and Stratton Engine (Engine)
- 1442A Tecumseh Engine (Tecumseh Small Engine Model 1442A Parts)
- 1442B Tecumseh Engine (Tecumseh Small Engine Model 1442B Parts)
Exact Part matches for your search term
[Viewing 2 of 2]
Fitting, Aeroquips
This part number matches the current model number 1442
PartSelect #: PS11811915
Manufacturer #: 1442
$4.68
Special Order
Pin
This part number matches the current model number 1442
PartSelect #: PS11938645
Manufacturer #: 1442
No Longer Available
Keep searches simple, eg. "belt" or "pump".

Burner Bowl - 8 Inch
PartSelect #: PS244399
Manufacturer #: WB31T10015
This part is located beneath the element and catches any spills.
$17.92
In Stock

Burner Bowl - 6 Inch
PartSelect #: PS244398
Manufacturer #: WB31T10014
This burner bowl is also known as a burner drip bowl or burner drip pan, and is designed for use with your cooktop or range. It is black in color and is approximately 6 inches in diameter. It can be f...
$16.56
In Stock

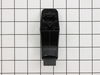
Door Handle End Cap
PartSelect #: PS256613
Manufacturer #: WB7X7183
This oven door handle end cap is used on both the left and right hand sides. Sold individually.
$27.09
In Stock

Screw, 8/18 x 3/8
PartSelect #: PS11746840
Manufacturer #: WP90767
This screw is sold individually.
$5.42
In Stock

Door Handle End Cap
PartSelect #: PS256619
Manufacturer #: WB7X7189
This end cap can be used for either the left or right side.
$22.26
In Stock

Burner Bowl - 8 Inch
PartSelect #: PS244397
Manufacturer #: WB31T10013
This burner bowl or drip pan is found beneath the heating element on your cooktop or range. This part measures 8 inches in diameter, and should not be confused with the smaller pan, which measures 6 i...
$30.47
In Stock

Drip Bowl - 6 Inch
PartSelect #: PS244396
Manufacturer #: WB31T10012
This gray drip bowl is sold individually.
$30.24
In Stock

Door Handle
PartSelect #: PS231857
Manufacturer #: WB15K5076
This is the replacement door handle for your range. It is made of black plastic and measures approximately 22 inches by 1 inch. The door handle connects to the range door and allows you to open and cl...
$48.96
In Stock

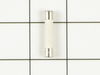
Ceramic Fuse - 20 amp
PartSelect #: PS11747931
Manufacturer #: WPM0805101
This microwave fuse is just over an inch in length. It has a white ceramic center, and metal on either end. This is a twenty amp 250-volt fuse, and is used to power your microwave. If your microwave w...
$10.19
In Stock

Heat Resistant Adhesive
PartSelect #: PS11728058
Manufacturer #: W10841140
This is a heat-resistant adhesive for your appliance. The heat resistance allows you to stick parts such as grate feet, gaskets, and felt seals in hot areas, such as a cooktop, without compromising th...
$23.85
In Stock

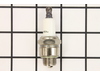
Plug-Spark
PartSelect #: PS9140427
Manufacturer #: 796112S
This part is the replacement spark plug for your engine. It measures approximately 2.5 inches by 1 inch. The spark plug creates the spark that ignites fuel in your engine during the combustion process...
$4.99
In Stock

Bottom Trim - White
PartSelect #: PS2321159
Manufacturer #: WB07K10250
Screws not included.
$25.43
In Stock
Common Symptoms of models starting with 1442
[Viewing 5 of 5]Leaking
Fixed by
these parts
these parts

Show All
Won’t turn on
Fixed by
these parts
these parts
Show All
Will Not Start
Fixed by
these parts
these parts
Show All
Element will not heat
Fixed by
these parts
these parts
Show All
Door won’t close
Fixed by
these parts
these parts
Show All


Keep searches simple. Use keywords, e.g. "leaking", "pump", "broken" or "fit".
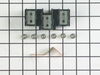
terminal block melted
The existing terminal block on my Ge oven/Range had melted due to a loose wire causing sparking and starting the plastic casing of the terminal block on fire and melting it, Part select made the part easy to find and had it at my house in 2 days. All I had to do was remove six screws to take the back sheet metal cover off of the oven. U
... Read more
nscrew the terminal connections remove two mounting screws that held the terminal on to the oven body. This was a little trickier than it should have been because the melted plastic had reformed making it very hard to access the mounting screws. i then mounted the new piece and plugged the oven in, it took 15 minutes and was very easy. definitely saved me at-least a $100 for the service call i would have made if finding the part wasn't so convenient
Read less
Parts Used:

-
jonathan from willow springs, IL
-
Difficulty Level:Easy
-
Total Repair Time:Less than 15 mins
-
Tools:Nutdriver, Screw drivers
53 of 67 people
found this instruction helpful.
Was this instruction helpful to you?
Thank you for voting!
The end caps broke on my oven door handle.
1st I opened the oven door and removed the 2 screws that hold the outside and inside of the door together. With the door separated I removed the 2 screws that hold the end caps in place, then removed the old end caps. I put the new end caps on the oven door handle, aligned the holes for the end cap screws and reinstalled the screws,then
... Read more
reinstalled the oven door screws,closed the oven door and started cooking.
Read less
Parts Used:
-
Harry from Thomasville, GA
-
Difficulty Level:Easy
-
Total Repair Time:15 - 30 mins
-
Tools:Screw drivers
45 of 46 people
found this instruction helpful.
Was this instruction helpful to you?
Thank you for voting!
microwave oven blew fuse
First I removed upper front grill by removing two Philips head screws on top and pulling off. This exposed the Philips head screw which holds control panel in place. After removing screw I pushed up on panel and it came off to expose fuse. With needle nose pliers I removed old fuse and again with pliers held new fuse in position. With th
... Read more
e help of a bladed screwdriver, I pushed new fuse into holder, then replaced panel, screw and grill. This took less than 15 minutes even as one of the wires on control panel pulled out of connection and took some time to locate where to reconnect, otherwise was an easy fix
.
.
Read less
Parts Used:

-
tad from tamarack, MN
-
Difficulty Level:Really Easy
-
Total Repair Time:Less than 15 mins
-
Tools:Pliers, Screw drivers
24 of 37 people
found this instruction helpful.
Was this instruction helpful to you?
Thank you for voting!