The hose clamp is used to hold the water hose in place which will prevent the hose from leaking water. Sometimes the clamp may lose its ability to latch on, causing a leaking washer. For the installat...
This drum shaft assembly is for washers. Drum shaft assembly connects the spin basket to the drive motor to spin the basket. Unplug the washer before installing this part. Wear work gloves to protect your hands.
Ask our experts a question about this model and we'll get back to you as soon as possible!
3 questions answered by our experts.
Sort by:
< Prev
1
Next >
Search filter:
Clear Filter
Your search term must have 3 or more characters.
Keep searches simple. Use keywords, e.g. "leaking", "pump", "broken" or "fit".
Sorry, we couldn't find any existing answers that matched.Try using some different or simpler keywords, or submit your new question by using the "Ask a Question" button above!
Kat
January 29, 2020
What does error code F01 mean for this Kenmore model
For model number 11028133410
Hi Kat, thank you for your question. The F01 error code means that your electronic control board has failed and needs to be replaced. Here is the part number: PS11723064. Good luck with your repair.
Why does the washer's water level pressure hose have an orange small tube inside of it.
For model number 11028133410
Hi Kat,
Thank you for your question. There should not be another tube inside the water level pressure switch hose. The one listed under your model number shows as being a clear hose. If you are seeing an orange color inside the tube, it may be from discoloration. We hope this helps. Thank you and have a great day.
Was this helpful?
Thank you for voting!
Rebecca
April 20, 2022
Machine has been making a loud noise while in spin mode. Today, a load completed, but the clothes were still super wet. I tried using the rinse and spin cycle, but the machine didn’t work. It goes from add garment to wash and back and forth, but doesn’t do anything else. I was able to identify the error codes and it shows f7 and e5? I researched and believe it’s the clutch. Can you please confirm? If so, where can I buy the part and what is the part number? Thank you I advance for your help.
For model number 11028133410
Hello Rebecca, Thank you for the question. The F7 E5 error code indicates is a shifter fault error code. This could be caused by a faulty Washer Motor Rotor. The motor rotor connects to the spin basket shaft and rotates the spin basket. We suggest checking the Rotor for wear or damage. If you need help placing an order, customer service is open 7 days a week. Please feel free to give us a call. We look forward to hearing from you!
1.) disconnect power to your washer. Turn off water supply and disconnect from the washer.
open the washer top and remove plastic cap from the wash plate
2.) using 7/16 socket, remove bolt from the wash plate. If you can't remove it with a socket , I recommend using impact wrench.
3.) remove wash plate
... Read more( you might need to spray penetrating oil or wd40 inside the bolt hole to loosen it. Check to make sure the wash plate gear grooves are not worn down, if they are, replace it.
4.) using your Maytag specific spaner nut wrench, remove the spaner nut from the shaft of the gear case. This should be right underneath where the wash plate was. If you can't turn it by hand , use a rubber mallet or hammer to encourage it.
5.) some people remove the wash basket at this point. I don't think it is necessary.
6.) close your washing machine. Tape the top closed to keep it from flying open. Tilt your washer back and prop it up where you have access to the underside of the washing machine.
7) remove motor rotor bolt and pull rotor off of the motor.
8.) disconnect the two wire connectors that supply power to motor. using a socket, remove bolts that are keeping motor attached to the gear case.
9.) Now that the gear case is all the is remaining on the underside, you can remove the 4 bolts that are holding the gear case to the washer. Now try to pull gear case out.
10.) if gearcase will not pull out, lower washer back to upright position. Spray penetrating oil or wd40 around the shaft of the gearcase and allow it to sit for 5-10 minutes. Using a hammer, lightly tap on the shaft of the gearcase and it should now fall out. ( you might have to apply penetrating oil again, or apply more force with the hammer.
11.) reinstall motor to new gearcase. Insert new gear case to the washer. Reinstall bolts and reconnect power supply wires.
12. ReInstall spaner nut inside the washer, reinstall wash plate.
Removed two screws on back of lid to raise top removed tub one bolt and one spanernut pulled tub lowered top reinstalled screws laid washer down to get to bottom of washer unplugged wiring removed four bolts pulled gear box and motor removed motor from gear box installed motor on new gear box reassemble washer
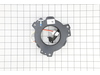
I removed the 2 hose clamps connecting to the pump, removed 3 screws holding pump in place, and disconnected 2 wires plugged into pump. Put the new pump on in reverse order.


 Diagram and Parts List for Kenmore Washer")