Models > HTS22GBPBRWW > Symptoms > Fridge too warm

Parts That Fix Hotpoint Refrigerator HTS22GBPBRWW Fridge too warm

Fridge too warm is a commonly reported symptom for the HTS22GBPBRWW Hotpoint Refrigerator, and we have put together a full guide on how to fix this. This advice is based on feedback from people who own this exact appliance. We have listed the most common parts for your HTS22GBPBRWW Hotpoint Refrigerator that will fix Fridge too warm. We have included repair instructions, and helpful step-by-step video tutorials. If you are experiencing this issue, not to worry, DIYers just like you have fixed this, and shared their experience to help you!

Fixes Symptom 71% of time
★★★★★
★★★★★
18 Reviews

Rated by 103 customers 


Easy 

30 - 60 mins 

Ratings submitted by customers like you who bought this part.   

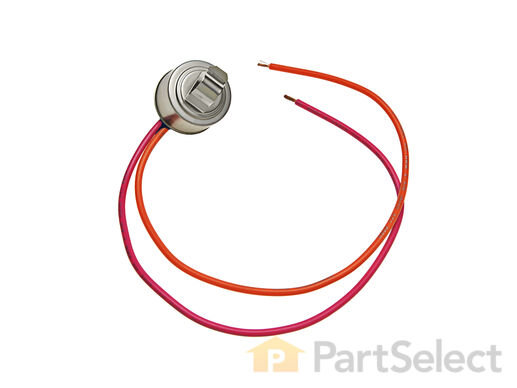
This defrost termination thermostat (Defrost Limiter Thermostat, High Limit Thermostat, Refrigerator Defrost Bi-Metal Thermostat) acts as a safety device to stop the evaporator coil from overheating, by turning off the defrost heater at the end of the defrost cycle. This part attaches to the tubing of the evaporator coil in the freezer. A faulty defrost termination thermostat may result in the defrost heater never heating and a solid frost buildup on the evaporator coil, which results in too warm temperatures. The thermostat contacts are normally closed and have continuity until it reaches 140 degrees. If this high limit thermostat is open at room temperature or colder, it is defective. This limit thermostat has an attached mounting clip and comes with pink and amber wire leads. The thermostat is 1 inch in diameter and 1/2 inch thick, the 2 wire leads are 10 inches long.

$ 29.26
  In Stock
PartSelect Number PS1017716
Manufacturer Part Number WR50X10068

Replacing your General Electric Refrigerator Defrost Thermostat

Replacing your Defrost Thermostat

Customer Repair Stories

freezer was freezing up.

took the back off and defrosted with a hairdryer. disconected the part pulled the part out cut the wires. put the other part on and instaled it. put it back together and it seems to be working just fine. thank you
  • doyle from kingston, WA
  • Difficulty Level:
    Really Easy
  • Total Repair Time:
    15 - 30 mins
  • Tools:
    Nutdriver, Socket set
3 of 3 people found this instruction helpful.
Was this instruction helpful to you?
Thank you for voting!

Ice cubes froze in the tray and frost was all underneath

I read stories from the website how others did it so I figured I would give it a try. I put all the frozen stuff in the refrigerator piled up. Took out the shelves. Took out 2 screws with a socket extension ( nut driver will work fine.) Remove the light bulb. lifted up on the back panel...it came right out. Saw the coils and on top the sensor. Took it off, cut the wires, spliced in the color coded new one ( pink to pink, orange to orange) Stuck it in the top coil in the original position and crossed my fingers! I put all the pieces back easily, restocked the freezer and waited. HOORAY!! My ice cubes are all separate and free. NO frost inside. A very easy fix for $20.

Note: If there is a large amount of ice build up on your coils a hair dryer works great. The drain is on the bottom anyway. Also , you may want to seal around the wire nuts to keep moisture out. I did
  • Michael from Sylva, NC
  • Difficulty Level:
    Easy
  • Total Repair Time:
    30 - 60 mins
  • Tools:
    Socket set
5 of 6 people found this instruction helpful.
Was this instruction helpful to you?
Thank you for voting!
Fixes Symptom 8% of time
★★★★★
★★★★★
44 Reviews

Rated by 23 customers 


Easy 

30 - 60 mins 

Ratings submitted by customers like you who bought this part.   

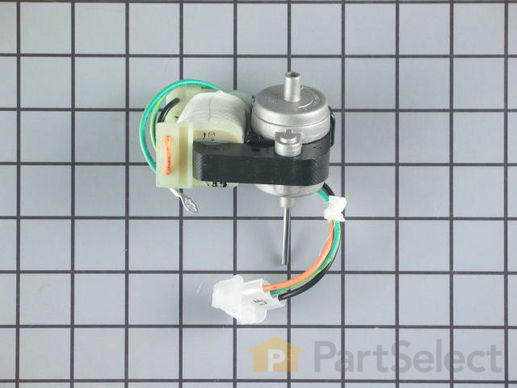
This fan motor is most times used with frost-free refrigerators with a condenser coil. When the compressor runs, so does this fan, circulating air through the refrigerator grille, cooling the compressor and condenser coils. This fan motor also helps to evaporate excess water in the drain pan.

$ 52.03
  In Stock
PartSelect Number PS1766247
Manufacturer Part Number WR60X10220

Replacing your General Electric Refrigerator Condenser Fan Motor

Replacing your Condenser Fan Motor

Customer Repair Stories

Refrigerator

The hard part was cleaning the dust around the coil and fan area. Its plug and play right after that. Two nuts on the fan housing and a wire harness snaps on and off. Bam! 1,2,3 Up and running. . Like new. . . Thank you ps
  • Robert from Cutler Bay, FL
  • Difficulty Level:
    Really Easy
  • Total Repair Time:
    15 - 30 mins
  • Tools:
    Nutdriver, Screw drivers, Wrench (Adjustable)
7 of 11 people found this instruction helpful.
Was this instruction helpful to you?
Thank you for voting!

Condenser Fan Motor stopped turning

1. Unplugged the fridge. 2. unplugged the fan connection and removed the wire holding clip. 3. removed the 2 screws holding the motor bracket in place and removed the bracket. 4. Pulled gently back on the motor so that the fan pressed against the front bracket until the fan slid off the motor shaft. 5. Pulled the rubber motor mounts off of the old motor and placed on the new motor. 6. Slide the new motor in place pressed the fan all the way onto the shaft. 7. Placed the rear motor bracket in place and started the screws by hand making sure the ground wire was attached to the furthest away screw. 8. tightened the screws down. 9. Pushed in the wire holding clip into the clip hole. 10. Plugged back in the fan. 11. Plugged back in the fridge. 12. Turned down the temp on the fridge to kick on the compressor and checked to assure the fan was operating and then set the temp back to normal. 13. Vacuumed the condenser coils to get them all clean and ready for more years of service!
  • Arthur from Alamosa, CO
  • Difficulty Level:
    Really Easy
  • Total Repair Time:
    Less than 15 mins
  • Tools:
    Socket set
14 of 15 people found this instruction helpful.
Was this instruction helpful to you?
Thank you for voting!
Fixes Symptom 4% of time
★★★★★
★★★★★
5 Reviews

Rated by 6 customers 


Easy 

15 - 30 mins 

Ratings submitted by customers like you who bought this part.   

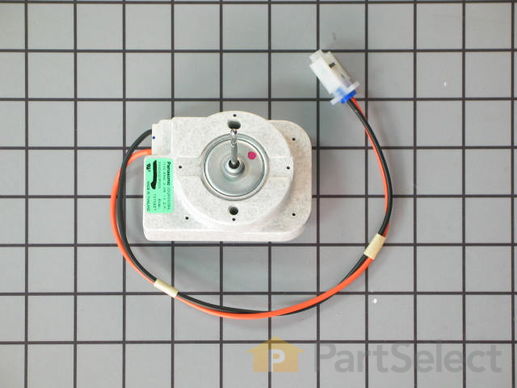
Also known as AC/DC Fan Motor. This evaporator fan motor is located in the back of the freezer, and circulates air over the refrigerator coils. These coils will convert the heat into cool air, which is then circulated.

$ 141.09
  In Stock
PartSelect Number PS1766252
Manufacturer Part Number WR60X10257

Customer Repair Stories

fridge was cool not cold, ice cream in freezer wasn't hard

removed ice maker, back panel and two additional plastic trim pices to get to fan. Single molex connection for the wires. I got the part the next day. Wasn't expecting part for three to five days. Very impressed!
  • adam from folsom, CA
  • Difficulty Level:
    Easy
  • Total Repair Time:
    15 - 30 mins
  • Tools:
    Nutdriver, Screw drivers
6 of 8 people found this instruction helpful.
Was this instruction helpful to you?
Thank you for voting!

Fridge not cold enough/Freezer Sweating

I opened freezer and removed Ice maker. Then removed top fan hood and finally the freezer back panel. Unplug fridge.Removed fan bracket and swapped gromet and fand blade to new motor. Put back in fan bracket and reassembled.Note: Tried without putting back together to see if the fan worked and it won't. Must plug all connections in including ice maker for fan to function. Fixed problem and fridge is better than it ever was. Part Select was excellent,Fast shipping! Thanks
  • Alfonso from Dingmans Ferry, PA
  • Difficulty Level:
    Easy
  • Total Repair Time:
    15 - 30 mins
  • Tools:
    Nutdriver
6 of 7 people found this instruction helpful.
Was this instruction helpful to you?
Thank you for voting!
Fixes Symptom 3% of time
★★★★★
★★★★★
5 Reviews

Rated by 5 customers 


Easy 

30 - 60 mins 

Ratings submitted by customers like you who bought this part.   

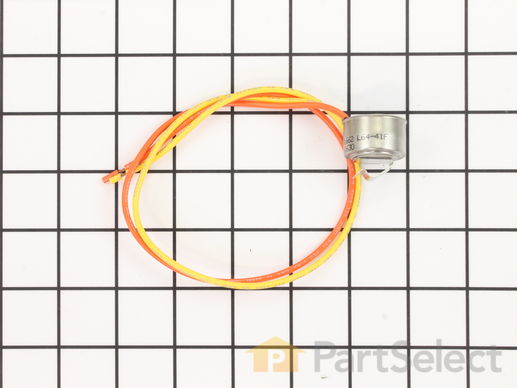
this part acts as a safety device against over-heating in case of mechanical failure.

$ 25.99
  In Stock
PartSelect Number PS1155320
Manufacturer Part Number WR50X10071

Customer Repair Stories

fridge stoped cooling

unplug fridge! removed ice maker. removed the back panel in frezer. I uncliped thermostat; cut wires on thermostat and installed new thermostat.
  • stephen from vernon, AL
  • Difficulty Level:
    Easy
  • Total Repair Time:
    30 - 60 mins
  • Tools:
    Nutdriver, Screw drivers
Was this instruction helpful to you?
Thank you for voting!

Freezer is too hot

Open the freezer panel which attached with screwws and locate the defrost thermmostate behind the back pannel. Cut off the old thermostat wires and connect the new wires.
  • David from New York, NY
  • Difficulty Level:
    Really Easy
  • Total Repair Time:
    15 - 30 mins
  • Tools:
    Screw drivers
4 of 8 people found this instruction helpful.
Was this instruction helpful to you?
Thank you for voting!
Fixes Symptom 3% of time
★★★★★
★★★★★
3 Reviews

Rated by 9 customers 


Easy 

1- 2 hours 

Ratings submitted by customers like you who bought this part.   

Also known as Heater Conduction.

$ 75.77
  In Stock
PartSelect Number PS303768
Manufacturer Part Number WR51X10038

Replacing your General Electric Refrigerator Defrost Heater

Replacing your Defrost Heater

Customer Repair Stories

Freezer stopped working

I noticed that if I unplugged the refrigerator and plugged it back in a while later it would start working but eventually would stop. I deduced the problem was likely the defrost thermostat. I ordered the thermostat but it was in a difficult place behind the evaporator coil which I could not remove. While I was trying to work it into position my hand pressed against the defrost coil and shattered the glass sheath. I ordered the coil and finally managed to get it and the thermostat installed. The refrigerator seems to work fine now.
  • Clifford from Melbourne, FL
  • Difficulty Level:
    A Bit Difficult
  • Total Repair Time:
    More than 2 hours
  • Tools:
    Nutdriver, Pliers, Screw drivers
9 of 13 people found this instruction helpful.
Was this instruction helpful to you?
Thank you for voting!
Fixes Symptom 3% of time
★★★★★
★★★★★
21 Reviews

Rated by 29 customers 


Easy 

30 - 60 mins 

Ratings submitted by customers like you who bought this part.   

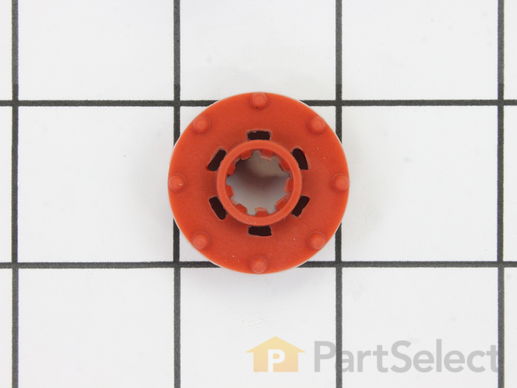
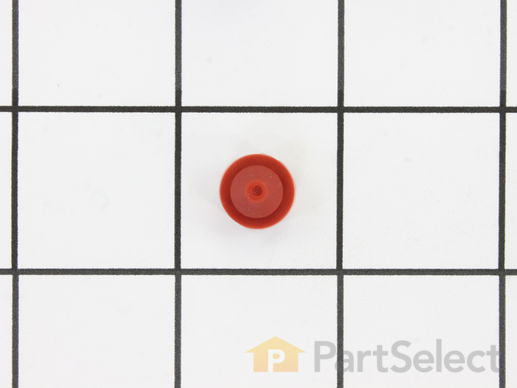
If you notice that your refrigerator or freezer is noisy or too warm, you may need to replace the evaporator fan grommet. This part is red in color, and is about 1 inch in diameter. The evaporator fan grommet is located behind the evaporator fan cover in the back of the freezer. You will need to remove the evaporator fan cover to access the evaporator fan and complete this repair. Before you begin this repair, ensure the power to the refrigerator is disconnected. You will need a pair of needle nose pliers, a small flat blade screw driver and both a 1/4 and 5/16-inch nut driver to complete this repair.

$ 13.21
  In Stock
PartSelect Number PS963756
Manufacturer Part Number WR02X12008

Replacing your General Electric Refrigerator Evaporator Fan Grommet - Red

Replacing your Evaporator Fan Grommet - Red

Customer Repair Stories

Fan making noise.

Remove ice maker and all of it's accessories in order to remove the panel covering the fan. Don't drop the screws!
Unscrew the lower fan bracket. You will see the lower red rubber grommet. Hold fan motor with one hand and push the fan off the shaft and into the compartment above. Then remove the round retainer thing below it by holding it and pulling down on the motor assembly. Install new grommet on upper part. and put it all together.
REMEMBER where the fan is on the shaft. It has about one inch of shaft placement. I put mine so that most of it was above the hole that the fan goes into and about 20 percent showing below the sheet metal.
Also check to see if your fan is damaged. Mine was not.
This refrigerator has been awesome! I have had many issues but have been able to fix all of them for the last 15 years!
  • Matthew from Escondido, CA
  • Difficulty Level:
    Really Easy
  • Total Repair Time:
    30 - 60 mins
  • Tools:
    Screw drivers
1 person found this instruction helpful.
Was this instruction helpful to you?
Thank you for voting!

Fan was not centered in the middle of the back panel opening.

Bent the motor bracket down, then using a rat tail file, elongated the holes in the back panel of the refrigerator to secure the fan in the "centered" position. This was a problem that was with the refrig. since it was made. The parts involved were perfect. NO problem at all installing them.
  • James from GREENSBORO, NC
  • Difficulty Level:
    Easy
  • Total Repair Time:
    30 - 60 mins
  • Tools:
    Screw drivers, Socket set
1 person found this instruction helpful.
Was this instruction helpful to you?
Thank you for voting!
Fixes Symptom 2% of time
★★★★★
★★★★★
3 Reviews

Rated by 3 customers 


Really Easy 

15 - 30 mins 

Ratings submitted by customers like you who bought this part.   

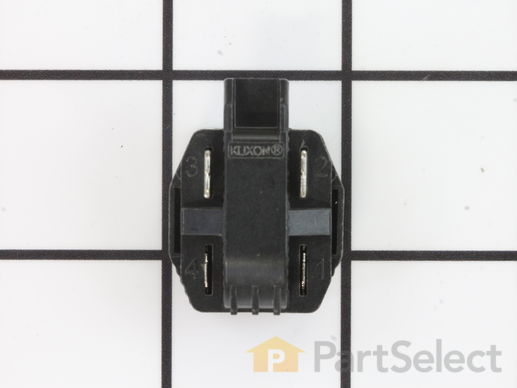
This part is the replacement compressor start relay for your refrigerator. It is made of black plastic and is approximately 1 ¼ inches long and 1 inch wide. The compressor start relay attaches to the compressor and helps to start the compressor motor. If the compressor will not start, or if your refrigerator or freezer is too warm, you may need to replace the compressor start relay. This part is sold individually. It is an OEM part sourced directly from the manufacturer.

$ 16.90
  In Stock
PartSelect Number PS11766700
Manufacturer Part Number WR07X26748

Customer Repair Stories

Does not start , trips breaker

I pried the relay from compressor with small screwdriver, cut and replaced burnt wire going to relay,pushed new relay on compressor and wires unfortunately it did not fix the problem.
  • Paul from RNCHO CORDOVA, CA
  • Difficulty Level:
    Really Easy
  • Total Repair Time:
    30 - 60 mins
  • Tools:
    Nutdriver, Screw drivers
3 of 3 people found this instruction helpful.
Was this instruction helpful to you?
Thank you for voting!

Freezer & Frig Were Not Cold

First I removed the rear cover, located at the bottom of the refrigerator. Then I cleaned out the dirt & dust on and around the compressor. The relay has a cover, that is secured with a spring loaded clip. To release the clip, push in with your fingers, while disengaging the end clip with a screwdriver. Once one side is off the other lifts off. Remove cove exposing the relay. There is one wire terminated, with a spade clip, remove it. With a strait blade screwdriver, pry the relay off the 2 post it slides on to. (Don't be surprised if it breaks into pieces, as they are sometimes brittle. ) Slide the new relay onto the 2 posts, replace the wire onto the right terminal, and replace the relay cover & clip. Replace the rear cover. Plug in and test.
  • Sam from Cooper City, AL
  • Difficulty Level:
    Really Easy
  • Total Repair Time:
    15 - 30 mins
  • Tools:
    Nutdriver, Screw drivers
74 of 101 people found this instruction helpful.
Was this instruction helpful to you?
Thank you for voting!
Fixes Symptom 2% of time
★★★★★
★★★★★
11 Reviews

Rated by 16 customers 


Easy 

30 - 60 mins 

Ratings submitted by customers like you who bought this part.   

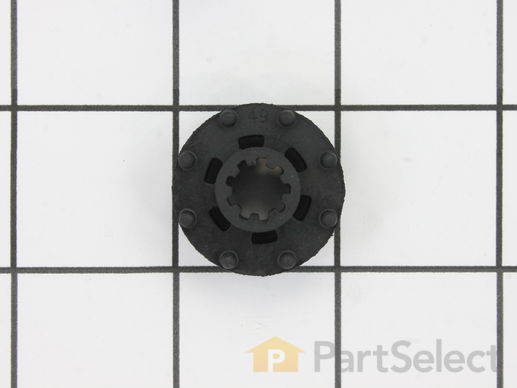
This evaporator fan motor grommet, or condenser fan grommet is built for refrigerators. It provides a cushion between the fan motor and the motor mounting bracket. It is made or round, black plastic and is approximately one inch in diameter. If your grommet is torn or damaged and you are getting noise from the fan motor, you may need to replace it. This is an OEM part sourced directly from the manufacturer.

$ 11.59
  In Stock
PartSelect Number PS284555
Manufacturer Part Number WR02X10098

Replacing your General Electric Refrigerator Evaporator/Condensor Fan Grommet

Replacing your Evaporator/Condensor Fan Grommet

Customer Repair Stories

Had a 'ticking' sound

Separately (from a different site) purchased new compressor fan and motor. I purchased the grommets here because the other site listed the grommets as temporarily out of stock. I did watch one of the videos on PartSelect about the grommet replacement. Repair was pretty simple, biggest challenge was getting to the screw on the far side of the motor. Removed the two screws holding the fan motor into place. Removed motor and blade. Reinstalled with new fan blade, new grommet and new motor.
  • John from PARKVILLE, MO
  • Difficulty Level:
    Easy
  • Total Repair Time:
    30 - 60 mins
  • Tools:
    Socket set
1 person found this instruction helpful.
Was this instruction helpful to you?
Thank you for voting!

Noisy

I didn’t do the repair because I ordered two grommets. When they arrived, one of the packages was empty! Instead of just sending me another one, they refunded the part so I still need one. By the way, I was not refunded half the shipping either which was more than the part itself.
  • Brad from SPRING MILLS, PA
  • Difficulty Level:
    Very Difficult
  • Total Repair Time:
    More than 2 hours
1 person found this instruction helpful.
Was this instruction helpful to you?
Thank you for voting!
Fixes Symptom 2% of time
★★★★★
★★★★★
2 Reviews

Rated by 26 customers 


Easy 

30 - 60 mins 

Ratings submitted by customers like you who bought this part.   

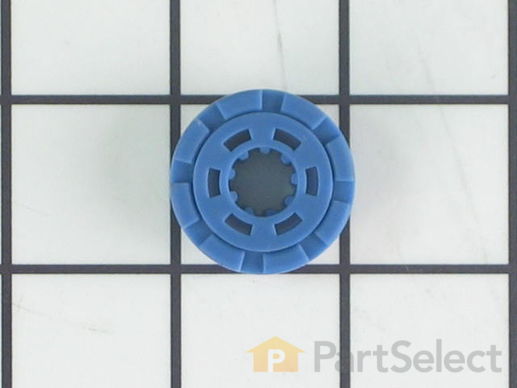
This compression ring is meant to hold the evaporator fan motor in place in the freezer compartment of your refrigerator. This is is a genuine OEM part. The tools needed to complete this repair are a Phillips screw driver and small flat blade screw driver. Be sure to turn off your refrigerator before removing the evaporator fan cover so the fan does not turn on during repair. It is recommended to check the grommets, evaporator fan, and fan blades during repair in case they also need replacning. The compression ring may need replacing if the fan is noisy, or the refrigerator compartments are too warm. This part is sold individually.

$ 9.88
  In Stock
PartSelect Number PS1015726
Manufacturer Part Number WR02X12149

Replacing your General Electric Refrigerator Compression Ring

Replacing your Compression Ring
Fixes Symptom 1% of time

Rated by 9 customers 


Really Easy 

15 - 30 mins 

Ratings submitted by customers like you who bought this part.   

$ 19.69
  In Stock
PartSelect Number PS1020949
Manufacturer Part Number WR60X10205

Customer Repair Stories

The original fan had its blades sheared by ice build-up

The original design is poor. The evaporator fan is mounted in an upright position just below the ice-maker. A plastic grate mounts over the fan assembly to allow for air circulation. Unfortunately, random chips of ice from the ice maker can fall into the fan, causing the fan to shear its blades. Replacement of the fan blade is relatively simple (accept for having to completely unload the freezer and remove all back covers, the ice-maker auger motor assembly, and the metal evaporator cover). In order to mimimze this from reoccuring, I installed a 1/4'' mesh metal screen over the exhaust ports on the cover. Thus far, this has worked well to keep ice chips out of the evaporator fan.
  • Jeffrey from Broomfield, CO
  • Difficulty Level:
    Easy
  • Total Repair Time:
    30 - 60 mins
  • Tools:
    Nutdriver, Screw drivers, Wrench set
3 of 3 people found this instruction helpful.
Was this instruction helpful to you?
Thank you for voting!
Fixes Symptom 1% of time
★★★★★
★★★★★
2 Reviews

Rated by 14 customers 


Easy 

30 - 60 mins 

Ratings submitted by customers like you who bought this part.   

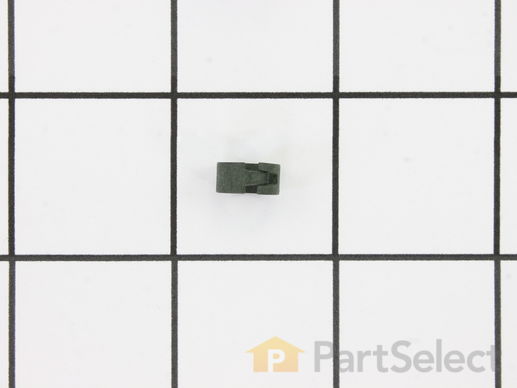
The lid bumper or evaporator fan motor bumper in your refrigerator prevents the fan motor from scraping against the side bracket. If your refrigerator/freezer is noisy, the bumper could be worn down or missing, and the sound could be a result of the motor scraping the side bracket. You will find it between the fan motor and the side bracket on the evaporator fan motor assembly. To access the bumper, you will need to remove the evaporator fan motor assembly from the freezer. This part is made of orange rubber and is less than half an inch in diameter. It has a rounded top and a slightly pointed bottom, and is sold individually.

$ 10.97
  In Stock
PartSelect Number PS284979
Manufacturer Part Number WR02X10540

Replacing your General Electric Refrigerator Lid Bumper

Replacing your Lid Bumper

Customer Repair Stories

noisy refrigerator

I followed your video and completely dismantled the refrigerator evaporator motor, fan, brackets, and grommet, I completely cleaned the refrigerator including the cooling coils. I then ordered the evaporator motor ,fan, grommets, lid bumper, and brackets. The order would take a week to arrive. In the meantime I cleaned and reassembled all the old parts, waiting for the new ones to come. Guess what! The refrigerator was quiet as a mouse. I really did not need the new parts, but I kept them anyway just for good luck. Not bad for a refrigerator that's twenty four years old.
  • James from NEW YORK, NY
  • Difficulty Level:
    Easy
  • Total Repair Time:
    1- 2 hours
  • Tools:
    Nutdriver, Pliers, Screw drivers, Socket set
1 person found this instruction helpful.
Was this instruction helpful to you?
Thank you for voting!

Defroster fan burned up

First I removed the ice tray rack lifting it out of the way to reach the back cover of the fan. Then, the whole back inside panel had to be removed. Two screws removed the fan and bracket from the freezer unit. The missing bumper lid just snapped into place. Replaced everything in reverse order. Pretty easy job.
  • Peter M. from Lincoln Park, NJ
  • Difficulty Level:
    Easy
  • Total Repair Time:
    30 - 60 mins
  • Tools:
    Nutdriver, Pliers, Screw drivers, Socket set
3 of 6 people found this instruction helpful.
Was this instruction helpful to you?
Thank you for voting!
Fixes Symptom 1% of time
★★★★★
★★★★★
2 Reviews

Rated by 9 customers 


Easy 

30 - 60 mins 

Ratings submitted by customers like you who bought this part.   

This is a replacement evaporator fan grommet for your refrigerator. The fan grommet absorbs the vibration from the evaporator fan motor for quiet operation while it runs. If your evaporator fan is unusually noisy, it could be because the grommet is damaged. This grommet is made of grey plastic and is approximately one inch in diameter. To access the fan grommet and complete this repair, you will need to remove the evaporator fan motor assembly. This part is sold individually.

$ 8.06
  In Stock
PartSelect Number PS773826
Manufacturer Part Number WR02X11331

Customer Repair Stories

Loud Squeal when fan was running

WE (WIFE) took out the old parts an replaced with new one ..Be careful to get the placement of the Grommet or they "POP" out on you. fast ship on the parts too.
  • Daniel from BURNEY, CA
  • Difficulty Level:
    Easy
  • Total Repair Time:
    30 - 60 mins
  • Tools:
    Nutdriver, Socket set
1 person found this instruction helpful.
Was this instruction helpful to you?
Thank you for voting!

Squeky Evaporator Fan

I made my wife fix it.
  • Douglas from LAFAYETTE, LA
  • Difficulty Level:
    Really Easy
  • Total Repair Time:
    30 - 60 mins
  • Tools:
    Screw drivers
2 of 2 people found this instruction helpful.
Was this instruction helpful to you?
Thank you for voting!
Fixes Symptom less than 1% of time
★★★★★
★★★★★
2 Reviews

Rated by 9 customers 


Easy 

30 - 60 mins 

Ratings submitted by customers like you who bought this part.   

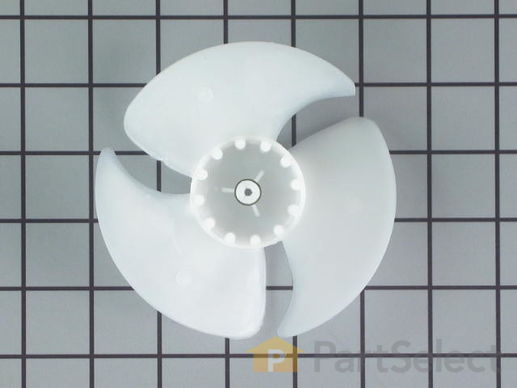
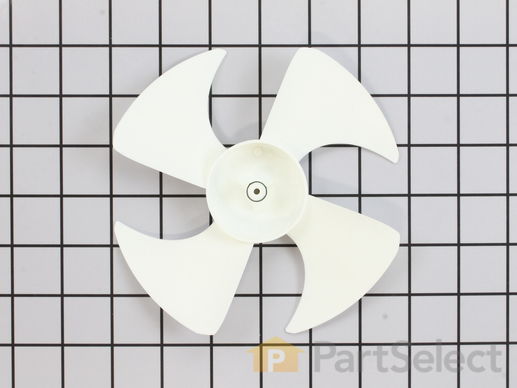
The condenser fan blade assembly helps to regulate the temperature in your refrigerator or freezer. This fan assembly has 4 blades, but other fans may have 3 blades, so be sure to check the number of blades on your fan. The fan blade is made of white plastic and is approximately 6 inches in diameter. If your freezer section is too warm, or you notice a strange noise coming from your refrigerator when it is running, you may need to replace the condenser fan blade assembly. This part is sold individually.

$ 17.89
  In Stock
PartSelect Number PS1022410
Manufacturer Part Number WR60X10207

Replacing your General Electric Refrigerator Condenser Fans Blade Assembly

Replacing your Condenser Fans Blade Assembly

Customer Repair Stories

Noise in the back of freezer

I must thank yo for sending the fan so fast. If I ever have to deal with any appliance again, you are first on my list.
  • MaryLou from Levittown, NY
  • Difficulty Level:
    A Bit Difficult
  • Total Repair Time:
    Less than 15 mins
3 of 5 people found this instruction helpful.
Was this instruction helpful to you?
Thank you for voting!