This ceramic terminal block kit includes one ceramic block and terminal assembly with mounting bracket. Terminal blocks generally provide an easy solution for connecting individual wires.
This part is the replacement light socket for your oven. The oven light socket provides power to the light, and at the same time holds the light bulb in place.
This light bulb lens covers the interior light bulb in an oven, range, or stove. No tools are necessary to replace this part. Simply slide off the wire bracket to remove the existing light bulb lens. ...
This large broiler pan is found in the bottom of your oven and is used to catch drippings from broiling foods. This part includes the grate and bottom pan and is made of porcelain. The grate measures ...
These are replacement screws designed to fit your range. They are made of metal and are approximately ¼ inch long. They come in a package of 12. These are OEM parts sourced directly from the manufacturer.
This door gasket or seal is used in ranges and ovens. The rubber gasket creates a protective seal between the oven door and the opening of the oven. The function of this seal is to trap heat and preve...
$183.95
In Stock
Questions And Answers for RS776G*01
Be the first to ask our experts a question about this model!
✖
Ask a Question
Ask our experts a question on this model and we'll respond as soon as we can.
First I removed the two screws that hold the element in place. I then pulled the element out about 3 inches and disconnected the two wires, reconnected the wires to the new element, reattached it to the oven and voila!
It worked. What was really cool, once I ordered the part, I received it in only two work days!
Old gasket had become brittle. Was able to find the 22 yr old model and part on PartSelect (could not track it down on GE's site. Inner panel was removed with four screws. Old gasket came out. Installed new gasket making sure the bead fit into the groove provided in the door panel. Re-assembled. All is well. Thanks
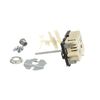
1. Removed the back panel. 2. Disconnected the wires from the old switch while connecting wires to the new switch one at a time. 3. Installed the new switch and broke off the excess metal on the post which fits into the burner knob on front of the range. 4. Replaced the burner knob and replaced the back panel.