


Models
>
MC8991XT0
MC8991XT0 Whirlpool Microwave - Overview
Sections of the MC8991XT0
[Viewing 6 of 6]


Manuals & Care Guides for MC8991XT0
Click to downloadKeep searches simple, eg. "belt" or "pump".

Light Bulb - 120V 25W
PartSelect #: PS11747806
Manufacturer #: WPA3073101
This light bulb is a 120 volt, 25 watt incandescent appliance light bulb with a small base screw-in that fits in a variety of appliances such as microwaves, refrigerators, freezers, cooktops, or stove...
$17.11
In Stock

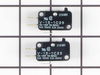
Door Interlock Switch Kit
PartSelect #: PS373050
Manufacturer #: 4392027
This part is a genuine manufacturer door interlock switch kit, also known as primary micro switch or microwave switch kit, for a microwave. The function of this part is to sense when the door of the m...
$85.78
In Stock

Thermal Fuse
PartSelect #: PS11740879
Manufacturer #: WP3188286
When the fuse trips due to a malfunction in the oven this part will trip and shut down your oven controller. It is usually located behind your control panel.
$44.48
In Stock


Magnetron
PartSelect #: PS11742509
Manufacturer #: WP4392009
This part is used to generate microwave energy/heat.
No Longer Available
 (Cord – Part Number: WP261869")
PAINT, TOUCH-UP (1/2oz.) (Cord
PartSelect #: PS11740572
Manufacturer #: WP261869
$12.89
Special Order

 – Part Number: WP482338")

Questions And Answers for MC8991XT0
We're sorry, but our Q&A experts are temporarily unavailable.
Please check back later if you still haven't found the answer you need.
Common Symptoms of the MC8991XT0
[Viewing 3 of 3]Won’t turn on
Fixed by
these parts
these parts
Show All
Element will not heat
Fixed by
these parts
these parts

Show All
Doesn’t shut off
Fixed by
these parts
these parts
Show All

Keep searches simple. Use keywords, e.g. "leaking", "pump", "broken" or "fit".
Microwave worked intermittently depending on how door was closed
Remove top grille (2 screws), undo control panel (1 screw). Tilt down control panel, switches are on the left. There are actually three switches that are involved with the door, two horizontally mounted, one vertically mounted. This would be an EASY REPAIR, but it took me a while to figure out which of the three switches was bad, and a
... Read more
lso took a while to figure out that there is a plastic rod that inserts through the hole in the switch body. Once i figured this out went like a breeze. Lower horizontal switch was the bad one, but since the kit came with two switches i went ahead and replaced the upper horizontal one as well. IT appears that the horizontal switches are probably more likely to fail than the vertical switch based on the position of the switch and force angles. Works great now!
Read less
Parts Used:
-
Robert from Bainbridge Island, WA
-
Difficulty Level:A Bit Difficult
-
Total Repair Time:30 - 60 mins
-
Tools:Pliers, Screw drivers
67 of 82 people
found this instruction helpful.
Was this instruction helpful to you?
Thank you for voting!
Close the door on the microwave, punch in the # nothing happened
I removed the unit from the wall. Took the cover off. Set the unit on its side. It revealed the working parts. Removed the old micro switches. Put in the new oness. Presto, it worked. Very easy for me.
The parts was delivered almost before my notice they were shipped.
The parts was delivered almost before my notice they were shipped.
Parts Used:
-
Robert S. from Stafford, TX
-
Difficulty Level:Really Easy
-
Total Repair Time:15 - 30 mins
-
Tools:Screw drivers
15 of 22 people
found this instruction helpful.
Was this instruction helpful to you?
Thank you for voting!
burnt out bulb
took cover off, installed bulb.
lost the owners manual,
part select's schematics were very helpful
thanks
lost the owners manual,
part select's schematics were very helpful
thanks
Parts Used:
-
THOMAS from STOW, OH
-
Difficulty Level:Really Easy
-
Total Repair Time:Less than 15 mins
27 of 61 people
found this instruction helpful.
Was this instruction helpful to you?
Thank you for voting!