


How to Fix a Torn Refrigerator Door Seal
The refrigerator door seal is a flexible strip of rubber that sits along the edge of the fridge door. It is an airtight seal that prevents cold air from escaping the refrigerator and keeps warm air from entering. If the door seal becomes torn, loose, or dirty, your refrigerator will be unable to cool properly, and your food may eventually become spoiled. The refrigerator will also consume more energy as it has to work harder to maintain the correct temperatures, leading to premature wear and increased energy bills. Finally, if your door seal is faulty, you will also likely notice increased condensation on the interior walls of the refrigerator as well as on your food. Therefore, it is important to fix any tears promptly, perform regular cleaning, or replace the door seal if it is no longer in good working condition.
How to Check for Door Seal Failure
Visual Inspection
- Close the refrigerator door and carefully examine the seal around the entire perimeter of the door.
- Look for any visible gaps or areas where the seal is not making full contact with the refrigerator cabinet.
- Check for signs of damage such as tears, cracks, or deformities in the seal.
Dollar Bill Test
- Open the refrigerator door and place a dollar bill (or any thin piece of paper) between the door seal and the refrigerator cabinet.
- Close the door on the dollar bill, ensuring that it is held firmly in place by the seal.
- Try to pull the dollar bill out from between the seal and the refrigerator cabinet. If you can easily remove the dollar bill without much resistance, it indicates that there is an air gap or leak in the seal.
How to Clean a Refrigerator Door Seal
Food particles, debris, and dirt can accumulate on the surface of the door seal over time. As these contaminants build up, they can cause the seal to become stiff and less flexible. A less flexible seal may not be able to fit properly along the refrigerator door, resulting in gaps or air leaks when the door is closed. Build-up on the door seal may also lead to increased wear and tear. Therefore, if you are having difficulties with your door seal, it is recommended to begin by thoroughly cleaning the seal.
- Mix a solution of mild detergent or cleaner with warm water in a bucket. Avoid using harsh chemicals as they may damage the seal.
- Dip a soft sponge or cloth into the cleaning solution and gently wipe the entire surface of the door seal until all stains and build-up are removed.
- After cleaning, rinse the door seal thoroughly with clean water to remove any remaining detergent or cleaner residue.
- Use a clean, dry cloth to wipe the door seal. Ensure that the seal is completely dry as any remaining moisture can lead to the growth of mold.
- Close the refrigerator door and test the seal to ensure that it closes properly and creates an airtight seal.
How to Repair a Torn Refrigerator Door Seal
If your door seal has tears or cracks, you can repair these using silicone glue. It is a professional colorless sealant and it is a popular choice for door seals. You can also utilize PVC glue which is a transparent sealant with a shorter drying time than other glues. It is important to note that using sealants to fix tears in your door seal is a temporary measure and it is best to replace the door seal as a more permanent solution.
- Clean the torn area of the fridge door seal and ensure the cleaned area is completely dry before beginning.
- Cut a piece of wax paper that is slightly larger than the torn area of the seal.
- Squeeze a small amount of silicone glue onto the torn area of the seal and spread it evenly over the tear.
- Carefully place the wax paper over the silicone glue and press it gently into place.
- Use your fingers to smooth out any air bubbles or wrinkles in the wax paper and ensure that it is lying flat over the sealant.
- Let the silicone sealant cure according to the manufacturer's instructions. This typically takes several hours.
- Once the silicone sealant is fully cured, carefully peel away the wax paper from the repaired area.
- Check the repaired area to ensure that the silicone sealant has formed a strong bond and sealed the tear effectively.
- Close the refrigerator door and check that the repaired seal creates an airtight seal.
How to Replace a Torn Refrigerator Door Seal
- Before beginning the repair, first prepare your new door seal for installation by soaking it in warm water for a few hours or using a hair dryer to soften it. This will make it more pliable and easier to install.
- Start at one corner and gently pull the old door seal away from the refrigerator door. You may need to use a putty knife to help pry the seal off.
- Use a mild detergent and warm water to clean the area where the old seal was attached to ensure a clean surface for attaching the new seal.
- Starting at one corner again, press the new door seal into place along the edge of the refrigerator door.
- Work your way around the entire perimeter, pressing the seal firmly against the door to ensure a tight fit. Make sure the seal is properly aligned and fully seated in the groove around the door.
- Close the refrigerator door and check for any gaps or areas where the seal is not making proper contact with the refrigerator cabinet. Adjust the seal as needed.
- After installing the new door seal, allow it to settle into place and conform to the shape of the refrigerator door. This may take a few hours.
- Once the new seal has settled, check that the refrigerator door closes properly and creates an airtight seal.
By following the steps outlined in this article, you can quickly and effectively repair your refrigerator door seal. From cleaning and inspecting the seal for damage to using temporary repair methods like silicone sealant and wax paper, there are several ways to deal with common issues with fridge door seals. However, it's important to note that while these repairs can be helpful, replacing a damaged seal with a new one is often the best long-term solution for your refrigerator.


Do you have a refrigerator shelf that's hanging on by a slim piece of plast...
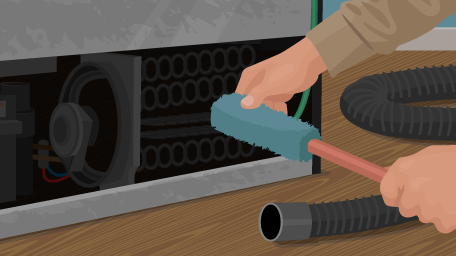
Your refrigerator condenser coils need to be cleaned at least once a year d...

Whether your holiday party this year is big or small, a well-organized refr...