


How To Fix A Refrigerator Light That's Not Working

Click a Part Below to Start Your Repair:
Light Bulb Or Lamp Light Sockets Door Light Switch Light Bulb & Ice DispenserAbout this repair:
- Rated as REALLY EASY
- 582 repair stories
- 23 step by step videos
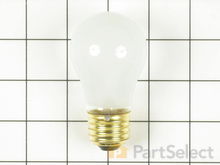
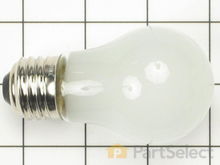
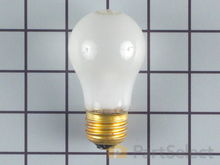
Light Bulb Or Lamp
Most light bulbs or lamps can be checked visually for a broken filament or can be checked with a multi-meter for continuity. You can also simply replace the bulb with a new one.
How to test a refrigerator lightbulb with a multi-meter.
- Remove the bulb from the refrigerator.
- Set your multi-meter to the Rx1 setting.
- Place one probe on the bottom of the lightbulb, and place the other on the threading of the bulb.
- If you receive a reading of infinity, you need a replacement lightbulb.
Light Sockets
If you have verified that the light bulb or lamp is not defective, then you should next inspect the socket.
How to inspect the light sockets of a refrigerator:
- Unplug your refrigerator before close inspection of the socket as this is a live voltage circuit.
- Inspect the socket for discolored terminals or heat damaged sockets that may prevent good connectivity to the light bulb or lamp.
- If you find either of the above, you need a replacement light socket.


Door Light Switch
The interior light of your refrigerator is controlled by a switch that is activated when the door is opened and closed. If this switch malfunctions the light might not turn on consistently, if at all.
How to test a refrigerator door light switch with a multi-meter:
- Unplug your refrigerator and locate your door light switch. The location of the switch varies depending on the model of your refrigerator, but it is usually located somewhere near the top of the door opening. The switch is often mounted into the interior plastic liner and care should be taken when removing it to prevent damage to the liner.
- Remove the switch in order to test it.
- Set your multi-meter to the Rx1 setting to test the switch for continuity and place the probes on the switch’s terminals. The multi-meter reading should change from infinity to a reading of zero. Keep the leads touching the terminals and press in on the switch. The reading should change back to infinity.
- If the results you receive are not consistent with these results, you need a replacement door switch.


Light Bulb & Ice Dispenser
If your model has an ice and water dispenser with a light bulb you should first verify that the bulb is good. These lights are normally low wattage and are not designed to be used as night lights. Extended periods of usage will typically cause premature failure of the bulb or damage to the socket. Most models will have an on/off switch on the control panel and that may be defective. You can check the switch for continuity with a multi-meter. The lamp or bulb socket may also be defective and the control plate will need to be removed for inspection.
How to test a refrigerator ice dispenser light on/off switch:
- Disconnect your refrigerator from the power source before beginning.
- Locate and remove your control panel cover to access the on/off switch.
- Remove the on/off switch from the appliance in order to test it.
- Set your multi-meter to the Rx1 setting and place the probes on the switch’s terminals. You should receive a reading of zero. With the probes still on the terminals press in on the switch, the reading should change to infinity.
- If your tests produce results different from those above, you will need a replacement dispenser door switch.


More Repair Parts
Still not sure which part is broken? We can offer you custom troubleshooting help if you search with your model number.