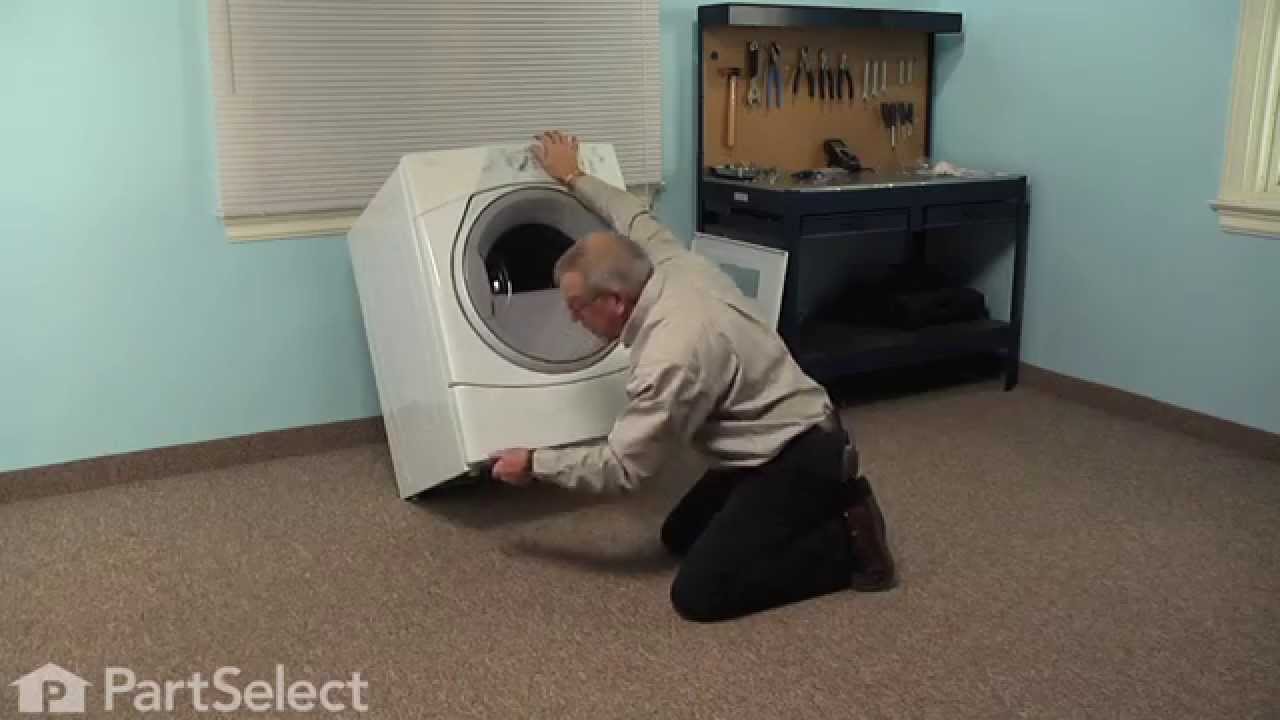
This Idler Pulley includes the tri-ring and gasket and everything included here is manufacturer-certified. This part maintains correct tension on the drive belt in order to spin the drum properly. If damaged or broken the dryer will not dry properly, will not tumble properly, or may not even start. Installation is rated as "Medium" difficulty. This part is located on the dryer drum, around the tension pulley. Refer to your user manual and model number for repair instructions and to ensure this part is right for you. For this repair project, the tools needed are a Phillips screwdriver, 1/4 inch nut driver, putty knife, small flat blade screw driver, and needle nose pliers.
Keep searches simple. Use keywords, e.g. "leaking", "pump", "broken" or "fit".
Sorry, we couldn't find any existing reviews that matched. Try using some different or simpler keywords.
★★★★★
★★★★★
Joan M - March 28, 2024
Verified Purchase
Stopped the loud squeel
Part came within a few days from.my order
★★★★★
★★★★★
Joe P - March 16, 2024
Verified Purchase
The part was just I needed
The pulley was sqealing, so ordered a new one an fixed the problem.
★★★★★
★★★★★
Rebecca W - November 9, 2023
Verified Purchase
Perfect Fit
Went right back in works well.
★★★★★
★★★★★
Herbert K - August 23, 2023
Verified Purchase
Performing as engineered
Part is performing as engineered. Do NOT put WD40, car grease, or any fossil fuel based lubricant on it. The heat and time will cause the lubricant to dry out and bake in its place, freezing up the parts and causing belt damage too. Try a synthetic type lubricant and then take your dryer apart and check it periodically for seizure.
★★★★★
★★★★★
Randall E - June 22, 2023
Verified Purchase
Works great
Should only offer pulley with tension arm
Same price but I saw it after I already ordered pulley. Either way it works great
★★★★★
★★★★★
Carol S - May 31, 2023
Verified Purchase
Perfect!
Was a little scared but solved the problem and didn’t have to buy a new dryer!
★★★★★
★★★★★
Mike D - May 17, 2023
Verified Purchase
Perfect fit easy fix
Made my drier work again. Easy fix perfect fit.
★★★★★
★★★★★
Joel B - May 10, 2023
Verified Purchase
Easy repair
The part came on time, it was easy to install. Much cheaper than a new dryer.
★★★★★
★★★★★
Ryan C - March 8, 2023
Verified Purchase
Easy repair
Part fit properly and was priced well.
★★★★★
★★★★★
Leanna L - March 3, 2023
Verified Purchase
Easy repair
Ended up having to buy more parts than initially thought after getting things apart, but they all arrived quickly and were easily replaced and I've never heard my dryer so quiet!
< Prev
1
2
3
Next >
Customer Repair Stories
Average Repair Rating: 3.7 / 5.0, 29 reviews.
What's this?
Sort by:
< Prev
1
2
3
Next >
Search filter:
Clear Filter
Your search term must have 3 or more characters.
Keep searches simple. Use keywords, e.g. "leaking", "pump", "broken" or "fit".
Sorry, we couldn't find any existing installation instruction that matched.
Dryer drum would not turn
Ordered $245 worth of parts for four possible fixes. None of the four fixes worked. Used an appliance repair person to do more troubleshooting. Fourteen days later and after spending an additional $380 ($625 total), a new control panel was installed. That solved the problem.
Took the front part of the dryer out, released tension on the idler pulley, took the drum out, and remove the old drum seal. Make sure you remove the old adhesive with sandpaper or wire brush. Put the new adhesive on the seal, not on the drum. Adhesive is very runny. Seal may need to be stretched to fit the drum. Set the seal on the drum
... Read more, let sit a few minutes. Put everything back together.
I disassembled the dryer, replaced the pulley (which was noisy), and the belt.reassembled, only to find out that the drum would not turn freely. checked all my procedures and kept having the same problem. Finally after 3 frustrating hours, I took the back off and noticed that idler arm was tight against the motor shaft, because the too s
... Read morehort belt didn't allow for the clearance needed. Had too take everything apart ,another hour, went and found one at our local repair shop, reinstalled everything , after another two hours runs fine. would appreciate a refund. And please check your part numbers in the future. Would hate to have someone else go through what i experienced.
Dryer starts with loud squeak initially. Eventually there was a loud clank and dryer stopped.
Rather than remove the front panels, door, control panel and drum, I noticed 1/4" metal screws on the back panel. There were approximately 6 holding the back panel in place. I did have to remove the top panel as well before removing the back. Once removed I had complete access to the broken idler pulley assembly. I immediately saw the b
... Read moreroken pulley. I installed the new one with very little effort. Reset the belt according to instructions from the video. Reassembled, plugged in, hit start and enjoyed the sweet sounds of success. All told it took me about 20 minutes from start to finish.
Took back panel off, and it was really easy putting the new idler pulley in.
Edwin from PASADENA, TX
Difficulty Level:
Really Easy
Total Repair Time:
30 - 60 mins
Tools:
Nutdriver, Screw drivers
1 personfound this instruction helpful.
Was this instruction helpful to you?
Thank you for voting!
Idler pulley was frozen on the shaft.
Removed the top, front cover, drum and belt. Removed the idler pulley bracket and pressed the frozen pulley from the shaft. Cleaned the shaft and applied a small dab of anti seize and replaced the pulley. Installed all parts in reverse order. Dryer works like new again.
Ask our experts a question about this part and we'll get back to you as soon as possible!
25 questions answered by our experts.
Sort by:
< Prev
1
2
3
Next >
Search filter:
Clear Filter
Your search term must have 3 or more characters.
Keep searches simple. Use keywords, e.g. "leaking", "pump", "broken" or "fit".
Sorry, we couldn't find any existing answers that matched.Try using some different or simpler keywords, or submit your new question by using the "Ask a Question" button above!
Wes
July 20, 2017
Replacing my idler pulley and I feel like it might be too small. The other one comes off and on easily however this one is giving me a lot of trouble. I hate to say I might’ve got the wrong one, but when I went in store they said it is the correct one for my model. So do you have any tips to make this installation easier
Hello Wes, we recommend replacing the idler pulley and the idler bracket together as one assembly. You can order the kit here W10837240. I hope this helps.
24 people found this helpful.
Was this helpful?
Thank you for voting!
Nic
July 20, 2017
Replacing the idler pulley bc of excessive squealing. Does this repair need lubricant? It looks like on my old one there was lubricant but just wanted to make sure before I put it on
Hi Nic, you can only use a dry lubricant in dryers, examples of this would be baby powder, or corn starch. However, for this repair you do not necessarily need lubricant, as they are normally assembled dry. Best of luck with this repair.
14 people found this helpful.
Was this helpful?
Thank you for voting!
Julian
July 20, 2017
I confirmed that this is the idler pulley for my make and model dryer before buying it. But when it arrived its thinner and a little bigger around- is it safe to use???
Hello Julian, this idler pulley was recently redesigned by the manufacturer, which is why it looks different. However, it will still work for your model. Please let us know if you have any further questions!
10 people found this helpful.
Was this helpful?
Thank you for voting!
Bob
March 6, 2019
The video you show on replacing my part shows a different dryer than what i have.
Hello Bob, thank you for your question. The idler pulley is used on many different styles of dryers. The dryer might be different but the installation video should provide the same instructions for your unit. I hope this helps!
7 people found this helpful.
Was this helpful?
Thank you for voting!
Robert
May 21, 2019
Does the idler pulley come with the washer and tri ring when you purchase it ?
For model number 110.87731700
hello Robert, Thank you for the question. This is the idler pulley with tri-ring and gasket as seen in the picture. Hope this helps!
6 people found this helpful.
Was this helpful?
Thank you for voting!
Barry
January 10, 2018
While observing my dryer drum i noticed that the belt wanders forward (toward door). At this point the drive motor stalls causing dryer to stop until the motor cools. If i move the belt backwards the dryer functions normally. My thought was that i may need to replace the belt and/or the pulley assembly. Can you please help me? Barry grimm
For model number GEQ8858JQ1 (electric)
Hi Barry,
Thank you for your question. Based on what you described, it sounds like the belt may be worn and stretched and it may be replaced. I would also check the pulley to see if it securely fastened. If it is worn or damaged you will need to replace it. I hope this helps. Thank you and have a great day!
6 people found this helpful.
Was this helpful?
Thank you for voting!
Charlie
August 19, 2019
My dryer squeaks for the first 30 seconds or so. Sometimes more often then others especially when it first comes on. I assume it's the belt tensioner pulley or possibly the drum rollers. I bought the whole kit with the pulley, belt, and rollers. I'm hoping you have a video or at least some tips on replacing it before I tear into it. I've done it on an older dryer before but nothing this new.
For model number WED8500DC1
Hello Charlie, Thank you for the question. I would suggest watching the how to video. Hope this helps!
https://www.youtube.com/watch?v=3WteoIPe-PE
5 people found this helpful.
Was this helpful?
Thank you for voting!
Tim
July 18, 2019
Have a Whirlpool cabrio dryer. Ordered the idler pulley part # 279640. Wheel is a little bigger in dia. But this is no problem. But i can't get to slide on pulley bracket arm. The center opening visually appears the same as the one i took off. But i can't even force it on. New idler center opening is to tight.
For model number WED5600XW0
Hi Tim, thank you for your question. I would suggest taking a look at our installation video here: https://youtu.be/y011lnwfx6Q. If that is not enough you might have to buy the whole part already assembled. I have linked the part below for you. Good luck with your repair.
Hi i have a Whirlpool cabrio i need the tensioner and pulley. Does w10837240 fit my model? Thank you for your help.
For model number Wgd5600xw1
Hello Ruben, thank you for inquiring. Yes, this Idler Pulley with Bracket part number PS11726337 (manufacturer's part number W10837240) is the correct replacement for your model. Good luck with your repair!
4 people found this helpful.
Was this helpful?
Thank you for voting!
Jesse
December 17, 2019
How do i access the idler pulley? The lower panel clips do not want to release. Thank you.
For model number 11069822800
Hello Jesse and thanks for writing.
For your convenience, we have attached the link to your manual with repair instruction. We hope this helps. Good luck with your repair
https://partselectcom.azureedge.net/assets/manuals/CB0964EF63134A82F3987C95C0572A2DF9B5EACD.pdf
2 people found this helpful.
Was this helpful?
Thank you for voting!
< Prev
1
2
3
Next >
✖
Ask a Question
Ask our experts a question on this part and we'll respond as soon as we can.