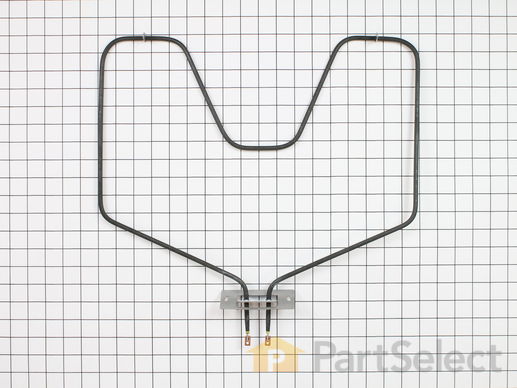
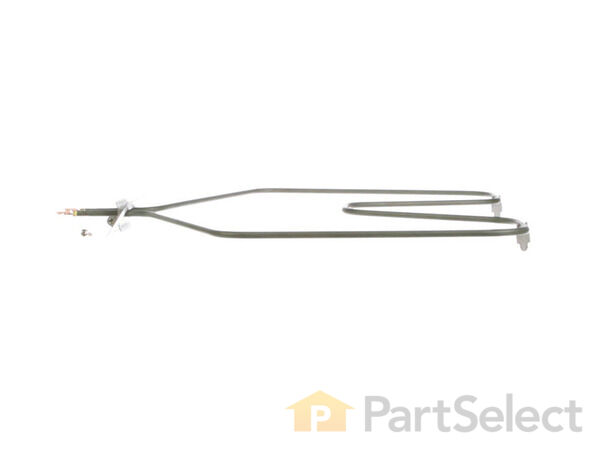
Bake Element - 220V 2300W
$
50.47
In Stock


Get this part fast. Average delivery time via standard shipping: 1.8 days.
PartSelect Number PS249466
Manufacturer Part Number WB44X5082
Manufactured by
GE
Product Description
Bake Element - 220V 2300W Specifications
This bake element goes in the bottom of your range and is 220 volts and 2300 watts. This closed hinged style element with screw-in terminals measures at 15-1/4 inches long and 18-1/4 inches wide. The bottom bake element provides heat for baking. Tools you will need for this repair include pliers, screwdrivers, and an adjustable wrench. Before you begin this installation, remember to shut off the house circuit breaker or unplug your range. For safety purposes we also recommend wearing work gloves.
How Buying OEM Parts Can Save You Time and Money
Troubleshooting
This part fixes the following symptoms:
Little to no heat when baking | Element will not heat | Oven not heating evenly | Oven is too hot
This part works with the following products:
Range, Microwave Oven Combo, Wall Oven.
This part works with the following products:
General Electric, Hotpoint, Kenmore.
Part# WB44X5082 replaces these:
AP2031084, 3358, WB44X5082, 65992, 8030, WB44X0192, WB44X10003, WB44X1126, WB44X192, WB44X5061, WB44X5072, WB44X5082R, WB44X5085, WB44X6082, WR44X5082R
Questions and Answers
We're sorry, but our Q&A experts are temporarily unavailable.
Please check back later if you still haven't found the answer you need.
Search filter:
Clear Filter
Your search term must have 3 or more characters.
Keep searches simple. Use keywords, e.g. "leaking", "pump", "broken" or "fit".
Sorry, we couldn't find any existing answers that matched.Try using some different or simpler keywords, or submit your new question by using the "Ask a Question" button above!
Jo Ann
October 13, 2017
I am replacing the bake element #wb44x5061 into my GE oven. I didn't pay attention when taking the old element out, but i have three wires in the back of the oven. Two of them are black and one is yellow. Which wires go on which element contact? Thank you

Hi Jo Ann,
Thank you for your inquiry. There is a video on our website that you can reference on how to install the bake element. You will find the video under part number PS249247. I hope this helps. Thank you and have a great day!
8 people found this helpful.
Was this helpful?
Thank you for voting!
Paula
May 3, 2018
While using my oven a fire suddenly started--big fire (about scared me to death) on the heating element. Turned off the oven, threw salt on fire. Now that's cooled and I'm ready to clean it up, I find that the heating element had burned completely through. Before I pay for a new element, how likely is it that there is more electrical/internal damage? Or is it likely just in need of a new element? Thank you.
For model number J BP23G V2WH

Hi Paula, Thank you for the question. In most cases the element will just need to be replaced. In rare cases the control board has shorted but replacing the element shoudl fix the issue. Hope this helps!
7 people found this helpful.
Was this helpful?
Thank you for voting!
Norma
January 22, 2019
Do you recommend a repairperson

Hello Norma, thank you for your question. This repair is really quite easy even for a novice! You shouldn't need a repair person. Here are the instructions: First unplug the unit or flip the breaker so the power is removed from the appliance. Remove the 2 screws that hold the bake element in place. Then pull the element out enough to see the wires and wire connectors and disconnected the two wires. Hold the wires in place so they don't get pulled back into the insulation of the unit. Reconnect the two wires to the new element and push it back in place and install the unit again with the 2 screws. Plug the unit back in, or flip the breaker and the unit should heat as it should! I hope this helps!
5 people found this helpful.
Was this helpful?
Thank you for voting!
Karen
January 2, 2018
The bottom heating element needs to be replaced in my GE stove (jbs03gs1ad). How do i find the part number for that element?
For model number jbso3gs1ad

Hi Karen,
Thank you for your question. To access your model number online, you will only need to enter JBS03GS1. The part number for the bake element listed under your model number is PS249466. I hope this helps. Thank you and have a great day!
3 people found this helpful.
Was this helpful?
Thank you for voting!
Steve Hall
January 23, 2018
I need top & bottom heating elements. What are the latest part numbers because this oven was purchased in 1986. I also need to replace the large (8”) eye on the stove top. If you could give me that part number too.Thanks, steve hall
For model number JMC27GJ

Hi Steve,
Thank you for your question. We do have the parts available for you. The part number for the 8 inch surface burner element is PS244046. The part number for the broil element is PS249386. The part number for the bake element is PS249466. I hope this helps. Thank you and have a great day!
3 people found this helpful.
Was this helpful?
Thank you for voting!
Mel
November 21, 2018
Need bake element replacement part for above GE model #.Thanks
For model number JBP26WV2WW

Hi Mel,
Thank you for your question. The part number listed under your model number for the bake element is PS249466. I hope this helps. Thank you and have a great day!
2 people found this helpful.
Was this helpful?
Thank you for voting!
Haley
April 1, 2018
I am looking for a bottom element for my oven and I found one that looks like it on your website but I do not know if it will work in my oven. Can you please tell me whether it would or not?
For model number JBS03C2WH

Hello Haley,
Thanks for your question. The bake element part number is PS249238 for your model.
I hope this helps.
2 people found this helpful.
Was this helpful?
Thank you for voting!
Related Parts:
Larry
August 31, 2017
Don't see screws to remove/install oven burner
For model number jbp90ww1ww

Hello Larry, thank you for contacting us. There is a plate on the end of that element, there are 2 screws holding that in, you can just remove those and carefully pull it out with the wires. Good luck with the repair!
1 person found this helpful.
Was this helpful?
Thank you for voting!
Richard
August 7, 2018
Did not see my model listed and i need a bake (lower) element for the oven
For model number JBP75W W1WH

Hi Richard,
Thank you for your question. We found your model number listed as JBP75WW1. The part number listed under your model number for the bake element is PS249466. I hope this helps. Thank you and have a great day!
1 person found this helpful.
Was this helpful?
Thank you for voting!
Earlene
November 7, 2018
Oven will not preheat or come on when set on a temperature. Is it the baking element or the ignition system?

Hi Earlene,
Thank you for your question. If the oven is not heating correctly, then the issue is likely with the oven sensor, sometimes called the oven thermostat, and you will need to check it with a multimeter. When testing the sensor with a multimeter, the sensor should be tested at room temperature and it should be unplugged from the oven. You will need to measure the resistance between the two prongs at the end of the sensor connector. Replace the oven sensor if the reading is less than 900 Ohms or more than 1200 Ohms. If the sensor checks out fine, you will need to check the electronic control board, the elements in the oven and the ignition system. I hope this helps. Thank you and have a great day!
1 person found this helpful.
Was this helpful?
Thank you for voting!
Customer Repair Stories
Average Repair Rating: 4.5 / 5.0, 219 reviews.
What's this?
Search filter:
Clear Filter
Your search term must have 3 or more characters.
Keep searches simple. Use keywords, e.g. "leaking", "pump", "broken" or "fit".
Sorry, we couldn't find any existing installation instruction that matched.
element quit working
Unhooked electrical wiring from unit and rehooked new unit to electrical wiring.
-
Wilbur from Taylorville, IL
-
Difficulty Level:Really Easy
-
Total Repair Time:15 - 30 mins
-
Tools:Screw drivers
-
Parts Used:WB44X5082
514 of 540 people
found this instruction helpful.
Was this instruction helpful to you?
Thank you for voting!
Bottom heating element went out
This repair took between 15 and 30 minutes BUT ONLY because my 10 year old son did the repair. He couldn't wait for his father to come home from work. His only complaint was the tight fit to reach the back of the oven (he wanted to take the oven door off but I said no). He removed the 2 screws that held the element in place and then pulled it from the oven until he could remove the screws that held the wires in place. He was concerned that a little of the insulation came out with the wires, but this was no issue. The new element hooked right up (we figured out that we had to use the 2 new screws for the wires because the old ones did not fit very well). We used the same 'old' screws to attach the element back to the oven. Plugged the oven back in and it works fine. My son was so proud and I didn't have to help any more than shining a flashlight for him.
-
Michael from Saint Paris, OH
-
Difficulty Level:Really Easy
-
Total Repair Time:15 - 30 mins
-
Tools:Screw drivers, Wrench (Adjustable)
-
Parts Used:WB44X5082
444 of 458 people
found this instruction helpful.
Was this instruction helpful to you?
Thank you for voting!
Oven heating element was broken.
The heating element in the lower oven of my 18 year-old GE double oven broke into two pieces and would not heat. Because of the age of the oven, a replacement part was unavailable through GE. I came across PartSelect.com through an Internet search and ordered the part online. Total cost was $33.50, counting s/h. FedEx delivered the new element less than 48 hours after I placed the order online.
IMPORTANT: FLIP the BREAKER to stop electricity from going to the oven. Replacing the heating element is a two step process: 1. Remove the old element. 2. Install the new element in its place. (NOTE: This job is much simpler if you lift and remove the oven door BEFORE you begin. NOTE also: There are no slots in the screws, so you must use a small socket wrench--not a screwdriver-- to remove the screws.) STEP 1: Two screws go through the small metal plate attached to the element prongs. These screws hold the element to the back oven wall. Remove the screws, then pull the element forward a few inches to gain access to two screws which hold the element prongs to wires that come through the back oven wall. (One wire and one screw for each of the two prongs.) Remove the two screws. Remove and discard the old element. STEP 2: Install the new element by doing Step 1 in reverse. Oven is now repaired! (It took more time to type these instruction than it took to repair the oven.)
-
Phyllis from Fisk, MO
-
Difficulty Level:Really Easy
-
Total Repair Time:Less than 15 mins
-
Tools:Socket set
-
Parts Used:WB44X5082
312 of 387 people
found this instruction helpful.
Was this instruction helpful to you?
Thank you for voting!
The oven element had broken in half and was sparking
I am not a handy person so I was really nervous about doing this. I first unplugged the oven just to be on the safe side. Then I removed the two screws that hold the element in place. Next I pulled the element forward and disconnected the two wires. After that I simply reconnected the two wires to the new element, pushed it back in and put the screws in. Piece of cake!
-
Brittany from Cayce, SC
-
Difficulty Level:Really Easy
-
Total Repair Time:15 - 30 mins
-
Tools:Pliers
-
Parts Used:WB44X5082
137 of 203 people
found this instruction helpful.
Was this instruction helpful to you?
Thank you for voting!
oven would no longer heat. Only broiler worked
First I removed the 2 screws that held the bake element in place. Then I pulled the element out and disconnected the two wires. Reconnected the two wires to the new element and pushed it back in place and installed the unit again with the 2 screws. Turned the oven on and it heated up like it should.
-
Liz from Williamson, NY
-
Difficulty Level:Really Easy
-
Total Repair Time:Less than 15 mins
-
Tools:Socket set
-
Parts Used:WB44X5082
103 of 168 people
found this instruction helpful.
Was this instruction helpful to you?
Thank you for voting!
bake element bent down to bottom of oven (ready to break)
1) turned off breaker to oven
2) removed oven racks
3) removed screws holding old element
4) pulled out element far enough to remove 2 wires attached to old element
5) noted colors, left white, right black
6) attached new element to wires
7) attached new element to oven
8) put back oven racks
9) turn breaker back on
10) test oven
done
-
James from Tazewell, VA
-
Difficulty Level:Really Easy
-
Total Repair Time:Less than 15 mins
-
Tools:Nutdriver, Screw drivers
-
Parts Used:WB44X5082
32 of 38 people
found this instruction helpful.
Was this instruction helpful to you?
Thank you for voting!
The bottom element had broken apart and needed to be replaced
The only reason I mentioned "a bit difficult" is that it is very important to unplug the unit first. I didn't want to say easy because I didn't want someone just jumping right in, (you do end up handling raw wires).
First I removed the two screws that were holding in the element to the back wall of the oven, then pulled out the old element slightly until you see where the wires are attached to the end of the element. I made note (I don't know if this is neccessary) which wire came off which screwset so I could put the new one in the same way. Took out the old element and attached the new one to the two screwsets on the ends of the element and then reinserted that part in in the back wall of the oven and attached plate that holds it in place. It was for my mother and she now thinks I'm a genius! Don't let anyone take a picture of you of you from behind because you definitely have to put your head in the oven. I believe the door is removable that may make it easier to get to it.
-
Becky from Norman, OK
-
Difficulty Level:A Bit Difficult
-
Total Repair Time:Less than 15 mins
-
Tools:Pliers, Screw drivers, Wrench (Adjustable)
-
Parts Used:WB44X5082
25 of 27 people
found this instruction helpful.
Was this instruction helpful to you?
Thank you for voting!
Bake Element burnt up
Turned off breaker to stove.Used nut driver to remove the holding plate from the back ove the oven. Their was between 4 to 6 inch of slack on the wire. Used the nut driver and removed the red wire from the right side of the old element, and then removed the white wire from the left side of the element. Replaced the cap head screws that required a nut driver, with the slotted screws that came with the new element, replaced the white wire(left) the red wire(right), end reattached the holding plate to the back of the oven and done!
There are stand offs on the bottom of the element, so you can't get it confused on where the wires go, but take care that the wires do not slip back in the element "hole" or you will have to "fish" them back out.
Brought the element up slowly to 500 degrees, to burn off any residue on the element. Smelled a chemical smell for the first 5-10 seconds of the "burn in", then no smell.
-
John from Lafayette, LA
-
Difficulty Level:Really Easy
-
Total Repair Time:Less than 15 mins
-
Tools:Nutdriver, Screw drivers
-
Parts Used:WB44X5082
21 of 21 people
found this instruction helpful.
Was this instruction helpful to you?
Thank you for voting!
The bake element would not heat up.
This repair took much longer than it should have.
When I noticed the oven would not heat in bake mode, I suspected the element was bad. Going on the forum, I found that I needed to ohm out the element to be sure, so from inside the oven, I removed the two screws holding the element into the stove, pulled out the element a bit and removed the screws from each contact, ohmed it out and found no continuity. I ordered a new bake element which arrived in a couple of days.
I installed the new element by connecting the wires back to each terminal end. It still didn't work and not only that, the broil element didn't work now either.
I inquired again on the forum and found that the suspect might be the control module that controls both bake and broil elements. The part was $250.
Not wanting to spend that on a 10 year old stove, I ordered a new stove at Sears that was on sale.
I sent the bake element back and waited for my stove to arrive.
Sears called a few days later that my stove was ready for pickup so in preparation, I pulled my old stove out from the wall and began to disconnect the pigtail to use on the new one. It was then I noticed a wire dangling that seemed to go to one side of the bake element. When I pulled out the bake element initially and disconnected the wires, I didn't notice that one terminal had TWO wires going to it and one had a single wire connected. It was a bit dark inside the stove when I initially took the screw off of each terminal and I never noticed the second wire on the left one. I installed the old bake element, knowing it may not work but just to see if the broil now worked and it did!
So I ordered another bake element and installed it connecting two wires to the left terminal and one to the right terminal, reattached it to the back of the oven and IT WORKS!!
I cancelled my new stove at Sears which saved me about $500. Just a $26.00 part.
-
Douglas from Derry, NH
-
Difficulty Level:Really Easy
-
Total Repair Time:Less than 15 mins
-
Tools:Nutdriver
-
Parts Used:WB44X5082
20 of 20 people
found this instruction helpful.
Was this instruction helpful to you?
Thank you for voting!
Element burned into.
First I removed the two screws that held the element in place. I pulled the element out about 2-3 inches and then removed the two screws that fastened to the ends of the element. Was careful to keep the same wires separate in order to fasten the new element back to the same two wires. When fastening the new element ends back to the wires, care must be taken to not bend the ends of the element when tightening the small screws to the ends. Everything went real good and am most pleased with the very fast service portrayed by Parts Select. They are a class act company and rate very high in customer satisfaction!
-
Ward from Gilmer, TX
-
Difficulty Level:Really Easy
-
Total Repair Time:Less than 15 mins
-
Tools:Nutdriver, Pliers
-
Parts Used:WB44X5082
19 of 20 people
found this instruction helpful.
Was this instruction helpful to you?
Thank you for voting!
Customer Reviews
Filter By Rating:
Search filter:
Clear Filter
Your search term must have 3 or more characters.
Keep searches simple. Use keywords, e.g. "leaking", "pump", "broken" or "fit".
Sorry, we couldn't find any existing reviews that matched. Try using some different or simpler keywords.
Michael A - October 6, 2020

Quick and Easy
Once I located the number on the old part and typed it in they cross referenced it for the replacement part. Delivery was fast and installing it was easy. Back in business in a few days.
Karen R - September 30, 2020

Right part repaired my oven
I had purchased this same part years ago for the same oven which I bought in 1997. I found the receipt from the first order and had a part number to refer to in this latest order. At first it didn't heat up but then it started to work properly. The part price doubled since I first bought it but certainly better than having to replace the appliance.
Brad O - July 14, 2020

Easy to install. Came with 2 new screws. Fit perfect. Heats great.
Arrived sooner than expected. Fit perfectly. Ill buy from here again.
Bob P - May 10, 2020

Works almost how its supposed to
It was easy installing the oven element but for some reason it only heats up ( turns red ) about 7/8 around the element. Don't know if this is unusual or how its supposed to be
JEFFREY K - May 9, 2020

Easy to order, easy to install, works like a champ!
Everything about this order was perfect. It was easy to order the CORRECT part, it came a day EARLY, and it was easy to install. Highly recommend!
Patricia A K - April 15, 2020

Heating element
My part came quickly my stove is up and heating just fine. Thanks
Beverly C - February 5, 2020

Easy instructions and installation.
The part was correct and working properly. Was extremely happy with the quick delivery time. The person who took my order was helpful and very pleasant.
Jean B - January 7, 2020

Element went out on December 21st. I called and it was sent to me and received on 24th. My husband installed it and Christmas was saved. Thanks again and again.
Perfect condition
Dorothy H - December 3, 2019

Repair was easy. Works just fine.
I was surprised how quickly I got this part. Ordered it Saturday night and it was delivered on Tuesday. My neighbor installed it. Has been working just fine. Thank you for the ease of ordering this part and the quick delivery.
Dale B - November 27, 2019

Oven for Thanksgiving
Heating elements went out before Thanksgiving. Wife panicked. Ordered necessary heating elements. Now ready for Thanksgiving turkey!
Model Cross Reference
This part works with the following models:
PartSelect Number: PS249466
Manufacturer Part Number: WB44X5082
Brand
Model Number
Description
Kenmore
99121-8
Range
- Kenmore Range/Stove/Oven Model 99121-8(1988) (991218(1988), 99121 8(1988)) Parts