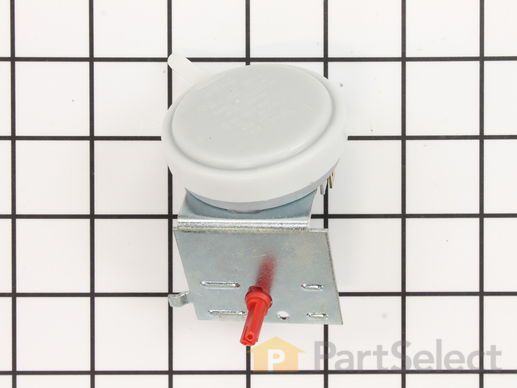
This part is located behind the control panel. It helps determine the level of water in the washer. As the water fills the hose, while tub is filling, it will push the air against a diaphragm inside the switch. More water that enters the tub, more pressure is applied against the switch.
We're sorry, but our Q&A experts are temporarily unavailable.
Please check back later if you still haven't found the answer you need.
2 questions answered by our experts.
< Prev
1
Next >
Sort by:
Search filter:
Clear Filter
Your search term must have 3 or more characters.
Keep searches simple. Use keywords, e.g. "leaking", "pump", "broken" or "fit".
Sorry, we couldn't find any existing answers that matched.Try using some different or simpler keywords, or submit your new question by using the "Ask a Question" button above!
Michael
April 16, 2019
My washing machine continues to fill with water periodically. I bought this tank switch, but the electrical connectors are different than my old switch. How do I set them up properly? To be clear there's a tan/black wire, a brown/black wire, and a black wire. The connections from bottom to top go brown, tan, black. On the new style I have one connector on the bottom and 2 on top (i believe). I tried a few different variations, but could not get the tank to fill.
For model number GLWS1349AS1
Hello Michael, Thank you for the question. The connectors are labelled 1,2,3. Take the wire that was connected to connector 1 and transfer it to connector 1 on the new switch, do the same with 2 and 3. Thank you for your inquiry, good luck with this repair!
Was this helpful?
Thank you for voting!
David
February 8, 2020
The new pressure switch does not have the label 123. Is where the red dot on the new switch 1 or 3
For model number Fws445rfs0
Hello and thank you for writing.
The red dot does indicate 1. We hope this helps. Please contact us anytime if you require further assistance.
Was this helpful?
Thank you for voting!
< Prev
1
Next >
Customer Repair Stories
Average Repair Rating: 3.9 / 5.0, 1 reviews.
What's this?
< Prev
1
Next >
Sort by:
Search filter:
Clear Filter
Your search term must have 3 or more characters.
Keep searches simple. Use keywords, e.g. "leaking", "pump", "broken" or "fit".
Sorry, we couldn't find any existing installation instruction that matched.
Set wash load size; would begin to agitate at proper time; however would continue to fill with water and overflow.
Removed back cover; pulled knob off front (removed small screw). Removed hose connected to pressure switch. Removed old switch. Electrical connections are numbered 1-2-3, and the part positions are also numbered 1-2-3. Pulled off old, installed new. Reconnected hose. Rehooked screw on front, replace knob and back cover.
Roger from Dassel, MN
Difficulty Level:
Easy
Total Repair Time:
15 - 30 mins
Tools:
Screw drivers, Wrench set
9 of 13 peoplefound this instruction helpful.
Was this instruction helpful to you?
Thank you for voting!
< Prev
1
Next >
Model Cross Reference
This part works with the following models:
PartSelect Number: PS1524557
Manufacturer Part Number: 134680100
With the Fix app, you can quickly and easily find information on your appliance, along with videos and articles to help you fix it.
"Like magic. I took a picture of the model number on my refrigerator, and the app identified it right away … Very convenient. I'm impressed." ★★★★★ - Clever Jeff
★★★★★
You added 1 item to your cart
✖
$
Qty:
Total item(s) in cart:
Order Subtotal
$
*Taxes and shipping will be applied during checkout