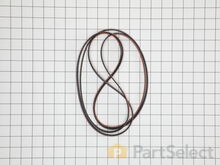
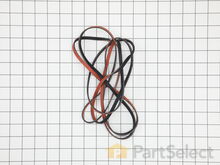
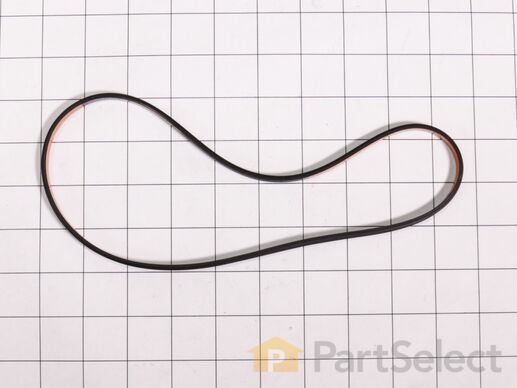
Keep searches simple. Use keywords, e.g. "leaking", "pump", "broken" or "fit".
Sorry, we couldn't find any existing reviews that matched. Try using some different or simpler keywords.
★★★★★
★★★★★
Danny L - April 17, 2019
Verified Purchase
Easy fix just had to wait on part to get here
The part and ordering was easy took ten minutes to fix . Ordered part on Tuesday morning and it didn’t get here until Monday afternoon
★★★★★
★★★★★
Tim H - February 26, 2019
Verified Purchase
Refreshing Change of Pace!
PartSelect did a great job at delivering what they promised. On time & quality part at a fair price.
★★★★★
★★★★★
Gary H - December 11, 2018
Verified Purchase
Blower belt
The belt is good condition & the order was on time with no problems. Works great.
★★★★★
★★★★★
Thomas S - September 6, 2018
Verified Purchase
Easy to order, worked as expected.
Arrived in timeley manner. Dryer back working great.
< Prev
1
Next >
Customer Repair Stories
Average Repair Rating: 2.7 / 5.0, 5 reviews.
What's this?
Sort by:
< Prev
1
Next >
Search filter:
Clear Filter
Your search term must have 3 or more characters.
Keep searches simple. Use keywords, e.g. "leaking", "pump", "broken" or "fit".
Sorry, we couldn't find any existing installation instruction that matched.
Blower stopped working
I expected to find a broken blower belt so purchased that belt and the others I planned to replace since the on line instructions indicated that I had to pull the drum to replace the blower belt. I did not, so didn't use most of the parts at all. The instructions that came with the parts, were only slightly helpful because they were for a
... Read more far different model. Some youtube videos were more help. I had to pop the top, which is easy and explained in the instructions, remove the front panel, which only requires removing two 5/16" small bolts, then lifting it up and off. Simple. With that panel off, I could see the blower belt and it was intact and seemed to work fine. I could have replaced it easily with no further disassembly at that point. However, since it was not blowing the air out of the dryer, I knew there was another problem. So I removed the front of the blower housing, which is four, 1/4" small bolts and it just pulls off. I could then see that the entire front of the blower was packed with lint that had gotten past the normal lint filter. I cleared that all out and checked that the blower itself was intact and clean and there were no other obstructions. When I rotated the blower by turning the motor, it moved easily. So I put it all back together without changing any parts and tested it. It worked perfectly again. I kept the parts for the next time I might need them.
Read less
Boots from KNOXVILLE, TN
Difficulty Level:
Easy
Total Repair Time:
30 - 60 mins
Tools:
Screw drivers, Socket set
3 of 3 peoplefound this instruction helpful.
Was this instruction helpful to you?
Thank you for voting!
Blower belt came loose, but didn't snap. It was old and perhaps brittle.
First, lift top by pushing in the 2 locking clips ( with the dryer door open), otherwise it won't lift. Secondly, remove front cover by taking out 2 screws easily seen . If you see any electrical connectors, remove them. Only thing a bit nightmarish was installing the new belt. It didn't seem long enough even though it was the
... Read moreoriginal exact replacement. I got hair dryer blower, used on belt for 30 seconds, and mission accomplished.
Read less
Gabe from Tulsa, OK
Difficulty Level:
A Bit Difficult
Total Repair Time:
1- 2 hours
Tools:
Nutdriver, Screw drivers
3 of 3 peoplefound this instruction helpful.
Was this instruction helpful to you?
Thank you for voting!
Tub seals were out , major clean up!..
Tear down , pulled drum, rollers, belts. These machines are very simple and very reliable!. I love these machines, they are one of the easiest to work on of any machine l have worked on. I have been a mechanic all my life!.Maytag got it right , their washers are as easy to work on as their dryers!..Very, Very simple..
1`) broken blower motor drive belt,2) blower moter drive belt pulley loosened & seperated from shaft
1) Unplugged unit & used the 5 in 1 tool to disengage top panel clips from top of front panel & tilted top panel up & out of the way, . 2) Disconnected electrical connection @ upper right of front panel, Used drill & 5/16" socket & adapter to remove 2 upper front panel screws on backside of panel & removed panel. 3) Removed 4 sc
... Read morerews from lint screen duct, unplugged elect. con.@ the right & removed lint screen & duct from dryer bulkhead.. 4) Loosened 2 top screws & removed 2 bottom screws from bulkhead & lifted bulkhead up & out & set aside. 5) Slid drum belt off the back of the drum & removed the drum 6) Ceaned the blower moter drive shaft threads & threads inside the shaft pulley. Used a file to clean up any burrs on shaft pulley, coated treads of pulley & shaft with red lock tite thread dressing & re-instaled pulley back onto shaft with ajustable pliers while holding blower fan blades steady from inside the blower motor housing. with other hand. note: (pulley is left handed thread) 7) Looped new belt onto drive motor pulley then worked it back onto blower moter pulley with one hand while turning the blades of the blower from inside the blower housing with other hand until it was back in place & ribs on belt were seated in the mating ribs of the pulley. 8) Put everything back in reverse order with the exception of removing the back panel to reinstall the drum belt onto the drive motor shaft pulley and tensioner @ bottom left in back of the dryer.
Hope this instructional is able to help some one else & good luck with your projects!
We're sorry, but our Q&A experts are temporarily unavailable.
Please check back later if you still haven't found the answer you need.
3 questions answered by our experts.
Sort by:
< Prev
1
Next >
Search filter:
Clear Filter
Your search term must have 3 or more characters.
Keep searches simple. Use keywords, e.g. "leaking", "pump", "broken" or "fit".
Sorry, we couldn't find any existing answers that matched.Try using some different or simpler keywords, or submit your new question by using the "Ask a Question" button above!
Jay
October 12, 2017
The drum is functioning. The dryer is too hot. "af" signal is on panel. All lint filters and screens are clean. No air is flowing from back of machine.
For model number WED7300XW0
Hi Jay,
Thank you for your question. The AF error code means restricted air flow. The lint screen or vent is clogged; the vent may be crushed, kinked or have too many turns. If all of your ventilation parts are fine, your problem may be with your control board. You may have to check that part. Good luck with your repair.
4 people found this helpful.
Was this helpful?
Thank you for voting!
Carla
August 19, 2019
Have Kenmore dryer model 592891070 has broken belt, it is a dongil muti ribbed belt 5 ridges 4 grooves measures 5/16 wide, 5ph2337, broken belt measures about 92 inches can not find it in your site
For model number 592891070
Hello Carla, thank you for contacting us, In order for us to locate the correct parts and repair information we will require the full model number of the unit. 592891070 is incomplete. Once you have located the full model number please feel free to resubmit the question and we will be happy to help you. Look forward to hearing from you!
Was this helpful?
Thank you for voting!
REYNALDO
May 12, 2024
Maytag Bravos XL Dryer will not work. The panel/console lights up as normal but nothing happens when START button is pressed.
Opened it up and found the dryer drum belt is loose (but not broken). Not sure how it came off the track. Can I just replace the belt? If so, which part do I need (not sure how long the belt is)?
For model number YMEDB850YW0
Hello Reynaldo, thank you for contacting us. Based on our understanding of the issue, we would suggest replacing the belt, part number PS11748884, to solve the problem. Glad to be of assistance!