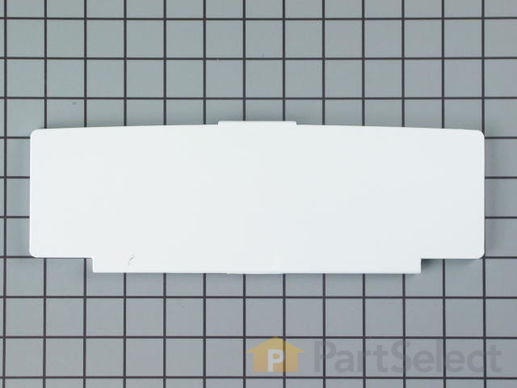
Dispenser Lid
$
23.07
In Stock


Get this part fast. Average delivery time via standard shipping: 1.8 days.
PartSelect Number PS11739535
Manufacturer Part Number WP22004481
Manufactured by
Whirlpool
Product Description
Dispenser Lid Specifications
This part is used to cover up the dispenser.
How Buying OEM Parts Can Save You Time and Money
Troubleshooting
This part fixes the following symptoms:
Lid or door won’t close | Lid or door will not open
This part works with the following products:
Washer.
This part works with the following products:
Maytag, Crosley.
Part# WP22004481 replaces these:
22002288, 22002493, 22004481
Questions and Answers
We're sorry, but our Q&A experts are temporarily unavailable.
Please check back later if you still haven't found the answer you need.
Sort by:
Search filter:
Clear Filter
Your search term must have 3 or more characters.
Keep searches simple. Use keywords, e.g. "leaking", "pump", "broken" or "fit".
Sorry, we couldn't find any existing answers that matched.Try using some different or simpler keywords, or submit your new question by using the "Ask a Question" button above!
JANE
January 31, 2019
Do you sell the pins for this lid? Do i have to get the larger and smaller pin?What was in there was a plastic rod but i'm not sure if that was a "home repair" done by someone or if that was the original part. i can't tell from the diagram.
thanks!

Hello Jane, thank you for your question! We do sell the pins, and there is a larger and smaller one -- PartSelect Number PS11743044 is the larger, and PartSelect Number PS11757600 is the smaller. We hope this helps!
Was this helpful?
Thank you for voting!
Customer Repair Stories
Average Repair Rating: 4.4 / 5.0, 22 reviews.
What's this?
Search filter:
Clear Filter
Your search term must have 3 or more characters.
Keep searches simple. Use keywords, e.g. "leaking", "pump", "broken" or "fit".
Sorry, we couldn't find any existing installation instruction that matched.
Lid hinge broke
Ordered the lid and it has two pins one longer and one shorter. I put the pin in the wrong part of the lid the first time, could not get the pin out--the lid was toast. Had to re-order the part and the hinge pin the second time. Easy to do if you REMEMBER where the pins go on the lid--Would have been nice to receive a paper description with the lid and the placement of the pins with the part sent, or the drawing showing the pin placement. Once the shorter pin is put in the top hinge spot--it is gone forever and will not work.
The shipping and order process was flawless, the parts both times were received within two days-great service.
-
Sharon from Rochester, MN
-
Difficulty Level:Really Easy
-
Total Repair Time:Less than 15 mins
-
Tools:Screw drivers
-
Parts Used:WP22004481
23 of 23 people
found this instruction helpful.
Was this instruction helpful to you?
Thank you for voting!
bad pump
I took off the rear panel and removed the hose clamps and electrical terminals, slid pump out of slot in bottom pan of washing machine. It only took minutes, this was part of a major overhaul. I replaced this as a precautionary measure. Great prices and quick service,
-
Brandon from Berea, OH
-
Difficulty Level:Really Easy
-
Total Repair Time:15 - 30 mins
-
Tools:Nutdriver, Screw drivers
-
6 of 11 people
found this instruction helpful.
Was this instruction helpful to you?
Thank you for voting!
Top Of Dispenser Broke At Hinge
Removed 4 screws holding dispenser frame. Removed old & installed new frame. Top, hinged lid needed to be slightly bowed so hinge pins could be fit in holes. End of repair.
-
KENNETH from Portsmouth, RI
-
Difficulty Level:Really Easy
-
Total Repair Time:Less than 15 mins
-
Tools:Screw drivers
-
4 of 4 people
found this instruction helpful.
Was this instruction helpful to you?
Thank you for voting!
broken hinge on dispenser lid
An earlier post saved us an awful lot of time and effort by mentioning the importance of holding on to the original pins for the hinges because they are not included in the lid replacement provided by the manufacturer.
Great site. Thank you.
-
Marta from Arlington, VA
-
Difficulty Level:Really Easy
-
Total Repair Time:Less than 15 mins
-
Tools:Screw drivers
-
Parts Used:WP22004481
3 of 4 people
found this instruction helpful.
Was this instruction helpful to you?
Thank you for voting!
Top pin on dispenser door was rusted so the door would come off.
First I removed the 4 screws that kept the bezel in place, removed the bezel. Replaced the new bezel, replaced screws, put new top pin in door and put door on.
-
Kathy from Tulsa, OK
-
Difficulty Level:Really Easy
-
Total Repair Time:Less than 15 mins
-
Tools:Screw drivers
-
3 of 5 people
found this instruction helpful.
Was this instruction helpful to you?
Thank you for voting!
Lid hinge was broken, Lint screen had a hole in it.
Remove part from package. put in place. press in pins. done. Now I'm ready to fix the tub bearings and the wax motor ! save $500 or more.
-
bill from brighton, MI
-
Difficulty Level:Really Easy
-
Total Repair Time:30 - 60 mins
-
Tools:Pliers
-
3 of 5 people
found this instruction helpful.
Was this instruction helpful to you?
Thank you for voting!
The repair went really quick. My husband was able to do it in about 5 minutes. Also the service was amazing. We ordered the part and we got it 3 days later. I have no complaints about ordering from this company and am sure that If I need to get new parts in the future this is where I will get them.
There was 4 screws that held the bevel in that still needed to be removed from the old broken one. Once we removed those we were able to place the new bevel and lid in the correct sport, replace the screws and viola, perfect.
-
Sarah from Ephraim, UT
-
Difficulty Level:Really Easy
-
Total Repair Time:Less than 15 mins
-
Tools:Screw drivers
-
2 of 3 people
found this instruction helpful.
Was this instruction helpful to you?
Thank you for voting!
Door lock wasn't working
There were two parts to the repair - the Dispenser Lid and Bezel was easy - I did it myself.
My wife, who normally would try to do the repair of the door lock herself has been very busy with her condo rental business. It took six weeks to get her to order the parts and then they sat in the box for two weeks before I convinced her to call her appliance repair company she uses for the renatl condos. They did a quality job for only $79.00. When my wife saw what he had to be do to repair the locking mechanism, she was convinced we made the right decision. The Maytag washer is working like new after weeks of manually adjusting the door latch, sometimes a dozen times, before it would lock and do a high speed spin.
-
Carolyn from Panama City Beach, FL
-
Difficulty Level:Really Easy
-
Total Repair Time:30 - 60 mins
-
Tools:Screw drivers
-
Parts Used:WP6-912678, WPY912679, WP400021-1, WP22004481, 22003222, W10859556, 22002290, 22002168, 22002003
2 of 32 people
found this instruction helpful.
Was this instruction helpful to you?
Thank you for voting!
fabric softner, and bleach dispenser not working
First off, unplug the machine.
Next remove the existing screws in the plastic dispenser. Then remove the door, there are two screws holding the door on connecting two brackets which need to be lifted to get them to release.
That gives you the access to the remove the front panel, which is done by pulling on the panel itself.
Once that is done you need to remove the two screws that are in the corners upper left, and right that are holding the brackets that hold down the top of the machine. Remove the brackets by gently turning them.
Once done the lid should easily lift up.
The dispenser can then be disconnected by removing the 2 rubber hoses on top and the the larger rubber hose on the bottom along with the electrical connections under the unit. Keep track of which wire goes to which lead.
After removing the dispenser just do everything in reverse.
The machine is like new, and the repair took about 45min and saved me at least $200 dollars.
-
anne from gaston, OR
-
Difficulty Level:Easy
-
Total Repair Time:30 - 60 mins
-
Tools:Nutdriver, Pliers, Screw drivers
-
2 of 4 people
found this instruction helpful.
Was this instruction helpful to you?
Thank you for voting!
Dispenser lid plastic around metal pins that insert into washer broke so it fell off everytime I opened to add soap etc
I got the part, but it did not come with the pins needed to insert into slot in washer. I had to go to Lowes and buy some pins and improvise to make them fit on both ends. It is working well....Probably saved myself $100.00 (service call etc) Thanks
-
Margaret from Burleson, TX
-
Difficulty Level:Easy
-
Total Repair Time:30 - 60 mins
-
Tools:Pliers
-
Parts Used:WP22004481
1 person
found this instruction helpful.
Was this instruction helpful to you?
Thank you for voting!
Customer Reviews
Filter By Rating:
Sort by:
Search filter:
Clear Filter
Your search term must have 3 or more characters.
Keep searches simple. Use keywords, e.g. "leaking", "pump", "broken" or "fit".
Sorry, we couldn't find any existing reviews that matched. Try using some different or simpler keywords.
Ken P - September 13, 2018

Easy repair-was surprised the part was still available.
It was easy to install and works great.
Paul J - September 8, 2018

order
One of the parts was backordered and later was refunded. Advertising for a product that the seller doesn't have is a problem with buying through the Internet.
Stephen M - August 8, 2018

Perfect.
With the other parts I was able to get everything back into spec.
Rhonda M - February 7, 2018

Easy
Easy
Model Cross Reference
This part works with the following models:
PartSelect Number: PS11739535
Manufacturer Part Number: WP22004481
Brand
Model Number
Description