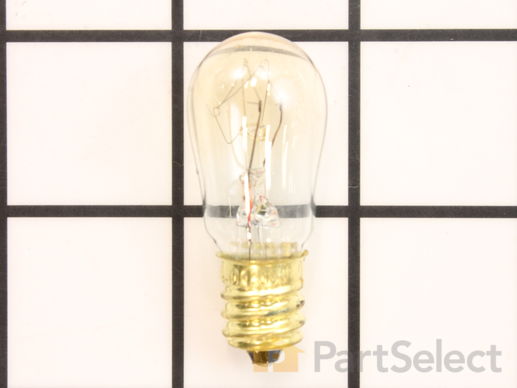
Part Location Diagram of WE05X20431 GE Light Bulb
See part 314 in the diagram
Replacing your General Electric Dryer Light Bulb
( Grid squares measure 1x1 inch )
Customer Service Representative

Get in touch, we're here to help!

Open until 12am EST

customerservice@partselect.com

Light Bulb

 Fits your GTD42EASJ2WW!
★★★★★
★★★★★
25 Reviews

Rated by 39 customers 

Easy 

30 - 60 mins 

Ratings submitted by customers like you who bought this part.

$ 14.14
  In Stock

Get this part fast! Average delivery time for in-stock parts via standard shipping: 1.8 days.

 Fits your GTD42EASJ2WW!
PartSelect Number PS10063224
Manufacturer Part Number WE05X20431
Manufactured by GE
Customer Service Representative

Get in touch, we're here to help!

Open until 12am EST

customerservice@partselect.com

Check if this fits your product and find model diagrams

Need help finding your model number?
Product Description

Light Bulb Specifications

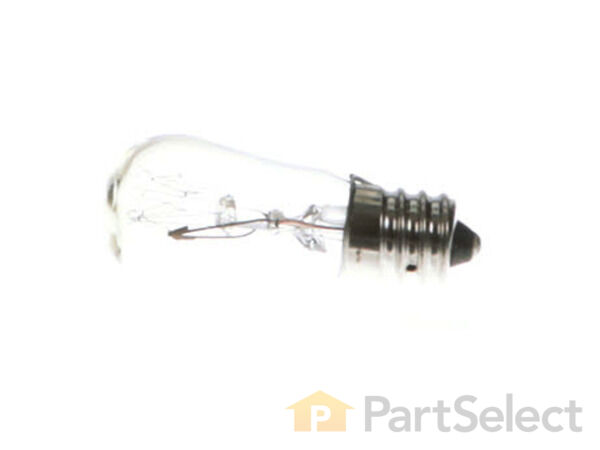
This light bulb, also known as a drum lamp, illuminates and lights up the dryer drum when the door is open. If the light bulb in the dryer is burnt out or lighting is inconsistent, replacing it can solve this problem. No tools are required for this replacement. To repair, first locate the top section in the interior of the dryer and check the bulb. Next, unscrew the bulb by making three to four turns. Pro tip: the bulb cannot be screwed straight in, instead lean it at a 45-degree angle. Refer to the diagram provided by the manufacturer for further instruction and guidance. Remember to unplug the dryer from the power source for your safety.
How Buying OEM Parts Can Save You Time and Money

How Buying OEM Parts Can Save You Time and Money

Troubleshooting
This part works with the following products:
Dryer.
This part works with the following products:
General Electric, Hotpoint.
Part# WE05X20431 replaces these:
AP5956400, WE04X0718, WE05X20431-36PK, WE4M305, WE4X718
Back to Top
Questions and Answers

Ask our experts a question about this part and we'll get back to you as soon as possible!

4 questions answered by our experts.
  • 1
Sort by:
Sorry, we couldn't find any existing answers that matched.Try using some different or simpler keywords, or submit your new question by using the "Ask a Question" button above!
Susan
February 24, 2018
I took out the old bulb and as soon as i tried to put the new bulb in it exploded. I didn't unplug the dryer as i have never had to unplug my previous dryer to change the bulb. Why would it do that?
For model number GTD45EASJ2WS
PartSelect logo
Hello Susan, Thank you for your inquiry. You'd have to check with an electrician to be sure but for safety reasons, you should always unplug your dryer before changing the light bulb as there still could be an electrical charge in the circuit. Hope this helps!

11 people found this helpful.

Was this helpful?
Thank you for voting!
Diana
December 28, 2017
My light bulb is brand new but will not go on when opening the door. How do i have to connect the cables?
For model number dhdsr46gg1ww
PartSelect logo
Hi Diana, Thank you for your question. For information on how to install the light bulb, there is a video listed with the part on our website that you may reference as well as installation instructions that customers have left as to how they installed the part. I hope this helps. Thank you and have a great day!

4 people found this helpful.

Was this helpful?
Thank you for voting!
Elizebeth
September 30, 2021
Where is the light bulb located in the gas dryer
For model number GTDP490GD6WS
PartSelect logo
Hello Elizebeth, thank you for writing. The bulb is located in the top section in the interior of the dryer. We have attached a video for you. The number is PartSelect Number PS10063224. Good luck with your repair.

2 people found this helpful.

Was this helpful?
Thank you for voting!
Vanessa
May 26, 2022
Will a light bulb 6w Indicator 120 volt fixtures work on a dryer
For model number GTDP300EM1WS
PartSelect logo
Hello Vanessa, Thank you for contacting us. We have researched the model you have provided and have found the part you are looking for is 120V, 10W, PartSelect Number PS10063224. If you need help placing an order, customer service is open 7 days a week. Please feel free to give us a call. We look forward to hearing from you!

1 person found this helpful.

Was this helpful?
Thank you for voting!
  • 1
Part Videos

Replacing your General Electric Dryer Light Bulb

Replacing your General Electric Dryer Light Bulb
Customer Repair Stories
 Average Repair Rating: 3.5 / 5.0, 39 reviews. What's this?
  • 1
  • 2
  • 3
Sort by:
Sorry, we couldn't find any existing installation instruction that matched.
Dryer was squeeling when running.
I removed the two screws at the front above the drum opening (with the dryer door open). The top panel then lifts off. I removed the screw at each side that holds the front panel to the side panels, tilted the front panel forward, which disengages the front of the drum from the front drum glide bearing. I then lifted the front panel slightly, unhooking the bottom of the panel from the dryer base, and swung the front panel aside. I removed the existing top drum bearing guide, which was disintegrated, and snapped in the new bearing guide, with the nylon slide strips installed in the bearing guide. Next pulled out the old felt strip, and pressed the new one in place. I then put the bottom of the front panel back into the bottom of the dryer front, and while lifting the drum to asure it fit over the bearing guide, pushed the front panel back to a vertical position to mate with the side panels. I then replaced the side panel screws, replaced the top, and replaced the front top panel screws.
Other Parts Used:
FELT TRAP DUCT Front Drum Bearing Drum Bearing Slide - White
  • Daniel from Chicago, IL
  • Difficulty Level:
    Really Easy
  • Total Repair Time:
    15 - 30 mins
  • Tools:
    Screw drivers
695 of 783 people found this instruction helpful.
Was this instruction helpful to you?
Thank you for voting!
Dryer made LOUD screaching constant sound
(1) open dryer door (2) remove screws holding door on and put door aside. Probably doesn't have to be done but I think its easier and safer so you don't accidently bend the hinges. (3) remove 2 screws holding top onto front. of dryer located in recess that door sits in (3) pull up on top and remove (from slots by the control panel) (4) remove final 2 screws holding front onto frame of dryer. You can disconnect the connectors from the front panel back to the dryer to make the job easier or work with it without disconnecting. I'd take your time and clean any lint dust, etc. (5) the Drum Bearing removes fairly easy as it is just snapped into 2 slots. insert slids into slots.... make sure you order all 4. Mine were all beat!. (6) replace with new Drum Bearing. (7) I did the lower felt seal as well. Pay attention to how you took the old one off and replace the same way. Remember it stretches to fit into the slots. Put all back together. Remember to front panel has to sit correctly into bottom slots before you screw the top screws back in. All in all.... a simple project, and no more noise!!!!! Great to have websites like this. Easy ordering, quick shipping, great diagrams.
Other Parts Used:
FELT TRAP DUCT Front Drum Bearing Drum Bearing Slide - Green Drum Bearing Slide - White
  • Brian from Langhorne, PA
  • Difficulty Level:
    Easy
  • Total Repair Time:
    15 - 30 mins
  • Tools:
    Screw drivers
268 of 424 people found this instruction helpful.
Was this instruction helpful to you?
Thank you for voting!
Dryer would squeal when first starting and then gradually became very noisey.
The repair was done as follows:

1. Removed the door
2. Removed the two screws securing the top panel then removed the panel.
3. Removed the two screws securing the front panel then removed the panel.
4. Removed the screws securing the left side panel then removed side panel and the two leveling feet.
5. Tipped dryer over on its back (you will want to protect your floor, the four screws that attach the heater unit protrude through the back).
6. Disengaged the belt tensioner and removed the belt and the drum.
7. Removed the three Torx screws securing the drum bearing to the drum and discarded old bearing.
8. Removed the four screws securing the bearing retainer to the heater unit.
9. Removed the four screws securing the heater unit and two sensor wires.
10. Lifted heater unit just high enough to remove bearing retainer. Discarded bearing retainer.

The new drum bearing kit is supplied with self tapping screws. I installed the screws into the bearing parts to tap the holes and then removed them prior to assembly.

11. Installed new bearing retainer to back of heater unit using the supplied screws. Install the four screws by hand, finger tight.
12. Re-attached heater unit and tighten screws.
13. Re-attached sensor wires.
14. Tightened the four bearing retainer screws.
15. Attached new drum bearing to drum using the three supplied Torx screws. I used tape to hold everything together while installing the screws.
Tightened the Torxscrews.

Next I used a vacuum to remove all the lint from inside the dryer. I also used a small plastic putty knife to remove the caked on lint on the impeller blades.

16. Inserted drum bearing into bearing retainer.
17. Installed drum belt and belt tensioner.
18. Installed left side panel and feet.
19. Replaced the two grey and two white slide bearings on the front panel. They just slip onto a small post and slide into a slot.
20. Installed front panel. (Rotate drum to help with installation)
21. Installed top panel and door

PROBLEM SOLVED!
Other Parts Used:
Rear Drum Bearing Kit Drum Bearing Slide - Green Drum Bearing Slide - White BELT DRIVE
  • Gene from Kutztown, PA
  • Difficulty Level:
    A Bit Difficult
  • Total Repair Time:
    More than 2 hours
  • Tools:
    Screw drivers
84 of 130 people found this instruction helpful.
Was this instruction helpful to you?
Thank you for voting!
Broken belt
Removed the top of dryer two screws behind door at top then removed top two screws top corner lift dryer tub put belt around the tub then looped belt around the pullies.
Other Parts Used:
BELT DRIVE
  • James from Charleston, MS
  • Difficulty Level:
    Really Easy
  • Total Repair Time:
    15 - 30 mins
  • Tools:
    Screw drivers
57 of 88 people found this instruction helpful.
Was this instruction helpful to you?
Thank you for voting!
Noise at drum
1 Unplug power cord. 2 Remove top and front panels. 3 Remove old bearing, slides and bulb. 4 Install new bearing slides and bulb. Reinstall front and top panels. 5 Restore power and test. Time to repair 25 minutes. Very satisfied with the parts and the time to receive them, very good parts service. Will definately use this service in the future and will highly recommend this company.
Other Parts Used:
Front Drum Bearing Drum Bearing Slide - White Drum Bearing Slide - Green
  • William from Sewell, NJ
  • Difficulty Level:
    Really Easy
  • Total Repair Time:
    15 - 30 mins
  • Tools:
    Pliers, Screw drivers
45 of 61 people found this instruction helpful.
Was this instruction helpful to you?
Thank you for voting!
Dryer squeeked badly when running.
I've always heard it was a simple job to replace the belt and that would solve the problem. I'd defer to others online when they suggest to replace the rear bearing - they are totally right about that suggestion. My bearing basically fell apart in my hands. Not sure if I needed a belt or not, but it's worth replacing while you are tearing the thing apart. It took way longer to tear apart than to put back together. The parts and prices from PartsSelect were perfect. The parts were received in 4 business days as they said and were perfect replacement parts.
Other Parts Used:
Rear Drum Bearing Kit Door Handle - White BELT DRIVE
  • Craig from Castle Rock, CO
  • Difficulty Level:
    A Bit Difficult
  • Total Repair Time:
    1- 2 hours
  • Tools:
    Nutdriver, Screw drivers
31 of 52 people found this instruction helpful.
Was this instruction helpful to you?
Thank you for voting!
Blower wheel shaft hole was rounded out, lamp was out
Removed two screws on dryer top and removed top, removed two screws holding front of cabinet and removed cabinet front to the side, disconnected wires to door switch, removed two bolts from motor mount bracket, pulled motor back to access blower wheel, removed old wheel and installed new one, reversed steps, unscrewed old light bulb and screwed in new one.

Had pure hell getting to drum belt and putting it back onto motor pulley and idler, cussed a little, didn't really help . replaced front of cabinet and top, did test run all worked ok.

This job was a little difficult, espicially accessing the belt and idler pulley...
Other Parts Used:
Blower Wheel
  • Edwin from Eagar, AZ
  • Difficulty Level:
    Difficult
  • Total Repair Time:
    30 - 60 mins
  • Tools:
    Nutdriver, Pliers, Screw drivers, Socket set
29 of 57 people found this instruction helpful.
Was this instruction helpful to you?
Thank you for voting!
blub burned out.
I first throwed the breaker then I took the old bulb out. Put new bulb in. Turned the breaker back on.
It worked great
  • Mary from Oak Point, TX
  • Difficulty Level:
    Really Easy
  • Total Repair Time:
    Less than 15 mins
14 of 19 people found this instruction helpful.
Was this instruction helpful to you?
Thank you for voting!
The light bulb in the dryer burned out
The repair, from the time that the bulb burned out until it was replaced took about six months. I could have shortened the time if I had ordered the bulb sooner. It was difficult because I had to listen to a fair amount of nagging, which, thankfully, has now ceased. I also had to actually go online and finI opened the dryer door, reached in with my right hand (which happened to be holding the new bulb) and screwed the new bulb in. Tip: Screw it in counter-clock wise. This was not mentioned in the instructions. Come to think of it, no instructions were provided. The company might wish to correct that oversight.
  • Colin C. from GENEVA, IL
  • Difficulty Level:
    Very Difficult
  • Total Repair Time:
    More than 2 hours
11 of 11 people found this instruction helpful.
Was this instruction helpful to you?
Thank you for voting!
Burned out interior dryer drum light
Tried to replace with home-store bought 6w light. Looked the same, fit into socket, but didn't work. Actually exploded when I turned it on! Be sure to use OEM part like this one. Worked perfectly!
  • David from Plymouth, MA
  • Difficulty Level:
    Really Easy
  • Total Repair Time:
    Less than 15 mins
11 of 18 people found this instruction helpful.
Was this instruction helpful to you?
Thank you for voting!
  • 1
  • 2
  • 3
Customer Reviews
Average Rating:
★★★★★
★★★★★
25 Reviews
4.4
Filter By Rating:
  • 5 Stars
    18
  • 4 Stars
    3
  • 3 Stars
    2
  • 2 Stars
    0
  • 1 Star
    2
  • 1
  • 2
  • 3
Sort by:
Sorry, we couldn't find any existing reviews that matched. Try using some different or simpler keywords.
  • 1
  • 2
  • 3
You May Also Need?
Model Cross Reference
This part works with the following models:
PartSelect Number: PS10063224
Manufacturer Part Number: WE05X20431
Brand
Model Number
Description
General Electric
653615
Dryer
General Electric
653616
Dryer
General Electric
653617
Dryer
General Electric
65361T0WW
Dryer
General Electric
65361T3WW
Dryer
General Electric
65361T5WW
Dryer
General Electric
65371T0WW
Dryer
General Electric
65371T3WW
Dryer
General Electric
65371T5WW
Dryer
General Electric
664615
Dryer
General Electric
664616
Dryer
General Electric
664617
Dryer
General Electric
66461T0WW
Dryer
General Electric
66461T2WW
Dryer
General Electric
66461T3WW
Dryer
General Electric
66461T5WW
Dryer
General Electric
672410
Dryer
General Electric
672411
Dryer
General Electric
672412
Dryer
General Electric
672510
Dryer
General Electric
672511
Dryer
General Electric
672512
Dryer
General Electric
672710
Dryer
General Electric
672711
Dryer
General Electric
672712
Dryer
General Electric
672810
Dryer
General Electric
672811
Dryer
General Electric
672812
Dryer
General Electric
674310
Dryer
General Electric
674311
Dryer
Customer Service Representative

Get in touch, we're here to help!

Open until 1am EST

Contact Customer Service