


Models
>
WU502
WU502 Maytag Dishwasher - Overview
Sections of the WU502
[Viewing 14 of 14]

 Diagram and Parts List for Maytag Dishwasher")

 Diagram and Parts List for Maytag Dishwasher")
 Diagram and Parts List for Maytag Dishwasher")
 Diagram and Parts List for Maytag Dishwasher")
 Diagram and Parts List for Maytag Dishwasher")


 FRAME & WATER VALVES Diagram and Parts List for Maytag Dishwasher")
 BASE FRAME & MOTOR Diagram and Parts List for Maytag Dishwasher")
Keep searches simple, eg. "belt" or "pump".

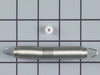
Screw
PartSelect #: PS12349731
Manufacturer #: W11233072
This is a multi-use and multi-appliance screw. It can be used on a microwave, refrigerator, range/oven, air conditioner, dehumidifier, washer, or dryer. The measurements of this screw are 8 x 1/2 inch...
$20.79
In Stock

Screw, 8/18 x 3/8
PartSelect #: PS11746840
Manufacturer #: WP90767
This screw is sold individually.
$5.42
In Stock

Hose Clamp
PartSelect #: PS11743008
Manufacturer #: WP596669
This hose clamp is used in a wide variety of household appliances. Most often it is found in washers, dishwashers, refrigerators, freezers, dehumidifiers, garbage disposals, or air conditioners. This ...
$11.80
In Stock

Hose Clamp
PartSelect #: PS11740613
Manufacturer #: WP285655
The hose clamp is used to hold the water hose in place which will prevent the hose from leaking water. Sometimes the clamp may lose its ability to latch on, causing a leaking washer. For the installat...
$11.10
In Stock

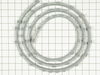
Clear Belt
PartSelect #: PS2347264
Manufacturer #: 6-9021150
The parts specs are: 25 3/8" long and 1/4" wide.
$53.44
In Stock

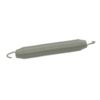
Float Switch
PartSelect #: PS11747680
Manufacturer #: WP99002560
Water that fills your dishwasher lifts this float. When it reaches a certain level, the float triggers the float switch to shut off, thereby shutting off the flow of water into the dishwasher.
$55.39
In Stock


Accessory Rack Pivot Clip
PartSelect #: PS2097676
Manufacturer #: 912098
This accessory rack pivot clip is all blue in color and it is made entirely of plastic.
$6.98
In Stock

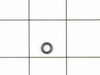
Inlet Hose Washer
PartSelect #: PS11757437
Manufacturer #: WPY013783
This inlet hose washer, also known as a high pressure inlet hose washer, is used in washing machines, refrigerators, freezers, and dishwashers. The function of this part is to create a watertight seal...
$8.00
In Stock

Screw, 8-18 x 1/2
PartSelect #: PS11741443
Manufacturer #: WP3390631
This screw is sold individually.
$7.84
In Stock


Questions And Answers for WU502
We're sorry, but our Q&A experts are temporarily unavailable.
Please check back later if you still haven't found the answer you need.
Sort by:
- < Prev
- 1
- Next >
Search filter:
Clear Filter
Your search term must have 3 or more characters.
Keep searches simple. Use keywords, e.g. "leaking", "pump", "broken" or "fit".
Sorry, we couldn't find any existing answers that matched.Try using some different or simpler keywords, or submit your new question by using the "Ask a Question" button above!
Lois
March 9, 2020
Can i order replacement racks which are wore out n scratch my dishes
For model number WU502
Hello Lois,
Thank you for your question. We apologize, but the part you're looking for is discontinued and no longer available from our website. We suggest getting in contact with the manufacturer to find a substitute replacement part that would be compatible to your model. We hope this helps.
Was this helpful?
Thank you for voting!
Chris
March 31, 2022
How do I drain standing water from clog
For model number WU502
Hello Chris, thank you for writing. Scoop out the water in your dishwasher, Check the drainage system, Clean the pump, Clean the spray arms, Clean the dishwasher filter, Assess the supply line. After you locate the drain line near the back of the dishwasher right under the filter screen. Mix together 1/2 cup of baking soda and 1/2 cup of water to form a paste. Pour the paste into the drain line through the filter screen. Pour 1/2 cup vinegar down the drain line and let the solution set for 15 minutes. After 15 minutes, pour hot water down the drain line to flush out the baking soda solution. If you need help placing an order, customer service is open 7 days a week. Please feel free to give us a call. We look forward to hearing from you.
Was this helpful?
Thank you for voting!
- < Prev
- 1
- Next >
Common Symptoms of the WU502
[Viewing 10 of 10]Leaking
Fixed by
these parts
these parts


Show All
Not draining
Fixed by
these parts
these parts


Show All
Will not fill with water
Fixed by
these parts
these parts

Show All
Noisy
Fixed by
these parts
these parts

Show All
Not cleaning dishes properly
Fixed by
these parts
these parts
Show All
Door latch failure
Fixed by
these parts
these parts
Show All
Will not dispense detergent
Fixed by
these parts
these parts


Show All
Will Not Start
Fixed by
these parts
these parts
Show All
Not drying dishes properly
Fixed by
these parts
these parts

Show All
Door won’t close
Fixed by
these parts
these parts
Show All


Keep searches simple. Use keywords, e.g. "leaking", "pump", "broken" or "fit".
replace door seal
Remove old seal by pulling out tabs one at a time.
To install new seal, I had to remove the front control panel and door panel to access the back side of all of the slots that the new seal tabs go into. Using needlenose pliers i pulled each tab individually until they were locked into place.
Replace door and control pan ... Read more el.
To install new seal, I had to remove the front control panel and door panel to access the back side of all of the slots that the new seal tabs go into. Using needlenose pliers i pulled each tab individually until they were locked into place.
Replace door and control pan ... Read more el.
Read less
Parts Used:

-
Jeffrey from Wilmington, DE
-
Difficulty Level:A Bit Difficult
-
Total Repair Time:1- 2 hours
-
Tools:Pliers, Screw drivers
36 of 41 people
found this instruction helpful.
Was this instruction helpful to you?
Thank you for voting!
Right Side Door Springs Broken
With the dishwasher door open remove the 3 srews connecting the top of the dishwasher to the bottom of the kitchen counter top. Remove the lower access panel from the dishwasher and lower the dishwasher about 1/4 inch in the front and back of the dishwasher). Once you have lowered the dishwasher enough slide the dishwasher out about 6 inc
... Read more
hes (enough to gain access to the door springs on the left and right side). Remove all broken spring parts and replace using new springs. The left side of the door contained a single heavy duty spring and the right side of the door contained a heavy duty and light duty 'helper' spring. I replaced only the right side springs since the left side spring was in excellent condition. When the springs are installed slide the dishwasher back into its original position and raise the dishwasher back up to its original height using the front and back adjustment screws. Replace the 3 screws holding the top of the dishwasher secure to the bottom of the countertop. Ensure that the door opens, closes and latches smoothly and then replace the lower access panel. Job done.
Read less
Parts Used:


-
Rock from Freeport, ME
-
Difficulty Level:Easy
-
Total Repair Time:15 - 30 mins
-
Tools:Screw drivers, Wrench (Adjustable)
25 of 29 people
found this instruction helpful.
Was this instruction helpful to you?
Thank you for voting!
Dishes not being washed, water below heater element
I attempted to fix it about a year ago. Took apart the screen center stem and water spinner.
I could not find anything wrong. The machine was used very infrequently over the years. Recently my wife approached me again to fix it and knowing I didn't find any thing the first time: I took the lower panel strip off and found the translu ... Read more cent belt broken. I found your site matched up a belt size and ordered it. Three days later it arrived, I installed it and everything seems to work. The water drains and I'm back in business. It was so easy I was embarrassed I did not fix it the first time.
I could not find anything wrong. The machine was used very infrequently over the years. Recently my wife approached me again to fix it and knowing I didn't find any thing the first time: I took the lower panel strip off and found the translu ... Read more cent belt broken. I found your site matched up a belt size and ordered it. Three days later it arrived, I installed it and everything seems to work. The water drains and I'm back in business. It was so easy I was embarrassed I did not fix it the first time.
Read less
Parts Used:
-
Theodore from Madison, CT
-
Difficulty Level:Really Easy
-
Total Repair Time:30 - 60 mins
-
Tools:Screw drivers, Socket set
25 of 31 people
found this instruction helpful.
Was this instruction helpful to you?
Thank you for voting!