Models > WRF767SDHZ00 > Symptoms > Light not working

Parts That Fix Whirlpool Refrigerator WRF767SDHZ00 Light not working

Light not working is a commonly reported symptom for the WRF767SDHZ00 Whirlpool Refrigerator, and we have put together a full guide on how to fix this. This advice is based on feedback from people who own this exact appliance. We have listed the most common parts for your WRF767SDHZ00 Whirlpool Refrigerator that will fix Light not working. We have included repair instructions, and helpful step-by-step video tutorials. If you are experiencing this issue, not to worry, DIYers just like you have fixed this, and shared their experience to help you!

Fixes Symptom 69% of time
★★★★★
★★★★★
83 Reviews

Rated by 47 customers 


Really Easy 

Less than 15 mins 

Ratings submitted by customers like you who bought this part.   

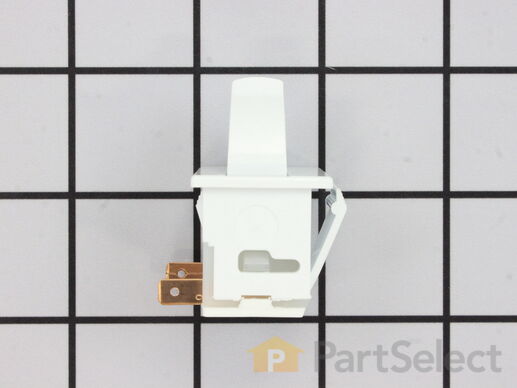
Door switch turns the light off when you close the door.

$ 38.48
  In Stock
PartSelect Number PS12728638
Manufacturer Part Number W11384469

Replacing your Kenmore Refrigerator Refrigerator Door Switch

Replacing your Refrigerator Door Switch

Customer Repair Stories

Light Switch broke

An easy job for smaller hands. Removed the two bolts holding the light cover. Removed two electrical connections from the old switch by pinching the retaining clip,removed the switch, snapped in the new one and re-attached the connectors. Your online illustrations helped me to know that the plastic housing for the light switch would only swing down so far and was not intended to be removed. Saved me from breaking that plastic cover's tabs. This home repair saved me more than 5 times the cost of hiring a professional to do it. Very happy homeowner.
  • James Richard from St. Cloud, MN
  • Difficulty Level:
    Easy
  • Total Repair Time:
    Less than 15 mins
  • Tools:
    Socket set
44 of 60 people found this instruction helpful.
Was this instruction helpful to you?
Thank you for voting!

Lights inside refrigerator not working

I used a flat-head screwdriver to pop out the old light rocker switch. Then, I unplugged the wires, plugged them into the new light rocker switch, and then popped the new switch into the hole. That's it! Lights began working again.
  • Clint from Rayville, MO
  • Difficulty Level:
    Really Easy
  • Total Repair Time:
    Less than 15 mins
  • Tools:
    Screw drivers
119 of 194 people found this instruction helpful.
Was this instruction helpful to you?
Thank you for voting!
Fixes Symptom 29% of time
★★★★★
★★★★★
34 Reviews

Rated by 25 customers 


Really Easy 

Less than 15 mins 

Ratings submitted by customers like you who bought this part.   

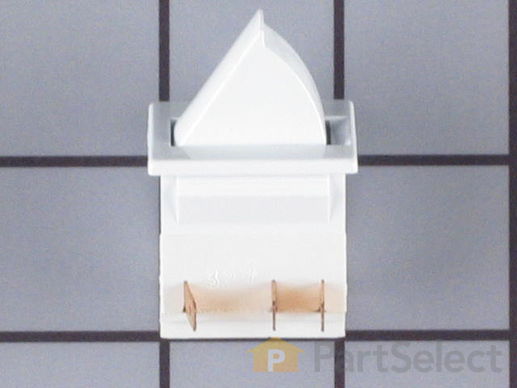
This light switch may also be known as a refrigerator door switch or a light switch kit, and is compatible with your refrigerator. The function of the refrigerator door switch is to turn on the light when your fridge door is open, and to make sure it is off when your refrigerator door is closed. The reason you would need to replace this part is if your light is not turning on when your door is open. For this repair, you will need a putty knife, and a small flat-blade screwdriver.

$ 27.65
  In Stock
PartSelect Number PS12731166
Manufacturer Part Number W11396033

Replacing your Maytag Refrigerator Door Switch

Replacing your Door Switch

Customer Repair Stories

Light switch rocker broke, disabling freezer internal light, water dispenser, and ice dispenser

Very simple. Matched female plugs with respective male color coded prong; pushed together then inserted unit in slot of freezer sidewall and rotated into position...job done.
  • Kenneth from Newton Grove, NC
  • Difficulty Level:
    Really Easy
  • Total Repair Time:
    Less than 15 mins
9 of 11 people found this instruction helpful.
Was this instruction helpful to you?
Thank you for voting!

while closing the door, the light switch fouled, resulting in the switch breaking

I used a flat screwdriver and released the lock tab on the bottom of the light switch, and pried the switch out, being careful to not damage the plastic around the mounting place of the switch, unplugged wiring from old switch, plugged in the new one and pushed the new switch into place. Job finished light switch now working.
  • Kevin from Beckley, WV
  • Difficulty Level:
    Really Easy
  • Total Repair Time:
    Less than 15 mins
  • Tools:
    Screw drivers
59 of 90 people found this instruction helpful.
Was this instruction helpful to you?
Thank you for voting!
Fixes Symptom 3% of time
★★★★★
★★★★★
5 Reviews

Rated by 4 customers 


Easy 

30 - 60 mins 

Ratings submitted by customers like you who bought this part.   

$ 148.98
  In Stock
PartSelect Number PS17216453
Manufacturer Part Number W11683243

Customer Repair Stories

lights out in main refrigerator

researched on line and found the wiring was in series and I the suggestion was to replace the first light in the series that was in the freezer. Ordered the replacement light board and took out the existing light and pooped in the new one. Lights now all work! 15 minutes at tops.
  • fred from CHESTERFIELD, MO
  • Difficulty Level:
    Very Easy
  • Total Repair Time:
    Less than 15 mins
13 of 13 people found this instruction helpful.
Was this instruction helpful to you?
Thank you for voting!

LED Light stopped working

Removing the old unit was difficult. The light was clearly designed for installation not for ease of repair. Since I was concerned about marring the surface of the refrigerator I used a paint scraper to get under the lip of the light and another smaller paint scraper to lift the unit away from the body of the refrigerator. It does not just "pop off". I eventually did get it free without any damage to the wall of the refrigerator. The repair was then very easy. There was a connector that was easy to separate allowing for the removal of the old unit without cutting any wires. The new unit had a mating connector, which easily connected to the old connector in the refrigerator. After some pushing I was able to install the new unit into the hole in the refrigerator. It does not exactly "snap in".
  • Paul from SUDBURY, MA
  • Difficulty Level:
    A Bit Difficult
  • Total Repair Time:
    30 - 60 mins
18 of 23 people found this instruction helpful.
Was this instruction helpful to you?
Thank you for voting!