Models > WRF560SEYM01 > Symptoms > Ice maker not making ice

Parts That Fix Whirlpool Refrigerator WRF560SEYM01 Ice maker not making ice

Ice maker not making ice is a commonly reported symptom for the WRF560SEYM01 Whirlpool Refrigerator, and we have put together a full guide on how to fix this. This advice is based on feedback from people who own this exact appliance. We have listed the most common parts for your WRF560SEYM01 Whirlpool Refrigerator that will fix Ice maker not making ice. We have included repair instructions, and helpful step-by-step video tutorials. If you are experiencing this issue, not to worry, DIYers just like you have fixed this, and shared their experience to help you!

Fixes Symptom 78% of time
★★★★★
★★★★★
220 Reviews

Rated by 215 customers 


Really Easy 

15 - 30 mins 

Ratings submitted by customers like you who bought this part.   

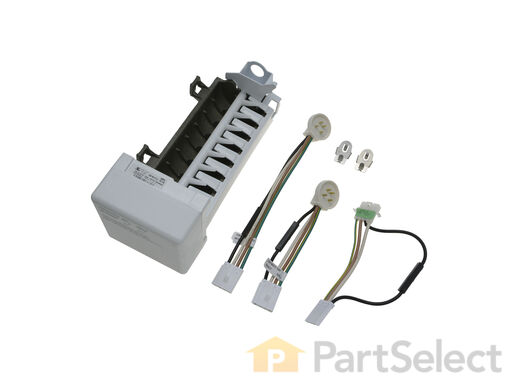
This ice maker (Complete Icemaker Assembly, Whirlpool Icemaker Kit, Ice Maker Assembly, Refrigerator Ice Maker, Icemaker) receives water from the water inlet valve, freezes it, and dispenses it into the ice bucket until the bucket is full. Ice makers will need to be replaced every 3-10 years depending on the frequency of usage, and water quality. You can perform a voltage test with a multimeter or perform an inlet valve test. If you’re unable to make ice, or notice leaks then it may be a sign your ice maker is damaged and could be in need of a replacement. This model measures approximately 11x5 inches, is constructed of plastic and metal, and comes in black/silver. This ice maker is a complete assembly; the whole assembly attaches to the wall of your freezer.

$ 147.07
  In Stock
PartSelect Number PS358591
Manufacturer Part Number 4317943

Replacing your Kenmore Refrigerator Replacement Ice Maker

Replacing your Replacement Ice Maker

Customer Repair Stories

No Ice in the Ice Maker

I am NOT a handyman, and my family laughed at me when I said I was going to fix the ice maker all by myself. I ordered a replacement ice maker. When it arrived, I opened the box and read the instructions. It seemed easy. I removed the old ice maker, with a socket set. I then took off the shut off lever from the old one and placed it on the new one, since the new one didn't come with it. I then put the new one in place. All the parts fit perfectly. The ice machine was making ice within an hour. My family was amazed... and I got the last laugh!
  • Chris from Duluth, GA
  • Difficulty Level:
    Really Easy
  • Total Repair Time:
    Less than 15 mins
  • Tools:
    Socket set
195 of 224 people found this instruction helpful.
Was this instruction helpful to you?
Thank you for voting!

Ice Maker quit working, I could manually cycle unit but then the water would overflow when unit was re-filling.

I backed out the 2 top screws about a quarter inch and then removed bottem screw with a quater inch nut driver. I then lifted Ice Maker clear of the two top screws and lowered it enough to unclip the power connection with a small screwdriver. The new Ice Maker was wired correctley for my refrigeator so all I had to do wea reconnect the power connection and mount new Ice Maker on the two top screws and install the bottem screw. It took e while for the new Ice Maker to start it's cycle but after it did, it worked GREAT. Part Select service was OUTSTANDING, ordered part one day and received the next. THANKS!!!!
  • Max from Green Castle, IN
  • Difficulty Level:
    Really Easy
  • Total Repair Time:
    15 - 30 mins
  • Tools:
    Nutdriver, Screw drivers
584 of 620 people found this instruction helpful.
Was this instruction helpful to you?
Thank you for voting!
Fixes Symptom 7% of time
★★★★★
★★★★★
8 Reviews

Rated by 26 customers 


Easy 

15 - 30 mins 

Ratings submitted by customers like you who bought this part.   

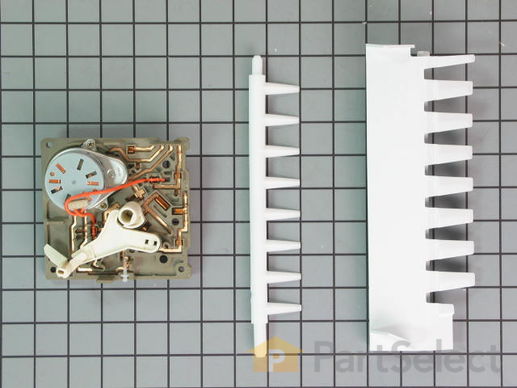
This kit includes the module motor, ejector arm, and ice stripper arm. The complete icemaker is sold separately.

$ 116.11
  In Stock
PartSelect Number PS733947
Manufacturer Part Number 8201515

Replacing your Whirlpool Refrigerator Icemaker Motor Kit

Replacing your Icemaker Motor Kit

Customer Repair Stories

Ice Magic Plus stopped making ice

First I removed the icemaker from the freezer by removing two horizontal screws holding it to the side wall, and one vertical screw holding the front to a bracket coming off the side wall. Then I used a flat screwdriver to unlock the electrical plug. (After doing this, I realized that this wasn't necessary at all, and this part could have been changed just as easily without removing the icemaker.) On the front, there is a white cover with Ice Maker Plus. Use a flat screwdriver to unlock the tangs and remove the cover. There are three screws in the corners that once removed, will allow the motor assy. to be gently pulled straight out. On the back of the part, you will see many gold lands that the timer touches. I don't think there was anything wrong with my motor. I had two spots where the gold plating was worn off, so I suspect it was not making contact, and the whole process would stop. Slide the new part in place making sure the teeth on the gears line up (not a big deal), and secure with the screws. Install cover and you're done. Mine has been making ice like it was brand new.
  • George from Hammond, LA
  • Difficulty Level:
    Really Easy
  • Total Repair Time:
    Less than 15 mins
  • Tools:
    Screw drivers
25 of 35 people found this instruction helpful.
Was this instruction helpful to you?
Thank you for voting!

KITCHEN AID SIDE-BY-SIDE REFRIGERATOR ICE-MAKER stopped working due to a broken motor assembly.

Changing the KITCHENAID MOTOR ASSEMBLY TO THE ICE-MAKER was fairly straightforward. The hardest part was figuring out WHAT was broken and how to fix it. I was determined to save myself hundreds of dollars by doing it myself and avoiding a visit by the 'repairman'.

1.) Went to KitchenAid website to look at Parts List for my side-by-side refrigerator and ice maker assembly (a PDF file, easily downloadable) . The illustrations helped me visualize the assembly and various parts involved.
2.) Removed cover on front of ice maker.
3.) Removed hex-head screw on undersurface of icemaker on the right, which stablilizes a plastic cover for the electrical connector to the ice maker. Once this is off, it's then possible to slide the ice maker out.
4.) Slide the ice maker out from it's 'shelf' in the freezer. You won't be able to completely remove it until you disconnect the power supply.
5.) Disconnect the multi-pin power connector. (It's probably safest to unplug the refrigerator altogether before doing this, but I did not. No exposed metal wiring or connectors. No problems when I did it this way.)
6.) Once the ice-maker was out, remove the white cover from the motor assembly (on the left side of the unit).
7.) Remove the three screws from the black housing of the motor assembly. (This is where I discovered that the connector between the motor and drive-train was broken and needed to be replaced.)
8.) Remove and replace the drive system for the ice cube ejector.
9.) Then reverse the steps to reassemble.

This may seem a bit vague, but it's really quite straightforward once the ice maker is out of the freezer. The replacement motor assembly includes the motor, the motor housing, the drive-train, and the ice-cube ejector. Very easy to re-asemble.

Shopping for and ordering the part took some time since there are so many different after-market parts dealers. In all honesty, I'm glad I decided on PartSelect.com. They had a decent price, safe checkout, and timely delivery. All the essentials of a good online store.

Thanks, and good luck to the next guy who has to deal with a KitchenAid snafu.
  • ANDREW from DURANGO, CO
  • Difficulty Level:
    A Bit Difficult
  • Total Repair Time:
    30 - 60 mins
  • Tools:
    Nutdriver, Screw drivers
56 of 76 people found this instruction helpful.
Was this instruction helpful to you?
Thank you for voting!
Fixes Symptom 5% of time
★★★★★
★★★★★
1 Review

Rated by 6 customers 


Easy 

30 - 60 mins 

Ratings submitted by customers like you who bought this part.   

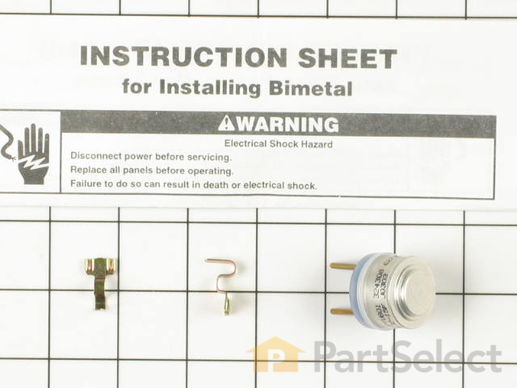
The ice maker thermostat, also known as the cycling thermostat, controls and regulates the ice maker ejection cycle by monitoring the temperature inside the freezer to determine when to release the ice into the bin and start the ice making cycle again. If your ice maker is making unusual noises, or if the ice maker is not making or dispensing ice, there could be an issue with the thermostat. Before you begin this repair, make sure the power is disconnected from your refrigerator, and that any food that may spoil is safely stored. This is an OEM part and is sourced directly from the manufacturer. This thermostat is sold individually, and comes with two attachment clips.

$ 62.09
  In Stock
PartSelect Number PS11743313
Manufacturer Part Number WP627985

Replacing your Kenmore Refrigerator Cycling thermostat

Replacing your Cycling thermostat

Customer Repair Stories

ice maker did not make ice

The ice maker was not getting water. I hotwired the water valve by switching the connectors for the water dispenser and ice maker water valves and water flowed into the icemaker when the water dispenser lever was pushed. I wronly assumed the water valve was good. I removed the icemaker and determined that the gear motor was not getting power in the position the icemaker had stopped.In this position, the thermostat determines when the motor gets power so I replaced the thermostat. The icemaker still would not get water! As it turns out, the water solenoid was sticking due to a deteriorated rubber washer which let the solenoid plunger get too far out of the magnetic field. I replaced the water solenoid assy and all is well. Don't get fooled by hotwiring the valve. If it isn't getting water, the solenoid probably is the culprit.
  • DAVID from TINLEY PARK, IL
  • Difficulty Level:
    A Bit Difficult
  • Total Repair Time:
    30 - 60 mins
  • Tools:
    Nutdriver
47 of 61 people found this instruction helpful.
Was this instruction helpful to you?
Thank you for voting!

No ice in ice trey

The easiest thing to do was pull the ice make off. After taking the 3 screws out of the wall of the freezer, take a screwdriver (flathead) and push on the tab for the electrical plug and wiggle the cord out. Then you can take 3 screws out for the main cover and another 2 screws on the next cover. There's the part, pop it out and replace holding pins and start the process of putting back together the opposite way you took it apart.
  • Wayne from Leesburg, FL
  • Difficulty Level:
    Really Easy
  • Total Repair Time:
    15 - 30 mins
  • Tools:
    Screw drivers, Socket set
78 of 100 people found this instruction helpful.
Was this instruction helpful to you?
Thank you for voting!
Fixes Symptom 3% of time
★★★★★
★★★★★
13 Reviews

Rated by 25 customers 


Easy 

30 - 60 mins 

Ratings submitted by customers like you who bought this part.   

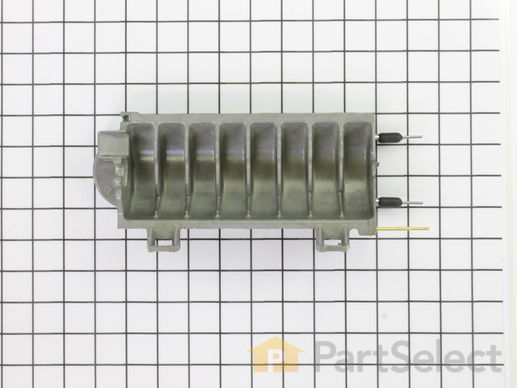
This is an ice maker mold and heater assembly for a refrigerator ice maker. It is used with modular style icemakers and is located in the freezer section of the refrigerator. This ice mold is flake resistant which prevents the coating on the mold from flaking into the ice cubes when the ice mold begins to wear. The ice mold forms the ice cubes and the heater allows the ice cubes to fall from the ice mold to drop them into the ice bucket. You will need to remove the ice maker from the refrigerator to access the mold and heater assembly. This is a genuine replacement part.

$ 165.75
  On Order
PartSelect Number PS11749915
Manufacturer Part Number WPW10190929

Replacing your Kenmore Refrigerator Ice Mold

Replacing your Ice Mold

Customer Repair Stories

The black plastic or teflon coating on the ice mold was coming off in flakes and freezing in the ice cubes

I took out the ice collection box and auger to get access to the three screws holding the ice maker assembly against the left wall of the freezer. You can use a screwdriver or a nut driver. I then unpluged the assembly and wiggled it loose from the water fill tube. I assumed that unplugging the unit would disable the water valve but I put a plastic tub under the fill tube just in case. I studied the assembly on the kitchen table for a few minutes before I disasembled it. After removing a snapon plastick cover I removed three or four screws on the gearbox and was able to pull and wiggle the parts apart. The heater contacts have rubber O rings so you have to be firm pulling the mould out of and into the gearbox mount. Make sure it is fully seated. On reassembly note that the ice kicking arm is notched so it fits into the gearbox only one way and it helps to have it in position when you screw the gearbox back on. I also found the plastic ice guide that fits on top of the mold a little awkward in snaping back together. Make sure its fingers space evenly with the ice kicking arms.
  • Roger from Sunnyvale, CA
  • Difficulty Level:
    Easy
  • Total Repair Time:
    30 - 60 mins
  • Tools:
    Nutdriver, Screw drivers
32 of 42 people found this instruction helpful.
Was this instruction helpful to you?
Thank you for voting!

Ice maker mold was cracked and leaking water into the bin which then froze all the cubes together.

I removed the ice maker assembly from the freezer compartment (four nuts/ nut driver) and unplugged the wire harness. I discovered the nature of the problem and I went on the Internet to look for replacement parts expecting I'd have to buy the entire ice maker. When I found PartSelect.com I looked through the pictures of the parts available for my ice maker. I found the correct part quickly and easily. And having an acurate photo on the site, I was able to match all the key features of the mold I had with the one on the screen. I ordered the part, and installed it the day it arrived with just a Phillips screwdriver and a nut driver. It functions perfectly.
  • George from Cottage Grove, MN
  • Difficulty Level:
    Really Easy
  • Total Repair Time:
    Less than 15 mins
  • Tools:
    Nutdriver, Screw drivers
28 of 30 people found this instruction helpful.
Was this instruction helpful to you?
Thank you for voting!
Fixes Symptom 2% of time
★★★★★
★★★★★
101 Reviews

Rated by 15 customers 


Really Easy 

15 - 30 mins 

Ratings submitted by customers like you who bought this part.   

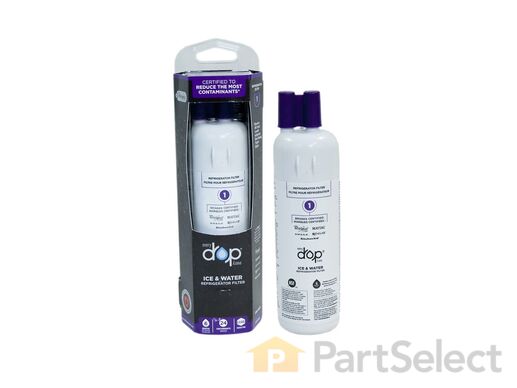
This is an OEM replacement ice and water filter for your refrigerator. In side-by-side refrigerators, it is found in the top right corner or the bottom left grille. In bottom-freezer refrigerators, the filter is in the bottom left grille. In top-freezer units, the filter is located in the middle of the refrigerator. This NSF certified filter reduces 28 contaminants including pharmaceuticals, metals, minerals, pesticides, cysts, industrial chemicals, Class I Particulates and chlorine. It is made up of coconut carbon block and has three layers of filtration. The first layer is particle filtration that helps block larger contaminants. The second layer is micro-filtration, which prevents medium-sized impurities from passing. The third layer is called absorption filtration, which absorbs microscopic-sized pollutants. It measures 2 inches deep, 2 inches wide, 1-1/2 inches high, and weighs 0.5 lbs. To ensure your filter is working its best, it needs to be replaced every six months. This single filter has a simple, quick-turn installation feature that does not require any tools.

$ 103.96
  In Stock
PartSelect Number PS11701542
Manufacturer Part Number EDR1RXD1

Customer Repair Stories

The refrigerator display said I need to replace the filter.

When the filter arrived, I removed it from the package.
Upon reading the instructions, I removed the old filter.
When I removed the old filter I NOTICED HOW IT CAME
OUT SO THAT I COULD HOLD THE NEW FILTER IN
THE SAME POSITION AND REPLACED IT WITH THE
NEW IN THE SAME POSITION. When I closed the cover
door, I went to the display panel and reset water filter display.
  • ronald from SEVERNA PARK, MD
  • Difficulty Level:
    Really Easy
  • Total Repair Time:
    Less than 15 mins
8 of 8 people found this instruction helpful.
Was this instruction helpful to you?
Thank you for voting!

no problem. the ice and water need to be replaced every 6 months

Took off the cover, pulled out the old filter, inserted the new one and closed the door.
  • Patricia from ALAMEDA, CA
  • Difficulty Level:
    Really Easy
  • Total Repair Time:
    15 - 30 mins
15 of 25 people found this instruction helpful.
Was this instruction helpful to you?
Thank you for voting!
Fixes Symptom 1% of time
★★★★★
★★★★★
43 Reviews

Rated by 10 customers 


Very Easy 

15 - 30 mins 

Ratings submitted by customers like you who bought this part.   

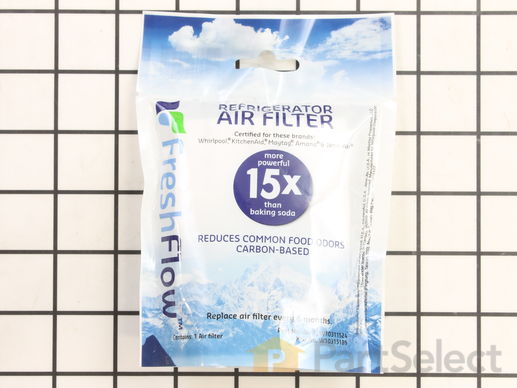
This Refrigerator Air Filter is a white 1.8x3.2" plastic filter which neutralizes odor and bacteria in the air. It should be replaced every six months at a minimum. Refer to your user manual and model number to see if this filter is right for your fridge. Location for storage of the air filter may vary from model to model, but generally, you will find a small cover on the back-middle-top of your fridge, which can be popped off to reveal the air filter, which can be easily changed out from there. This part does not come sold with the indicator; it is the filter only. Sold individually.

$ 21.56
  In Stock
PartSelect Number PS2580853
Manufacturer Part Number W10311524

Replacing your Whirlpool Refrigerator Refrigerator Air Filter

Replacing your Refrigerator Air Filter

Customer Repair Stories

Changed air filter

Very simple, easy, and quick! Anybody can do it!!
  • Tom from LONGMONT, CO
  • Difficulty Level:
    Very Easy
  • Total Repair Time:
    Less than 15 mins
3 of 4 people found this instruction helpful.
Was this instruction helpful to you?
Thank you for voting!

air filter needed replacement

pulled the top shelf and poped open the door and replaced the filter
  • David from Dublin, NH
  • Difficulty Level:
    Very Easy
  • Total Repair Time:
    Less than 15 mins
3 of 3 people found this instruction helpful.
Was this instruction helpful to you?
Thank you for voting!
Fixes Symptom 1% of time
★★★★★
★★★★★
15 Reviews

Rated by 4 customers 


Very Easy 

15 - 30 mins 

Ratings submitted by customers like you who bought this part.   

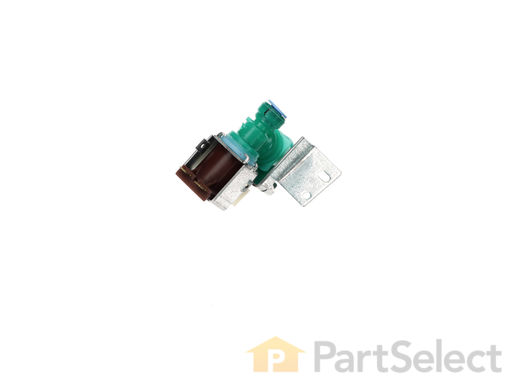
When energized, this part releases water from the supply line into the ice mold.

$ 124.16
  In Stock
PartSelect Number PS11750831
Manufacturer Part Number WPW10238100

Customer Repair Stories

Leaking around icemaker hose going in to part

Took lower back board off, took part off to expose it so I could see where it was leaking, got part number, ordered it.
Shut off water to frig at wall shut off, unhooked both hoses and plug, hooked new part up, turned water back on. Watched couple days to make sure it wasn't leaking. Vacuumed out back good, which I was amazed didn't really need it, hooked part back in place, replaced back with screws.
  • Cathy from LASCASSAS, TN
  • Difficulty Level:
    Very Easy
  • Total Repair Time:
    Less than 15 mins
  • Tools:
    Screw drivers, Wrench (Adjustable)
2 of 2 people found this instruction helpful.
Was this instruction helpful to you?
Thank you for voting!

Valve leaking water

Unhooked water line from house to fridge then unbolted valve from fridge body then removed plastic water line from fridge to valve by pushing in on pex release tab then reversed process with new valve. Works like a charm. No more leakage. Wood floor is dry and Happy!
  • Steven from WEST JORDAN, UT
  • Difficulty Level:
    Really Easy
  • Total Repair Time:
    30 - 60 mins
  • Tools:
    Nutdriver, Pliers, Screw drivers, Socket set
3 of 4 people found this instruction helpful.
Was this instruction helpful to you?
Thank you for voting!
Fixes Symptom 1% of time
★★★★★
★★★★★
34 Reviews

Rated by 25 customers 


Really Easy 

Less than 15 mins 

Ratings submitted by customers like you who bought this part.   

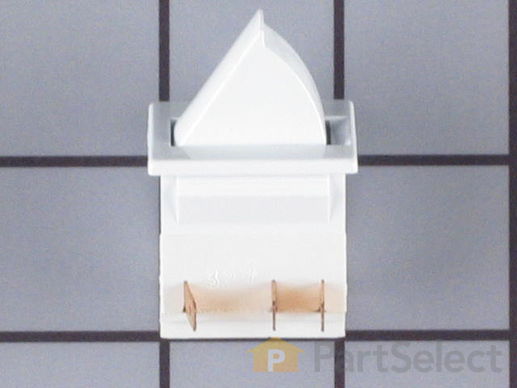
This light switch may also be known as a refrigerator door switch or a light switch kit, and is compatible with your refrigerator. The function of the refrigerator door switch is to turn on the light when your fridge door is open, and to make sure it is off when your refrigerator door is closed. The reason you would need to replace this part is if your light is not turning on when your door is open. For this repair, you will need a putty knife, and a small flat-blade screwdriver.

$ 27.65
  In Stock
PartSelect Number PS12731166
Manufacturer Part Number W11396033

Replacing your Maytag Refrigerator Door Switch

Replacing your Door Switch

Customer Repair Stories

Light switch rocker broke, disabling freezer internal light, water dispenser, and ice dispenser

Very simple. Matched female plugs with respective male color coded prong; pushed together then inserted unit in slot of freezer sidewall and rotated into position...job done.
  • Kenneth from Newton Grove, NC
  • Difficulty Level:
    Really Easy
  • Total Repair Time:
    Less than 15 mins
9 of 11 people found this instruction helpful.
Was this instruction helpful to you?
Thank you for voting!

while closing the door, the light switch fouled, resulting in the switch breaking

I used a flat screwdriver and released the lock tab on the bottom of the light switch, and pried the switch out, being careful to not damage the plastic around the mounting place of the switch, unplugged wiring from old switch, plugged in the new one and pushed the new switch into place. Job finished light switch now working.
  • Kevin from Beckley, WV
  • Difficulty Level:
    Really Easy
  • Total Repair Time:
    Less than 15 mins
  • Tools:
    Screw drivers
59 of 90 people found this instruction helpful.
Was this instruction helpful to you?
Thank you for voting!
Fixes Symptom 1% of time

Rated by 1 customer 


Easy 

15 - 30 mins 

Ratings submitted by customers like you who bought this part.   

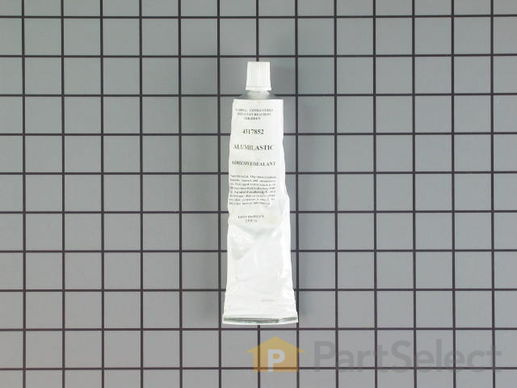
Also known as Alumilastic Cement.

  No Longer Available
PartSelect Number PS11742366
Manufacturer Part Number WP4317852