Models > WFW9200SQA12 > Symptoms > Lid or door won’t close

Parts That Fix Whirlpool Washer WFW9200SQA12 Lid or door won’t close

Lid or door won’t close is a commonly reported symptom for the WFW9200SQA12 Whirlpool Washer, and we have put together a full guide on how to fix this. This advice is based on feedback from people who own this exact appliance. We have listed the most common parts for your WFW9200SQA12 Whirlpool Washer that will fix Lid or door won’t close. We have included repair instructions, and helpful step-by-step video tutorials. If you are experiencing this issue, not to worry, DIYers just like you have fixed this, and shared their experience to help you!

Fixes Symptom 76% of time
★★★★★
★★★★★
42 Reviews

Rated by 8 customers 


Very Easy 

15 - 30 mins 

Ratings submitted by customers like you who bought this part.   

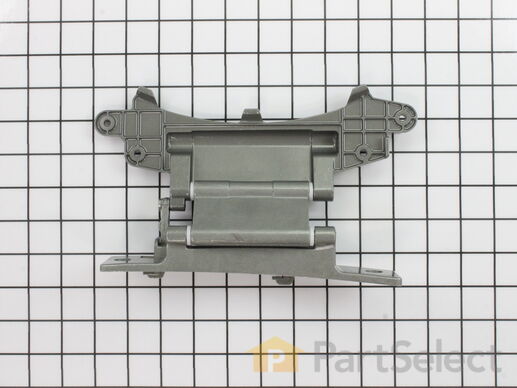
This door hinge is a genuine OEM replacement part that is made to fit various front-load washing machines. It is a high-quality replacement that is guaranteed to fit with your model. The door hinge connects the door of the washing machine to the main body of the appliance, allowing the door to open and close smoothly. If the washer door hinge is damaged or no longer securely attached, you will likely have difficulty opening or closing the door. You may also notice excessive movement in the hinge mechanism, and misalignment of the door when closing. You may also notice that the washer door cannot stay closed properly while the washer is running.

$ 168.78
  In Stock
PartSelect Number PS11745072
Manufacturer Part Number WP8183202

Replacing your Whirlpool Washer Washing Machine Door Hinge

Replacing your Washing Machine Door Hinge

Customer Repair Stories

Washer hinge casting broke

Removed washer door from washer. Lay door on work bench (table). You need to remove screws from around most of the washer door to remove broken hinge. Install hinge into door frame. Fasten all screws for hinge and door frame. Reinstall complete door assembly onto washer with removed screws. Helpful to have some hold door for ease of alignment. Tools used: 1/4 inch torque #15 bit with 1/4inch nut driver.
  • Robert from GILBERT, AZ
  • Difficulty Level:
    Really Easy
  • Total Repair Time:
    15 - 30 mins
  • Tools:
    Nutdriver
10 of 11 people found this instruction helpful.
Was this instruction helpful to you?
Thank you for voting!

Not a problem

Unscrewed door screws from washer lifted the door up a little removed door. Unscrewed screws from the glass side and f door remove hinge replaced with new hinge screwed glass door back together. Attached door back to washer screwed screws back in done
  • Theresa from BATESBURG, SC
  • Difficulty Level:
    Very Easy
  • Total Repair Time:
    15 - 30 mins
  • Tools:
    Nutdriver
47 of 50 people found this instruction helpful.
Was this instruction helpful to you?
Thank you for voting!
Fixes Symptom 12% of time
★★★★★
★★★★★
3 Reviews

Rated by 2 customers 


Easy 

30 - 60 mins 

Ratings submitted by customers like you who bought this part.   

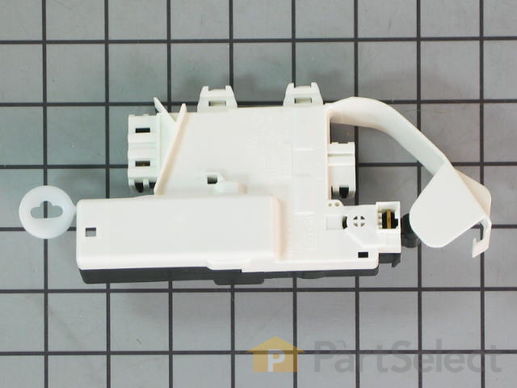
This part ensures that your door stays locked while the machine is running.

$ 146.80
  In Stock
PartSelect Number PS11751211
Manufacturer Part Number WPW10253483

Replacing your Whirlpool Washer Door Lock Latch

Replacing your Door Lock Latch

Customer Repair Stories

the latch broke on my front loading washer.

My son did the repair.So I just know he got it working.Also the part I order came the next day after I called.And if I ever need another part for any of my other appliance I will be sure to call you.And I have told other people I know about you Thanks alot.Deborah Gaffney
  • Deborah S from Connellsville, PA
  • Difficulty Level:
    A Bit Difficult
  • Total Repair Time:
    1- 2 hours
  • Tools:
    Screw drivers
34 of 49 people found this instruction helpful.
Was this instruction helpful to you?
Thank you for voting!

Door latch module was defective

This model is a front-loading washer. The spring loaded retainer for the front of the boot must be removed, then the boot can moved to the side exposing the module. Remove the two screws holding the model, pull the model out, remove the three electrical plugs, then reverse this procedure to install new module.
  • Carlton from Greer, SC
  • Difficulty Level:
    Easy
  • Total Repair Time:
    Less than 15 mins
  • Tools:
    Nutdriver, Pliers, Screw drivers
95 of 113 people found this instruction helpful.
Was this instruction helpful to you?
Thank you for voting!
3 Strike
Fixes Symptom 12% of time
★★★★★
★★★★★
2 Reviews

Rated by 1 customer 


Really Easy 

Less than 15 mins 

Ratings submitted by customers like you who bought this part.   

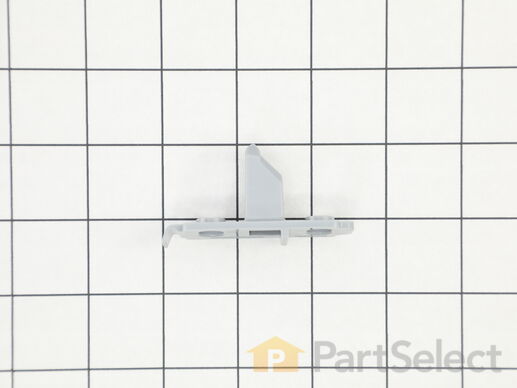
This part attaches to the door and fits into the door lock when the door closes.

$ 11.10
  In Stock
PartSelect Number PS11755543
Manufacturer Part Number WPW10488048

Customer Repair Stories

Broken Strike on Washer Door - prevented door from latching, and washer would not start

The end of the strike had broken off, and the pictures did not clearly show there was a cross-member at the end of the strike. That crossmember is what broke on the old strike. The strike has only two screws, both requiring a Torx bit (#20, I believe). Unscrew both screws to remove the strike plate. It was a little difficult to get out - it has a curved top to lock into the top slot, but the bottom slides slightly down into another slot. There isn't a lot of room in the opening to slide the strike up and down and get it out. Putting the new strike on is easier - ensure the curved end fits into the slot at the top and slide it up just a bit, push the bottom of the strike plate in, then let it drop right into place, and reinsert the screws. The only problem I had was the strike's holes for the screws are slotted horizontally, so the strike can be positioned across almost 3/8". The latch would not engage the strike the first time, so I had to loosen the screws and reposition the strike a bit. This time it latched, but the fit wasn't quite right, so I adjusted it again to get it where I needed it.
  • David D from Severn, MD
  • Difficulty Level:
    Really Easy
  • Total Repair Time:
    Less than 15 mins
  • Tools:
    Screw drivers
0 of 1 people found this instruction helpful.
Was this instruction helpful to you?
Thank you for voting!