


Models
>
WCXH208H0WW
WCXH208H0WW General Electric Washer - Overview
Sections of the WCXH208H0WW
[Viewing 4 of 4]


Keep searches simple, eg. "belt" or "pump".


Control Rotary Knob
PartSelect #: PS418709
Manufacturer #: 131761704
Sold Individually. This knob accepts a D-shaped shaft.
$42.49
In Stock


Timer Knob
PartSelect #: PS815514
Manufacturer #: 134191800
This is a genuine timer knob, which works with washers.
$87.65
In Stock

SCREW 8-18 X .31
PartSelect #: PS299875
Manufacturer #: WR2X9494
This screw is sold individually. Size 8 - 18 x 0.31
$35.41
Special Order


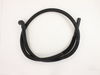
Drive Belt
PartSelect #: PS269367
Manufacturer #: WH08X10003
This drive belt contains 6 ribs.
No Longer Available


Questions And Answers for WCXH208H0WW
We're sorry, but our Q&A experts are temporarily unavailable.
Please check back later if you still haven't found the answer you need.
Common Symptoms of the WCXH208H0WW
[Viewing 3 of 3]Lid or door won’t close
Fixed by
these parts
these parts

Show All
Leaking
Fixed by
these parts
these parts

Show All
Will Not Start
Fixed by
these parts
these parts
Show All
Keep searches simple. Use keywords, e.g. "leaking", "pump", "broken" or "fit".
Door catch broken
I paid a plumber $150 to replace this part a year ago. I simply took the screws out,ordered the part,paid for 1 day shipping, and screwed the new part on. The washer DID NOT WORK without this part,and worked perfectly the minute I replaced it.
Parts Used:
-
Jennifer from South Chatham, MA
-
Difficulty Level:Really Easy
-
Total Repair Time:Less than 15 mins
-
Tools:Screw drivers
9 of 11 people
found this instruction helpful.
Was this instruction helpful to you?
Thank you for voting!
Broken Spin Speed Knob
Very simple! Found the part using the diagrams and photographs on this site. When it came, my husband ust pulled the remainder of the broken knob off the little post with a pair of needle-nosed pliers. Slid the new knob on. It took longer to find the pliers than to make the repair!
Parts Used:

-
Sally from Acton, AL
-
Difficulty Level:Really Easy
-
Total Repair Time:Less than 15 mins
-
Tools:Pliers
6 of 6 people
found this instruction helpful.
Was this instruction helpful to you?
Thank you for voting!
Rubber seal (boot) needed to be replaced.
I began by removing the seal from the exterior lip of the machine housing. I took a razor and removed any rubber and adhesive that remained on the unit.
Next, I remove the boot from the soap dispenser tube (located at about 11:00 of the opening) with a needlenose plyers. The manual recommends flattening a 3" copper pipe to ... Read more fashon a tool to release the "bread tie" fastener. I can see why but patience with a needlenose sufficed.
I pulled the boot down from the tub housing (with much force) exposing the band that holds the boot in firmly. I one pull, both pieces came out. I could tell getting the new one is was going to be a chore.
I cleaned the area and after about 40 strenuous minutes of getting the new boot onto the tub, only a couple things remained. Even with help, be prepared to dedicate hours of frustration getting the band around the boot securing it to the tub. The working space is minimal and the task is virtually hopeless to slightly possible.
Once that's taken care of, you may feel like you can accomplish anything. The rest goes up in the order it came out. Make sure you slide the boot up as far up the soap dispensing unit as possible before securing the bread tie clamp.
Run the seal around, close the door and have one of you kids clean up the work area (and mop the blood, sweat and tears from the unit and the floor.
Read less
Parts Used:

-
Jon from Stevens Point, WI
-
Difficulty Level:Very Difficult
-
Total Repair Time:1- 2 hours
-
Tools:Pliers, Screw drivers
10 of 23 people
found this instruction helpful.
Was this instruction helpful to you?
Thank you for voting!