Models > TBX18DHC

TBX18DHC General Electric Refrigerator - Overview

Sections of the TBX18DHC

[Viewing 1 of 1]
Keep searches simple, eg. "belt" or "pump".
Light Switch – Part Number: WR23X10725
Light Switch
★★★★★
★★★★★
(59)
PartSelect #: PS8758429
Manufacturer #: WR23X10725
The interior light of your refrigerator is controlled by a switch that is activated when the door is opened and closed. If your refrigerator light will not turn on, there could be an issue with the sw...
$8.56
  In Stock
Package of 12 Screws – Part Number: WZ4X244D
Package of 12 Screws
PartSelect #: PS312573
Manufacturer #: WZ4X244D
This is a package of twelve Phillips-head screws. They can be used as replacement screws in refrigerators, ice makers, or freezers. Be sure to check that your appliance model is compatible with these ...
  No Longer Available
Door Shelf Retainer Bar End Cap – Part Number: WR2X7232
Door Shelf Retainer Bar End Cap
PartSelect #: PS298403
Manufacturer #: WR2X7232
This almond colored door shelf end cap is a little under three inches long.
  No Longer Available
Evaporator Fan Blade Kit – Part Number: WR60X114
Evaporator Fan Blade Kit
★★★★★
★★★★★
(5)
PartSelect #: PS304684
Manufacturer #: WR60X114
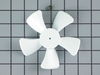
This kit features a 5-blade plastic evaporator fan blade that rotates CCW and measures 4.5-inches in diameter and has a 3/8-inch-tall shaft. This kit also has a metal compression ring that secures the...
$26.55
  In Stock
Fill Tube Grommet – Part Number: WR2X8474
Fill Tube Grommet
★★★★★
★★★★★
(4)
PartSelect #: PS299055
Manufacturer #: WR2X8474
This fill tube grommet is used on the icemaker.
$31.95
  In Stock
Capacitor – Part Number: WR55X24065
Capacitor
PartSelect #: PS10065391
Manufacturer #: WR55X24065
This part helps the compressor kick on and off while maintaining a constant temperature to keep things frozen in your freezer.
$55.86
  In Stock
Ice Cube Tray – Part Number: WR30X311
Ice Cube Tray
★★★★★
★★★★★
(1)
PartSelect #: PS300166
Manufacturer #: WR30X311
14 Cube.
$8.06
  In Stock
Defrost Timer – Part Number: WR9X483
Defrost Timer
★★★★★
★★★★★
(1)
PartSelect #: PS310852
Manufacturer #: WR9X483
This refrigerator defrost timer will cycle for thirty minutes after every ten hours of run time.
$53.52
  In Stock
Condenser Fan Motor - 115V – Part Number: WR60X187
Condenser Fan Motor - 115V
★★★★★
★★★★★
(5)
PartSelect #: PS304731
Manufacturer #: WR60X187
This part comes with 3 round pin connection terminals. This fan motor circulates the air through the refrigerator grille and cools the compressor and condenser coils. It also helps to evaporate extra...
$234.08
  In Stock
Water Tubing Clip – Part Number: WR1X5278
Water Tubing Clip
PartSelect #: PS295031
Manufacturer #: WR1X5278
This water tubing clip, also known as a P-clamp, is usually used within refrigerators and freezers to organize the water line and tubing, but due to its versatility, this clip may also be used in othe...
$8.06
  In Stock
Power Cord – Part Number: WR23X10300
Power Cord
★★★★★
★★★★★
(3)
PartSelect #: PS759476
Manufacturer #: WR23X10300
This heavy-duty cord has a three-pronged plug (2 electrical, 1 grounding). The power cord supplies power to your refrigerator, allowing it to keep the contents inside cool. There could be an issue wit...
$29.54
  In Stock
Fresh Food Door Gasket – Part Number: WR24X301
Fresh Food Door Gasket
PartSelect #: PS296904
Manufacturer #: WR24X301
This brown fresh food door gasket is used to seal the refrigerator door when closed to keep the cool air inside and the room air out.
  No Longer Available

Questions And Answers for TBX18DHC

Be the first to ask our experts a question about this model!

Common Symptoms of the TBX18DHC

[Viewing 7 of 7]
Light not working
Fixed by
these parts
Fixing
Show All
Noisy
Fixed by
these parts
Fixing Fixing Fixing
Show All
Fridge too warm
Fixed by
these parts
Fixing Fixing Fixing
Show All
Leaking
Fixed by
these parts
Fixing Fixing
Show All
Will Not Start
Fixed by
these parts
Fixing Fixing
Show All
Freezer section too warm
Fixed by
these parts
Fixing Fixing
Show All
Ice maker not making ice
Fixed by
these parts
Fixing
Show All
Keep searches simple. Use keywords, e.g. "leaking", "pump", "broken" or "fit".
Sticking Light Switch
I applied some tips learned by reading other reviews. So before I started I grabbed my trusty vise grip pliers and a small screw driver. I locked onto the switch actuator, the part that the refrigerator door pushes in, with the vise grips and pulled on it just hard enough to get the screw driver inserted in the right side to push in the catch clip so the switch could be pulled out further each time the catch clip was depressed to the next detent. Then I used the screw driver on the left site to encourage the switch past the detents on the left and very quickly the switch was out of the mount. The wires from the refrigerator pulled out with the old switch. I unplugged the old switch from the wires and plugged in the new switch and shoved the new switch back into the mount, wiggled it a couple of times to make sure it was secure and the job was done. Once I applied the vise gripes at first, the whole job took less than a minute.
Parts Used:
Light Switch
  • Jonathan from Lilburn, GA
  • Difficulty Level:
    Really Easy
  • Total Repair Time:
    Less than 15 mins
  • Tools:
    Pliers, Screw drivers
116 of 144 people found this instruction helpful.
Was this instruction helpful to you?
Thank you for voting!
Panel hot to touch between freezer & refrigerator. Motor hot, fan not rotating.
Unplugged refrigerator, removed three screws to take out part, disconnected the wires and removed bad unit. Removed fan blade from old unit and attached to the new unit. Attached wires, placed the new motor back in. Plugged it back in, within 20 minutes panel between freezer and refrigerator was cool to touch.
Parts Used:
Condenser Fan Motor - 115V
  • Kimberly from Grandy, NC
  • Difficulty Level:
    Really Easy
  • Total Repair Time:
    15 - 30 mins
  • Tools:
    Screw drivers
32 of 38 people found this instruction helpful.
Was this instruction helpful to you?
Thank you for voting!
The refrigirator light would not come on.
Poped out with screwdriver the old swithch and unplugged the two wires. Plugged in the wires to the new swithch and pushed it back in the hole where the old switch was before.
Parts Used:
Light Switch
  • Jania from Novato, CA
  • Difficulty Level:
    Really Easy
  • Total Repair Time:
    Less than 15 mins
  • Tools:
    Screw drivers
24 of 38 people found this instruction helpful.
Was this instruction helpful to you?
Thank you for voting!