


Models
>
SE-3930
SE-3930 ((AFTERS71V5731)) Maytag Dryer - Overview
Sections of the SE-3930
[Viewing 1 of 1] Maytag Dryer")
Keep searches simple, eg. "belt" or "pump".

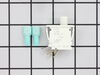
Door Switch Kit
PartSelect #: PS1964648
Manufacturer #: W10169313
This part replaces two terminal switches in a dryer and prevents the dryer from running when the door is open. This includes two connectors. If your dryer will not shut off, start, or does not tumble,...
$29.94
In Stock

Door Latch Kit
PartSelect #: PS2029855
Manufacturer #: 306436
This is a door latch kit, but you may also know it as a door catch kit. It is designed for your dryer. This part helps hold the door shut on your appliance. This dryer door latch kit comes in two piec...
$13.72
In Stock

Blower Wheel
PartSelect #: PS2052494
Manufacturer #: 56000
If your dryer is noisy, will not tumble, or is not producing enough heat, you may need to replace the blower wheel. This part is white in color, and is made of plastic. This part is approximately 8 in...
$64.27
In Stock

Heating Element Kit - Red Dot
PartSelect #: PS2061575
Manufacturer #: 61927
This 240 volt heating element is used for electric clothes dryers. Included with this element is a fuse kit consisting of a thermal fuse, a high limit thermostat, two wire leads, and four mounting screws.
$102.15
In Stock

Terminal Block
PartSelect #: PS11741048
Manufacturer #: WP33001244
This terminal block assembly does not come with any hardware. It it three inches long and made of plastic and metal.
$11.34
Special Order

Felt Seal
PartSelect #: PS11742855
Manufacturer #: WP56088
This seal is sixty-eight inches long. It is all white in color and it is made of a felt material.
$29.12
In Stock

Front Drum Support Roller
PartSelect #: PS2053217
Manufacturer #: 56285P
This front drum support roller is used for both gas and electric clothes dryers. It is three inches in diameter and includes its own shaft and a nut.
$43.92
Special Order

High Limit Thermostat - L300-40
PartSelect #: PS2052996
Manufacturer #: 56082
This hi-limit thermostat acts as as safety mechanism that keeps the dryer from overheating. With this thermostat, a dryer's heating element will cut out if the internal temperature reaches 300 degree...
No Longer Available

Small Felt Pad
PartSelect #: PS2055468
Manufacturer #: 58049
This felt pad is white on one side, beige on the other, and is made of a felt material. Though the one pictured here is white, these small pads also comes in black or gray.
***Sold individually.
No Longer Available

Questions And Answers for SE-3930
We're sorry, but our Q&A experts are temporarily unavailable.
Please check back later if you still haven't found the answer you need.
Common Symptoms of the SE-3930
[Viewing 3 of 3]Door won’t close
Fixed by
these parts
these parts

Show All
Noisy
Fixed by
these parts
these parts


Show All
Won’t Start
Fixed by
these parts
these parts
Show All


Keep searches simple. Use keywords, e.g. "leaking", "pump", "broken" or "fit".
Switch sticking in on position
FIRST unplug dryer from electrical source, CAUTION, the top of this dryer does not open with clips, do not pry on top to open! On the front of the dryer look under the lower panel, and find two screws, one on the left side, and one on the right, remove these screws, and pull slightly down on panel to remove. Behind this panel find two s
... Read more
crews holding the door panel, one on the left, and one on the right, remove the left, and support the door panel while removing the right side. Gently pull the bottom of door panel outward, and the clips on top of door panel will unhinge from top, carefully rotate left side of door panel to floor, and note the wire connections on switch, and orientation of switch, then unplug wires, and move door panel to a comfortable working positon. Door must be open to remove switch, then depress the two plastic retaining keepers on each side of switch, and push switch through toward door. Replace with new switch, reconnect the wires, and reassymble in reverse order. Remember, door assymbly must be inserted in dryer top at an angle, and then bottom rotated downward, and bottom panel nylon guildes inserted into door panel bottom.
Read less
Parts Used:

-
Don from Jacksonville, FL
-
Difficulty Level:Really Easy
-
Total Repair Time:15 - 30 mins
-
Tools:Nutdriver
99 of 133 people
found this instruction helpful.
Was this instruction helpful to you?
Thank you for voting!
Door latch broken
I used my screw driver to pry the old female end of the latch from the dryer unit. I forced the new female part of the latch into the hole and bang...45 seconds later the door closed securely --like new!
Parts Used:

-
thomas from appleton, WI
-
Difficulty Level:Easy
-
Total Repair Time:Less than 15 mins
-
Tools:Screw drivers
47 of 48 people
found this instruction helpful.
Was this instruction helpful to you?
Thank you for voting!
Blower fan cracked
Unplug the power cord from the unit. Remove the lower front panel; then the upper front panel including the door (unplug wire to door switch). Then remove the cover on the fan housing. Need to block the motor from turning; I used a stick to jamb the front of the motor; then unscrew the old blower fan and screw on the new one. Then repla
... Read more
ce the cover and put front panels back on.
Read less
Parts Used:

-
Rick from Birch Run, MI
-
Difficulty Level:A Bit Difficult
-
Total Repair Time:30 - 60 mins
-
Tools:Nutdriver, Socket set
44 of 54 people
found this instruction helpful.
Was this instruction helpful to you?
Thank you for voting!