


Models
>
RHE396PP
RHE396PP Whirlpool Range - Overview
Sections of the RHE396PP
[Viewing 10 of 10]


 , CUTTING Diagram and Parts List for Whirlpool Range")
 Diagram and Parts List for Whirlpool Range")

 Diagram and Parts List for Whirlpool Range")


 Diagram and Parts List for Whirlpool Range")
Keep searches simple, eg. "belt" or "pump".

Chrome Drip Bowl - 8 inch
PartSelect #: PS11750107
Manufacturer #: WPW10196405
This manufacturer-certified drip bowl is also known as a drip pan, and it is designed for use with cooktops and ranges. It sits below 8-inch burner elements and catches drips and spills from the cookw...
$7.67
In Stock

Light Bulb - 40W
PartSelect #: PS884734
Manufacturer #: 8009
This an authentic OEM 40-Watt replacement light bulb, used in a number of household appliances. It is specially designed to withstand extreme temperatures, which is why these replacement bulbs are mos...
$11.73
In Stock

Surface Burner Plug-In Block Kit
PartSelect #: PS340571
Manufacturer #: 330031
The surface burner plug-in block kit features a newer-style terminal block. This kit is designed for use with ranges and cooktops. This terminal block is how the coil element on your stove connects to...
$13.42
In Stock

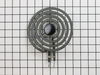
Surface Burner - 8 Inch - 2600W
PartSelect #: PS11743367
Manufacturer #: WP660533
The surface burner or element on your range provides the heat that you cook with. If your element will not heat, you may need to replace the surface burner. This surface burner is 8 inches in diameter...
$36.93
In Stock

Standard Y-Frame Range Surface Burner
PartSelect #: PS11743366
Manufacturer #: WP660532
The standard y-frame surface burner provides heat to your range. If you notice that your element will not heat, you may need to replace your surface burner. This product is 6 inches in diameter, and 1...
$30.15
In Stock


2 Piece Broiler Pan
PartSelect #: PS971245
Manufacturer #: 4396923
This is cookware designed for use in your range or oven. It is a two-piece dish that is used to grill or cook food while the broil function is on, meaning it can withstand high temperatures. This set ...
$37.51
In Stock

Insulation
PartSelect #: PS11750415
Manufacturer #: WPW10208653
This insulation is also known as oven wrap insulation, and is used in conjunction with your range. Its purpose is to be installed in between the oven and the cabinets that surround it. This will help ...
$60.71
In Stock

Door Switch with Wire
PartSelect #: PS11745635
Manufacturer #: WP8283288
This part is what tells the dryer to stop running when the door is open.
$91.50
In Stock

Main Power Terminal Block
PartSelect #: PS11745232
Manufacturer #: WP8203546
Sold individually.
$24.59
In Stock


Bake Element
PartSelect #: PS11746803
Manufacturer #: WP865940
This partially open curved style bake element is 15 inches long and 19-1/4 inches wide. The terminals are 13 inches apart and they have a depth of 3-3/4 inches.
$85.79
In Stock
Questions And Answers for RHE396PP
We're sorry, but our Q&A experts are temporarily unavailable.
Please check back later if you still haven't found the answer you need.
Common Symptoms of the RHE396PP
[Viewing 3 of 3]Element will not heat
Fixed by
these parts
these parts


Show All
Will Not Start
Fixed by
these parts
these parts

Show All
Little to no heat when baking
Fixed by
these parts
these parts

Show All


Keep searches simple. Use keywords, e.g. "leaking", "pump", "broken" or "fit".
mice had made nests in the insulation wrap in the range
I numbered every part. ex: 1 L., for first part removed left side. I used a magic marker to circle the holes and wrote the number of screws used on the part, set the srews in a separete place, so that I new where these screws went to. The cleanup was pretty time consuming, but I was able to keep my stove, when every repairman I called to
... Read more
fix my stove told me I was better off buying a new stove. ($600.00 stove 2 years old)Please Note: The insulation blanket needed for the entire stove is two pieces, the sides and top are one part # and the bottom and back, are another part #. I did not know this. I just purchased the top and sides. I got lucky, the back and bottom were still in good shape. So I guess I should have read the description of the part more carefully to see what it covers, before I ordered it. It took two people two hours to do the work, it was really nice to have an extra set of eyes, to remember what direction pieces of metal from the stove went. I would do it all over in a heart beat instead of buying a new stove.
Read less
Parts Used:
-
Wendy from Red Hook, NY
-
Difficulty Level:Easy
-
Total Repair Time:More than 2 hours
-
Tools:Screw drivers
98 of 133 people
found this instruction helpful.
Was this instruction helpful to you?
Thank you for voting!
8 inch burner wouldn't come on. Wires shorted out
One screw holds the block onto the stove top. Had to clean out fitting for phillips screwdriver or screw would have stripped because it was old with lots of buildup. Even cleaned out, this screw required great force with phillips screwdriver to keep from stripping. Caution! If you strip it, you'll have to drill it out! The rest was a snap
... Read more
. Cut the old wires leading to the old block (not too close to where wires disappear into back of stove, though!). Strip insulation off both wires and attach with the connectors that came in the kit. Then push the wires into the block, and finally, attach the block back to the stove top (new screw is supplied). Restore power and everything should be fine. One problem: Roper/Whirlpool built their appliance in such a way that when the connector block shorts out, it usually takes the infinite switch with it. So I ended up having to go back and purchase that switch as well (which just so happens to cost twice to three times as much!). If you put it all back together and it still doesn't work, that's probably what happened, so go ahead and remove the knob panel and check that switch (it's right behind the control knobs on the front). You will probably find a burned connector at the back top left or the switch. Don't forget to write down which wire goes where (or just take a picture of it).
Read less
Parts Used:
-
Jonathan from Lilburn, GA
-
Difficulty Level:Easy
-
Total Repair Time:15 - 30 mins
-
Tools:Pliers, Screw drivers
61 of 72 people
found this instruction helpful.
Was this instruction helpful to you?
Thank you for voting!
1 had 2 large burners not working at all, and was cooking everything on the 2 smaller burners
It was so simple to repair - all I had to do was slide the older burners out and slide the new ones in - it took less than 10 min to complete the whole job! No tools used at all.
Parts Used:
-
Mary from Lebanon, CT
-
Difficulty Level:Really Easy
-
Total Repair Time:Less than 15 mins
27 of 30 people
found this instruction helpful.
Was this instruction helpful to you?
Thank you for voting!