


Models
>
RF23R6201SG
RF23R6201SG ((AA)(0000)) Samsung Refrigerator - Overview
Sections of the RF23R6201SG
[Viewing 1 of 1](0000) Samsung Refrigerator")
Keep searches simple, eg. "belt" or "pump".

Handle Mounting Screw
PartSelect #: PS4144145
Manufacturer #: DA61-03734A
This screw, known as a handle fixer, is used to keep the door handles on your refrigerator secure. This screw is a genuine OEM part that comes individually, and simply screws into place in your refrig...
$9.36
In Stock

Refrigerator Evaporator Fan Motor
PartSelect #: PS9603956
Manufacturer #: DA81-06013A
This is an evaporator fan motor for a wide range of Samsung refrigerators. Evaporator fans pull warm air through evaporator coils to cool and maintain the internal temperature of the refrigerator. If ...
$129.53
In Stock

Refrigerator Evaporator Fan Motor
PartSelect #: PS4138377
Manufacturer #: DA31-00146H
This evaporator fan motor is sourced from the original manufacturer for use in refrigerators. It circulates cold air throughout the refrigerator compartment to maintain consistent cooling. If the evap...
$136.42
In Stock

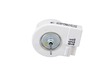
Door Closing Mechanism
PartSelect #: PS4176636
Manufacturer #: DA97-12625A
This Samsung auto-close lever assembly is an OEM replacement part made for use in Samsung refrigerators. It is a black lever mechanism, measuring approximately 2 inches by 2 inches. When the fridge do...
$28.46
In Stock


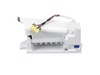
Ice Maker Assembly
PartSelect #: PS12115582
Manufacturer #: DA97-13718C
This ice maker assembly is for refrigerators.
Ice maker assembly contains the complete ice maker and housing. The assembly may include multiple parts; refer to your parts diagram for a complete lis...
$181.12
In Stock


Assembly Cap - Chute Ice;AW4,T
PartSelect #: PS4176621
Manufacturer #: DA97-12594A
This ice dispenser chute cap, or chute gasket, is compatible with various models of Samsung refrigerators. It is a rubber seal that is located around the opening of the ice dispenser chute. It is resp...
$88.18
In Stock

Questions And Answers for RF23R6201SG
We're sorry, but our Q&A experts are temporarily unavailable.
Please check back later if you still haven't found the answer you need.
Common Symptoms of the RF23R6201SG
[Viewing 3 of 3]Fridge too warm
Fixed by
these parts
these parts

Show All
Noisy
Fixed by
these parts
these parts
Show All
Ice maker not making ice
Fixed by
these parts
these parts
Show All
Keep searches simple. Use keywords, e.g. "leaking", "pump", "broken" or "fit".
Ice maker frosting up, not making ice
After watching a few you tube videos on the Samsung ice maker removal, this repair was not that bad. The key to this repair is PATIENCE!
Unplug your fridge, have a steamer and Phillips & straight screw driver handy. Remove ice bucket, place rags or paper towels in bottom half of ice maker. Fire up your steamer and melt ALL ice befor ... Read more e proceeding! Once all ice is gone, remove one screw to the left on cover for the wiring, remove plastic wire cover , remove screw just below ice maker itself, push locking tab in to release plastic lower tray attached to bottom of ice maker. Once you do this it exposes the refrigerant line (u shaped) under ice maker. If you can still see ice once that plastic cover drops down, yep... more steaming , if you try chip away any remaining ice damage will result to that refrigerant line then it’s game over. Fridge needs to be replaced! Once fully clear of ice , carefully pry that refrigerant line down a bit so it is released from the bottom of ice maker. Do not bend it down too far only enough so it will clear when pulling ice maker out. Un clip yellow electrical connector to ice maker and gently pull the ice maker towards you and down to fully remove. As you are pulling it out be sure refrigerant line does not get hung up. Once removed you may find more ice build up on top of auger assembly. All ice/ frost needs to be gone. Follow u shaped refrigerant line back towards the styrofoam, push one clip on each tube towards the back with the tab facing down! The plastic rectangle trim piece slides off fairly easy. This web page gives detailed pictures on what to expect, as there could be other issues in that ice compartment that need addressed! https://edmondappliancerepairokc.com/samsung-french-door-ice-maker-frosting-up/
Hope this helps, it sure made a difference in mine. The ice maker has been producing ice like never before!
Read less
Parts Used:

-
daryl from LAKE MARY, FL
-
Difficulty Level:Easy
-
Total Repair Time:1- 2 hours
-
Tools:Screw drivers
4 of 6 people
found this instruction helpful.
Was this instruction helpful to you?
Thank you for voting!
CLOSING MECHANISM BROKE IN TWO.
OPENED THE LEFT SIDE REFRIGERATOR DOOR WHERE THE DEFECTIVE MECHANISM WAS. GOT UP ON THE FIRST STEP OF THE STEP STOOL,REMOVED THE PHILLIPS HEAD RETAINING SCREW FROM THE BROKEN PART.PUT THE NEW CLOSING MECHANISM IN PLACE AND RE-INSTALLED THE PHILLIPS HEAD SCREW. STEPPED DOWN FROM THE STEP STOOL AND SHUT THE REFRIGERATOR DOOR.
Parts Used:
-
TERRY from BAKERSFIELD, CA
-
Difficulty Level:Very Easy
-
Total Repair Time:Less than 15 mins
-
Tools:Screw drivers
6 of 12 people
found this instruction helpful.
Was this instruction helpful to you?
Thank you for voting!
Part broke
Took out the screw, removed the broken part, put new part on, put retaining screw back in.
Parts Used:
-
Gary from MADISON, AL
-
Difficulty Level:Really Easy
-
Total Repair Time:Less than 15 mins
-
Tools:Screw drivers
3 of 7 people
found this instruction helpful.
Was this instruction helpful to you?
Thank you for voting!