


Models
>
PVM9179DK6WW
PVM9179DK6WW General Electric Microwave - Overview
Sections of the PVM9179DK6WW
[Viewing 6 of 6]


Keep searches simple, eg. "belt" or "pump".


Primary Door Interlock Switch
PartSelect #: PS237015
Manufacturer #: WB24X10047
This interlock switch is located in the door latch.
$33.44
In Stock


EXHAUST ADAPTER
PartSelect #: PS12709817
Manufacturer #: WB02X32715
This is the replacement damper bracket for your microwave. It is made of plastic and is approximately 11 inches wide and 3 inches long. The damper bracket attaches to the outer cabinet and directs air...
$8.54
In Stock

DIODE-CABLE ASM
PartSelect #: PS16219547
Manufacturer #: WB27X35382
This part is the replacement high-voltage diode for your microwave. It is approximately 3 inches long and is sold individually. The high voltage diode is an electrical current control device inside yo...
$8.54
In Stock

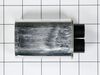
SWITCH MONITOR INTERLOCK
PartSelect #: PS11766871
Manufacturer #: WB24X25397
This is the replacement monitor switch for your microwave. It is black in color and measures approximately 1 inch by ¾ of an inch. This switch monitors the door latch position of your microwave and co...
$24.79
In Stock

MOUNTING PLATE ASM
PartSelect #: PS16216996
Manufacturer #: WB56X35363
This mounting plate, also known as a bracket, is crucial for keeping your microwave mounted to the wall, when placed above the stove. This OEM part is sold separately from the screws that are needed t...
$13.76
In Stock


SHELF
PartSelect #: PS2339913
Manufacturer #: WB48X10064
This metal rack is for microwaves and provides a stable surface for cookware in the microwave oven.
$69.54
In Stock


Questions And Answers for PVM9179DK6WW
We're sorry, but our Q&A experts are temporarily unavailable.
Please check back later if you still haven't found the answer you need.
Common Symptoms of the PVM9179DK6WW
[Viewing 5 of 5]No heat
Fixed by
these parts
these parts


Show All
Won’t turn on
Fixed by
these parts
these parts


Show All
Doesn’t shut off
Fixed by
these parts
these parts
Show All
Door not closing properly
Fixed by
these parts
these parts
Show All
Tray won’t turn
Fixed by
these parts
these parts
Show All

Keep searches simple. Use keywords, e.g. "leaking", "pump", "broken" or "fit".
Loss of Rack holder clip for GE Profile Convection Microwave oven
It was super easy! Opened the door, matched up the hole on the side of the microwave convection oven with the first portion of the rack holder clip, pushed in the rack holder clip and made a twist to ensure the rack holder clip seated in the wall of the oven. Less than 30 seconds to install - no tools necessary. I that the clips came
... Read more
in an order of a unit of 8 clips, allowing me a quick-fix if I need additional clips for loss. Now I have stable racks within my oven ensuring safe insertion and removal of food from the oven. Having the full use of both of the racks in my convection oven during the summer is a Godsend, especially living in the Ohio Valley with its' hot steamy summers - my kitchen stays cool as a cucumber, and so do I!
Read less
Parts Used:
-
Nancy E from Cincinnati, OH
-
Difficulty Level:Really Easy
-
Total Repair Time:Less than 15 mins
34 of 44 people
found this instruction helpful.
Was this instruction helpful to you?
Thank you for voting!
Microwave runs with the door open
Remove microwave outer cover. Turn on side & locate the upper & lower door switches. Better to replace in pairs even if one is ok. Remove the wire harness to each switch. Then replace switch and re connect the wire harness. Re attach outer cover
and test to see if that solved the problem. If so then well done!!
and test to see if that solved the problem. If so then well done!!
Parts Used:
-
Thomas from Andover, NJ
-
Difficulty Level:Really Easy
-
Total Repair Time:15 - 30 mins
-
Tools:Pliers, Screw drivers
35 of 50 people
found this instruction helpful.
Was this instruction helpful to you?
Thank you for voting!
Microwave would turn on and count down, but not heating and not rotate turntable. Pressing door up would occasionally start heat.
First I disconnected the power and opened the door. Then I removed the top screws holding the top vent louvers, then removed the screw at the top of the touch pad. The touch pad removes by sliding up slightly then tilting top out. I unscrewed two screws holding the door latch assembly. Press the tab to remove and replace switch. Reco
... Read more
nnect wires, reseat latch mount by placing top bracket tab in place first, allign and secure with screws. Reseat touch pad by placing bottom tabs in first, tilt forward and press up to seat top tabs, secure with top screw. Secure vent louver screws, plug in and watch your microwave work again.
Read less
Parts Used:
-
Michael from Ridgefield, CT
-
Difficulty Level:Really Easy
-
Total Repair Time:Less than 15 mins
-
Tools:Screw drivers
37 of 58 people
found this instruction helpful.
Was this instruction helpful to you?
Thank you for voting!