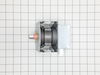
This ceramic microwave fuse is just over an inch in length. It is white in the center, and metal on both ends. This is a 20-amp fuse, and is used to power your microwave. If the touch pad on the micro...
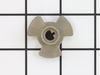
There are two different couplers (also known as a turntable shaft) that can be used for this tray - a male D-shaped shaft and a female D-shaped shaft. The couplers are sold separately.
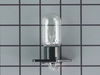
This is a replacement oven lamp for your microwave. The base is made of black plastic, and the lamp itself is made of glass. The base is approximately 2 inches long and 1 inch wide. The bulb is locate...
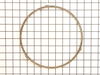
This cooking rack is for microwaves and provides a stable surface for cookware in the microwave. Follow the instructions in your owner's manual when installing this part. Sold individually.
$61.71
Special Order
Questions And Answers for PEB9159SF1SS
Ask our experts a question about this model and we'll get back to you as soon as possible!
5 questions answered by our experts.
Sort by:
< Prev
1
Next >
Search filter:
Clear Filter
Your search term must have 3 or more characters.
Keep searches simple. Use keywords, e.g. "leaking", "pump", "broken" or "fit".
Sorry, we couldn't find any existing answers that matched.Try using some different or simpler keywords, or submit your new question by using the "Ask a Question" button above!
Michael
February 27, 2020
I hit convection and set temperature to 425. When it got to temperature it just quit. Keypad works, lights work. I unplugged and plugged back in. Tried microwave and hit start nothing. Tried convection and nothing after hitting start.
For model number PEB9159SF1SS
Hi Michael,
Thank you for your question. If the microwave is not starting, there are some parts that you will need to check to see which one is causing the issue. You will need to check the line fuse, the door switches, the thermostat, the oven lamp and the diode cable. We hope this helps. Thank you and have a great day.
2 people found this helpful.
Was this helpful?
Thank you for voting!
Hugh
August 18, 2021
My wife was microwaving an item and it quit working. Interior light comes on, the touch pad works and will set time and even count down after start button is engaged. No fans come on, the turn table does not turn and no heat is produced. What should i test to determine the failure? Thanks, love your web site and information. Hugh
For model number PEB9159SF1SS
Hello Hugh, thank you for your question. There are a few parts that could cause these symptoms. It may mean the door switch is broken. The door switch can also be called an interlock switch. Part number: PS237015. Use a multi-meter to check the switches while depressing the actuator button. If there is no continuity at that point, replace the switch. Ensure that the door hooks which trigger the door switch are working properly, as that could also cause this issue. Part number: PS227745. There could be a problem with the high voltage diode. Test the diode for continuity using a multi-meter; there should be low resistance in one direction and high resistance in the other in a working diode. If the resistance is low in both directions or has no continuity, the diode needs to be replaced. Part number: PS239148. It could also be the magnetron. Part number: PS12722595. Test the magnetron by disconnecting its attached wires and attaching the leads of a multi-meter to the magnetron terminals. The continuity should show two to three ohms of resistance between the terminals. The magnetron will need to be replaced if it shows no continuity, or shows continuity between the terminals and the grounded outer case of the magnetron. If your test with the multi-meter comes back normal, then further testing might need to be done by a certified technician. Before you begin any repair, please unplug the appliance from the electrical outlet. Good luck with your repair!
How do you remove the control panel, It has 1 screw on the upper right, but still cannot remove, HELP
For model number PEB9159SF1SS
Hi Richard, thank you for your question. To remove the control panel you need to follow these instructions.
1. Remove the left and right screws which are at the top of the mounting grill.
2. Open the door and slide the grill to detach, this will make the control panel screw visible.
3. Remove the control panel screw.
4. Unfasten the control panel by lifting it up.
Good luck with your repair!
Was this helpful?
Thank you for voting!
Barb
May 23, 2023
I need rubber tips for the bottom of the wire rack that goes inside.
For model number PEB9159SF1SS
Hi Barb, thank you for reaching out. According to our research, rubber tips do not come separately. Rubber tips come as a part of the rack, part number PS8767263. We hope this helps!
My wife was reheating an item and suddenly heard a pop noise, she opened up the door and the filter screen had a small fire ( there was no metal or alum. on the plate)
It no longer works, however the key pad still shows clock etc.
any clue what this may have caused this?
For model number PEB9159SF1SS
Hello Joe, thank you for your inquiry. Based on our understanding of the issue, we would suggest checking the diode, part number PS239148, to solve the problem. Glad to be of assistance!
Turned out the issue was easily solved by replacing a single, inexpensive fuse.
First off, UNPLUG THE MICROWAVE.
The fuse is located under the plastic grill at the top of the microwave. It's held on by two screws. Once you've removed the screws and taken off the plastic grill, you go to the right side of the mic
... Read morerowave and remove another screw that holds a small metal grill in place. Removing the small metal grill is probably the toughest part of this repair. You kind of have to rock it back and forth a bit to get it to release. Once that's off, you can get to the fuse. I removed the burnt out one with a pair of needle nose pliers. I also put a small piece of cardboard under the fuse when I did this so I didn't accidentally drop it into the innards of the microwave. I did the same thing when I replaced the new fuse. I then plugged the appliance back in and made sure it worked. Once that was confirmed, I replaced both grills.
Remove shroud . Two black philips head screws on side, and several on the back side. The two bottom screws on the back are special screws that a philips,straight slot, or hex screwdriver will not remove. I took a dremel tool with a thin metal grinding disc and created a straight slot through the centr of the two bottom screws. This allowe
... Read mored their removal with a straight slot screwdriver. Slide the cover straight back and off. The bulb is located on the top of the microwave connected with one screw. Replaced the bulb. It has two prongs that fit into the holder. Replace screw. Slide cover back on. It slides into retaining splines on 3 sides. Replace screws, and you're in business.
Unpluged power cord!! Removed front control panel to expose electronics (need to remove top horizontal vent cover to expose mounting hardware). Unplugged leads to control panel board. Removed magnetron with Tstat (3- phillip heads, need stubby). Installed new parts and control panel, plugged it in tested. Done.