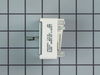
The temperature sensor, also known as the oven temperature sensor assembly is usually found in the back of the oven. The function of the oven temperature sensor assembly is to measure the temperature ...
This part is a replacement lens for your oven or range. The lens is red in color, and when the elements are turned on, the light behind the lens will turn on to inform the user that the element is, in...
This surface element is for ranges.
Surface element supplies the heat to a cooking area on top of the range.
Unplug the range or shut off the house circuit breaker for the range before installin...
The rubber bumper sits between the burner and the range itself to ensure the burners do not scrape the stove top. This OEM replacement bumper is sourced directly from the manufacturer, and is sold individually.
This part is a replacement screw for your oven. It is made of black metal and is sold individually. This screw is approximately 1/4 inch in diameter and about 1/2 inch in length. It is designed to con...
This is made of rubber and acts as insulation at the bottom of the door frame, it has hooks at each end to attach to the frame.
$40.84
On Order
Questions And Answers for PCB985SK1SS
Ask our experts a question about this model and we'll get back to you as soon as possible!
1 question answered by our experts.
Sort by:
< Prev
1
Next >
Search filter:
Clear Filter
Your search term must have 3 or more characters.
Keep searches simple. Use keywords, e.g. "leaking", "pump", "broken" or "fit".
Sorry, we couldn't find any existing answers that matched.Try using some different or simpler keywords, or submit your new question by using the "Ask a Question" button above!
Chris Miall
March 2, 2020
The glass top on our stove is cracked. Is it replaceable? Is it safe to use if it is cracked?
For model number PCB985SK1SS
Hello Chris, thank you for your inquiry. It is recommended that if the cooktop is cracked, that you do not use the burners closest to the crack in the glass as the heat can cause the crack to expand and may cause the cooktop glass to shatter. The replacement cooktop for your model is listed as No Longer Available/Discontinued. There are no part substitutions listed. Our suggestion here would be to call the manufacturer and see if they can provide you with a substitution for these part numbers. We hope this helps.
Was this helpful?
Thank you for voting!
< Prev
1
Next >
✖
Ask a Question
Ask our experts a question on this model and we'll respond as soon as we can.
Removed six 1/4" hex nuts on rear of oven. Then through front/inside removed a single 1/4" hex nut to actually remove sensor. Unplug sensor connector, remove. Reversed steps, push oven back in place and plugged in. Tested oven function.
Unplugged appliance and removed 5 screws on back of stove/oven and removed plate. Disconnected the sensor and unscrewed it on the inside of the oven. Pulled the cord through and replaced with new sensor. Replaced all parts and plugged in the appliance and tested. Worked great.
1) pull out the stove 2) remove the 7 sheet metal screws holding the back panel on. (the panel that also covers where the cord splits and connects to the oven. 3) Find the small plastic connector located in the middle of the back of the range and unplug it. 4) open the front of the oven and remove the one screw holding in
... Read morethe oven temp sensor. 5) replace the sensor and make sure to "feed" the new cord through as best you can. 6) I had to dig through the insulation a little bit to find the new wiring harness 7) connect the wiring harness and put the back of the range back on
note: this was very simple to do if you think this might be the problem don't hesitate to handle this one yourself.