


Models
>
LRE3193SB
LRE3193SB ((00)) LG Range - Overview
Sections of the LRE3193SB
[Viewing 1 of 1] LG Range")
Keep searches simple, eg. "belt" or "pump".

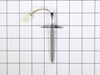
Thermostat
PartSelect #: PS3530468
Manufacturer #: 6930W1A003X
The range thermostat is also commonly known as a stove, oven, cooktop, or range thermal fuse. This thermostat protects your oven from excessive heating, and will shut the oven heat off if excessive he...
$20.30
In Stock

Temperature Sensor
PartSelect #: PS11732697
Manufacturer #: EBG61305805
This temperature sensor, also known as a thermistor, is compatible with various makes and types of appliances. This thermistor uses electrical currents to detect the interior temperature of the applia...
$87.56
In Stock

FOOT
PartSelect #: PS3635599
Manufacturer #: 4778W1N001B
This is a genuine OEM leveling leg for various models of LG ranges. This leg is used to stabilize and support the range, and if damaged, broken, or missing, will cause your range to rock back and fort...
$18.00
In Stock


Range Convection Fan Motor
PartSelect #: PS7791924
Manufacturer #: EAU61865301
This part is the replacement A/C fan motor or convection fan motor for your range. It is used to spin the fan blade, which circulates hot air through the oven, and ensures even heating. If you notice ...
$109.31
In Stock


Oven Rack
PartSelect #: PS11761984
Manufacturer #: MHL63411403
This genuine OEM rack is placed inside your oven cavity, serving as a stable surface for your cookware. It measures approximately 25 inches by 17 inches. The wires can warp due to repeated temperature...
$139.55
In Stock


Questions And Answers for LRE3193SB
We're sorry, but our Q&A experts are temporarily unavailable.
Please check back later if you still haven't found the answer you need.
Common Symptoms of the LRE3193SB
[Viewing 6 of 6]Little to no heat when baking
Fixed by
these parts
these parts

Show All
Element will not heat
Fixed by
these parts
these parts

Show All
Oven not heating evenly
Fixed by
these parts
these parts
Show All
Oven is too hot
Fixed by
these parts
these parts
Show All
Won’t turn on
Fixed by
these parts
these parts
Show All
Door won’t open after self cleaning cycle
Fixed by
these parts
these parts
Show All
Keep searches simple. Use keywords, e.g. "leaking", "pump", "broken" or "fit".
Hammer 1, Glass range top and heating element 0
Dropped a hammer on the range while removing a ceiling light. Viewed a How-To video on Google. Ordered the needed parts. Followed the steps from the How-To video. Reinstall was a bit tricky by myself - could have used an extra set of hands. I have a few words of caution:
1) Put something between the range top and range - like a ... Read more sheet or drop cloth - to prevent a dropped screw from falling into a crevice in the stove. I dropped a screw and was unable to retrieve it, even with a magnet.
2) Makes sure you remove all bumpers, screws, clips, etc. from the item being replaced and put them on the new item if the new item does not come with replacement bumpers, screws, etc.
Read less
Parts Used:
-
Richard from CHESAPEAKE, VA
-
Difficulty Level:Easy
-
Total Repair Time:30 - 60 mins
-
Tools:Screw drivers
13 of 28 people
found this instruction helpful.
Was this instruction helpful to you?
Thank you for voting!
Bottom heat element went out
Checked element no reading. Took off back panel and removed element. Took 5 days to get element. Put in new one. Took 20 minutes. Did not have to cut panel as video had shown. It had screws and was easy to get out and put the new one in. The new element was exactly the same as the old one. I checked all elements before ordering. Wa
... Read more
s satisfied with everything but the delivery time
Read less
Parts Used:
-
Jack from LEXINGTON, KY
-
Difficulty Level:Really Easy
-
Total Repair Time:30 - 60 mins
-
Tools:Pliers, Screw drivers
4 of 8 people
found this instruction helpful.
Was this instruction helpful to you?
Thank you for voting!
Half the LEDs on my stove went out, the part fixed it.
Unplugged the stove, took the top cover off, removed the old part and replaced it.
Parts Used:
-
Edward from FORT WORTH, TX
-
Difficulty Level:Really Easy
-
Total Repair Time:30 - 60 mins
-
Tools:Pliers, Screw drivers, Socket set
2 of 3 people
found this instruction helpful.
Was this instruction helpful to you?
Thank you for voting!