This handle screw, also known as a mounting bolt, is a mounting screw to help secure the door handle to your refrigerator door. If your handle is loose, you may just need to tighten the screw. If your...
This is a drawer roller for the freezer compartment of your LG refrigerator. This roller is made of white plastic, and acts as a wheel to allow the drawer to glide smoothly back and forth when you ope...
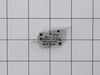
This is a micro switch for various models of LG refrigerators. This switch is responsible for turning the ice dispenser on and off within the freezer compartment of the fridge. If this switch is damag...
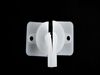
This water tubing clip holds the water fill tube in place in your refrigerator. The water fill tube attaches and supplies water to the ice maker/water dispenser in your fridge-freezer. If the tubing i...
This is a temperature sensor for various models of LG refrigerators. Temperature sensors are used to adjust the level of cooling depending on the internal temperature of the refrigerator. If your refr...
This couldn't have been easier. Two tiny screws in the front needed unscrewed, and then two plastic clips in the middle just had to be popped lose. Finally, you unplugged the power cord. Then, you just needed to reverse the process by plugging the new ice maker in, popping the clips in place, and screwing the two holes back in and turning
... Read more the whole thing on. Voila! Perfect ice cubes again. And for only a little over $100.
Removed ice dispenser and display with small screwdriver from front of the fridge. Pried out the whole piece slowly. This exposed the motor that activates the chute. Plugged in the new motor before any removal to verify the motor was the problem. When it worked, removed old and installed new. 3 screws. Piece of cake.
Unplug the refrigerator and empty the freezer. Remove the lower basket and roll out upper tray. Open the freezer door. I was able to lie on the floor to remove the 2 screws holding the ice maker without removing the freezer door. Depress the 2 tabs and slide the ice maker forward to remove. Install in reverse order. Change the wate
... Read morer inlet valve at the same time.


 LG Refrigerator")
 LG Refrigerator")
 LG Refrigerator")
 LG Refrigerator")
 LG Refrigerator")
 LG Refrigerator")
 LG Refrigerator")