


Models
>
LD10MPS
LD10MPS - Overview
Models starting with LD10MPS
Click on the best match to narrow your results.
Keep searches simple, eg. "belt" or "pump".

Black Sleeve Diode
PartSelect #: PS11747959
Manufacturer #: WPR9800486
In your microwave, the diode allows current to flow one-way only, converting alternating current to direct current. If you notice that your microwave does not heat properly, you may need to replace th...
$31.50
In Stock

Fuse,Time Delay
PartSelect #: PS3522743
Manufacturer #: 3B74133Q
The fuse-time delay may also be known as a line fuse or a microwave fuse, and it is a piece for your microwave. The function of this part is to shut off the microwave if there is a power surge, in ord...
$7.73
In Stock


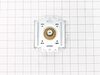
Magnetron
PartSelect #: PS3529034
Manufacturer #: 6324W1A001L
This magnetron in your microwave creates the radiation needed for cooking or warming your food. It is located inside the main cavity, typically near the transformer or waveguide. When the magnetron be...
$180.80
In Stock

LAMP,INCANDESCENT
PartSelect #: PS3610071
Manufacturer #: 6912W3B002K
This incandescent lamp is sourced from the original manufacturer, for use in microwaves and ovens. It illuminates the interior of the appliance cavity allowing you to view the food as it cooks or hea...
$11.34
In Stock


Common Symptoms of models starting with LD10MPS
[Viewing 2 of 2]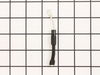

Keep searches simple. Use keywords, e.g. "leaking", "pump", "broken" or "fit".
no heat
I looked up the #1 reason for no heat for my microwave on the site , and using my model number found that 92% of the time it was the Black Sleeve Diode. Ordered the $15 part, and installed it within 30 minutes. Most of the time was used for removing the built in microwave and removing the cover. Replaced the diode by finding it on the
... Read more
diagram that I printed from this site (free). Very relieved that we don't need to have our custom cabinetry re-sized to accommodate a new microwave. Thank you!
Read less
Parts Used:

-
Lisa from PARADISE, PA
-
Difficulty Level:Easy
-
Total Repair Time:15 - 30 mins
-
Tools:Pliers, Screw drivers
28 of 28 people
found this instruction helpful.
Was this instruction helpful to you?
Thank you for voting!
Magnitron failed
Over the stove microwave installed in top cabinet row.
1. Unplug device.
2. Two people to remove from wall/cabinet (remove two, large, top mounting screws and rotate entire microwave down and off the wall mount). Should be some wood spacers between top of device and bottom of cabinet.
3. Remove screws from sheet metal cover ... Read more .
4. Remove one screw holding blowers in place and rotate out of the way, in order to gain access to 2 of 5 screws that hold the magnetron in place.
5. Unplug magnetron and remove the 5 screws.
6. Drop in new magnetron and re-assemble microwave in reverse order (steps 5-3).
7. Two people restore micro to wall/cabinet. Replace wood spacers, re-install two, large mounting screws (finger-tight). Test device. Secure the two large screws.
Read less
Parts Used:
-
Joseph from WILTON, NH
-
Difficulty Level:A Bit Difficult
-
Total Repair Time:1- 2 hours
-
Tools:Screw drivers
8 of 12 people
found this instruction helpful.
Was this instruction helpful to you?
Thank you for voting!
No heat
Removed case,
Discharged HV capacitor and removed cooling fan.
Unscrewed ground end of HV diode and unplugged from HV capacitor.
Installed new diode by reversing the order. In my case, the problem was the magnetron was bad, so I replaced it as well.
Discharged HV capacitor and removed cooling fan.
Unscrewed ground end of HV diode and unplugged from HV capacitor.
Installed new diode by reversing the order. In my case, the problem was the magnetron was bad, so I replaced it as well.
Parts Used:
-
John from SANTA CLARA, CA
-
Difficulty Level:Really Easy
-
Total Repair Time:30 - 60 mins
-
Tools:Screw drivers
4 of 4 people
found this instruction helpful.
Was this instruction helpful to you?
Thank you for voting!