


Models
>
JGCP430ADP
JGCP430ADP Jenn-Air Cooktop - Overview
Sections of the JGCP430ADP
[Viewing 4 of 4]

.gif "SUPPLEMENTAL INFORMATION Diagram and Parts List for Jenn-Air Cooktop")

Manuals & Care Guides for JGCP430ADP
Click to downloadKeep searches simple, eg. "belt" or "pump".

Burner Electrode
PartSelect #: PS11744318
Manufacturer #: WP74009336
This is a burner electrode for your oven, range, or stove. This part has a male spade. It helps your burner ignite by creating a spark, producing a flame, and lighting the surface burner. If your burn...
$41.57
In Stock

Screw, 8/18 x 3/8
PartSelect #: PS11746840
Manufacturer #: WP90767
This screw is sold individually.
$5.42
In Stock

Screw
PartSelect #: PS12349731
Manufacturer #: W11233072
This is a multi-use and multi-appliance screw. It can be used on a microwave, refrigerator, range/oven, air conditioner, dehumidifier, washer, or dryer. The measurements of this screw are 8 x 1/2 inch...
$20.79
In Stock

X-Large Burner Head with Electrode
PartSelect #: PS2085280
Manufacturer #: 74007736
This is the burner head and electrode for your gas range. If your gas igniter glows but will not light, or if the element will not start or heat entirely, you may need to replace the burner head. This...
$81.10
In Stock

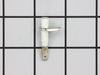
Knob - Stainless Steel
PartSelect #: PS11749600
Manufacturer #: WPW10175692
Sold Individually. This knob accepts a D-shaped shaft.
$49.81
In Stock

Large Burner Head
PartSelect #: PS2085279
Manufacturer #: 74007735
This part includes the spark igniter.
$85.54
In Stock

Burner Cap
PartSelect #: PS11745641
Manufacturer #: WP8284669
Burner Cap - 6000 BTU
Sold individually.
$55.11
In Stock

 (Black) – Part Number: WPW10154101")


Palnut
PartSelect #: PS2365913
Manufacturer #: 7103P166-60
This palnut is designed for use in cooktops, ranges, wall ovens, dehumidifiers, and range hoods. The palnut is screwed onto a bolt on top of an ordinary nut, and locks the nut in place when the nut is...
$16.17
In Stock

Spark Module
PartSelect #: PS11755329
Manufacturer #: WPW10475147
This is a 4-point re-ignition spark module. NOTE: This part has been redesigned by the manufacture, it may appear different but will still function the same.
$336.05
In Stock
Questions And Answers for JGCP430ADP
We're sorry, but our Q&A experts are temporarily unavailable.
Please check back later if you still haven't found the answer you need.
Common Symptoms of the JGCP430ADP
[Viewing 3 of 3]Gas igniter glows, but will not light
Fixed by
these parts
these parts


Show All
Will Not Start
Fixed by
these parts
these parts
Show All
Element will not heat
Fixed by
these parts
these parts
Show All
Keep searches simple. Use keywords, e.g. "leaking", "pump", "broken" or "fit".
Ignitor stopped working on gas cooktop
As others reported, there are 2 torx screws that need to be removed so that the burner element can be removed. One came out with a little effort, the other one did not as it was corroded. After breaking a torx bit, a second torx bit succeeded in breaking off the screw head. This then required a drill to drill out the broken shaft and th
... Read more
en rethreading the screw hole. On to the ignitor replacement. The tiny screw holding the ignitor was corroded and would not come out. It too had to be drllled out and rethreaded. It was a 1/3" #4 screw with fine threads. Had to get it an appliance repair store as the local hardware places don't carry fine threaded screws. Finally got it all put back together after a week. My advice before ordering an ignitor is make sure you can take the current burner off the cooktop first to do the repair in the first place. BTW, the ignitor I ordered came quickly and was the correct part!
Read less
Parts Used:

-
Jeff from Lake Orion, MI
-
Difficulty Level:Difficult
-
Total Repair Time:More than 2 hours
-
Tools:Pliers, Screw drivers, Wrench set
83 of 86 people
found this instruction helpful.
Was this instruction helpful to you?
Thank you for voting!
The ceramic insulator on the burner ignitor cracked & the spark shorted so that the burner would not ignite.
Firts I removed the 2 screws that held the burber in place. Then I lifted the burner up & disconnected the wire that connected to the ignitor. Then I removed the one screw that held the ignitor to the burner. I then reversed these steps, replacing the cracked ignitor with the new one, replaced the screw holding it to the burner, then reco
... Read more
nnected wire, returned the burner to the stove and replaced the two screws that held it. All Done!
Read less
Parts Used:
-
Loren from San Luis Obispo, CA
-
Difficulty Level:Really Easy
-
Total Repair Time:Less than 15 mins
-
Tools:Screw drivers
31 of 33 people
found this instruction helpful.
Was this instruction helpful to you?
Thank you for voting!
Burners kept clicking after ignited
This problem was driving me crazy for months. Of course, after I bought and installed the part and it still was not fixed I finally found a website that told me how to fix the clicking. The problem is that the removable head burners (#8 on the top assembly diagram) are not making good electrical contact with the base burners (#22). What I
... Read more
did was grab the head burners and grind them back and forth into the base burners with the weight on the heal of my hand. Steel wool or sandpaper would work too--you just want to clean the surfaces to restore electrical contact.
If you still want to know how to replace the spark module start by removing #24. This will allow the removal of #9 (after you take the knobs off). You may have to do some fiddling cause the rubber gasket is sticky. Next there are 2 obvious regular screws for #14 and 2 not so obvious star screws in the space where the burner valves are. After #14 is off there are 2 screws on the spark module to be removed and one that you can't loosen that is in a slot. You wriggle the module out of that one.
If you still want to know how to replace the spark module start by removing #24. This will allow the removal of #9 (after you take the knobs off). You may have to do some fiddling cause the rubber gasket is sticky. Next there are 2 obvious regular screws for #14 and 2 not so obvious star screws in the space where the burner valves are. After #14 is off there are 2 screws on the spark module to be removed and one that you can't loosen that is in a slot. You wriggle the module out of that one.
Read less
Parts Used:

-
Robert from Ranchos de Taos, NM
-
Difficulty Level:Really Easy
-
Total Repair Time:15 - 30 mins
-
Tools:Screw drivers
27 of 29 people
found this instruction helpful.
Was this instruction helpful to you?
Thank you for voting!