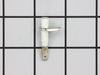
This is a burner electrode for your oven, range, or stove. This part has a male spade. It helps your burner ignite by creating a spark, producing a flame, and lighting the surface burner. If your burn...
$41.57
In Stock
Order within the next 12 hrs and your part ships today!
This part is the replacement grommet for your cooktop or range. It is made of black plastic and is approximately 1 ¼ inches in diameter. This part may also be known as the cooktop burner knob gasket, ...
$9.13
In Stock
Order within the next 12 hrs and your part ships today!
As others reported, there are 2 torx screws that need to be removed so that the burner element can be removed. One came out with a little effort, the other one did not as it was corroded. After breaking a torx bit, a second torx bit succeeded in breaking off the screw head. This then required a drill to drill out the broken shaft and th
... Read moreen rethreading the screw hole. On to the ignitor replacement. The tiny screw holding the ignitor was corroded and would not come out. It too had to be drllled out and rethreaded. It was a 1/3" #4 screw with fine threads. Had to get it an appliance repair store as the local hardware places don't carry fine threaded screws. Finally got it all put back together after a week. My advice before ordering an ignitor is make sure you can take the current burner off the cooktop first to do the repair in the first place. BTW, the ignitor I ordered came quickly and was the correct part!
Firts I removed the 2 screws that held the burber in place. Then I lifted the burner up & disconnected the wire that connected to the ignitor. Then I removed the one screw that held the ignitor to the burner. I then reversed these steps, replacing the cracked ignitor with the new one, replaced the screw holding it to the burner, then reco
... Read morennected wire, returned the burner to the stove and replaced the two screws that held it. All Done!
- Removed the cover. - Removed te two Torx screws. - Pulled the burner a couple of inches to be able to disconnect the wire. - Spent a lot of time removing the small Philips screw holding the ignitor. Ended up breaking the ignitor with pliers to be able to put WD40 under the screw's head. - Treated all screws with a hi
... Read moregh temperature copper paste to prevent oxidation. Installed the new ignitor with the new screw. - Reconnected the wire. - Installed the two Torx screws. - Voila, it works.


 Diagram and Parts List for Jenn-Air Cooktop")


 (Black) – Part Number: WPW10154101")