


Models
>
JES1142SJ04
JES1142SJ04 General Electric Microwave - Overview
Sections of the JES1142SJ04
[Viewing 1 of 1]
Manuals & Care Guides for JES1142SJ04
Click to downloadKeep searches simple, eg. "belt" or "pump".

Cooking Tray
PartSelect #: PS248296
Manufacturer #: WB39X82
This tray rotates in your microwave ensuring more even temperatures.
$71.62
Special Order

Light Bulb and Socket
PartSelect #: PS247776
Manufacturer #: WB36X951
This light bulb is sold with the socket. The bulb is 120V and 25W.
$20.99
In Stock


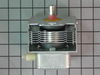
Magnetron
PartSelect #: PS953838
Manufacturer #: WB27X10682
This part is used to generate microwave energy/heat.
No Longer Available


Turntable Guide with Rollers
PartSelect #: PS224055
Manufacturer #: WB02X10806
This microwave turntable guide is located under the glass turntable. It is made of plastic, and comes with rollers.
No Longer Available


Primary/Secondary Switch
PartSelect #: PS237415
Manufacturer #: WB24X823
This is sold individually. Your appliance would need 2 of these.
$103.49
In Stock


Questions And Answers for JES1142SJ04
We're sorry, but our Q&A experts are temporarily unavailable.
Please check back later if you still haven't found the answer you need.
Sort by:
- < Prev
- 1
- Next >
Search filter:
Clear Filter
Your search term must have 3 or more characters.
Keep searches simple. Use keywords, e.g. "leaking", "pump", "broken" or "fit".
Sorry, we couldn't find any existing answers that matched.Try using some different or simpler keywords, or submit your new question by using the "Ask a Question" button above!
Elaine
November 27, 2019
Could you please let me know what the cu. Ft. Is on this model. Thanks so much
For model number JES1142SJ04
Hello Elaine,
Thank you for your question. The cubic feet for your microwave is 1.1 Cu ft. Hope this helps!
Was this helpful?
Thank you for voting!
Mary
27 days ago
Where can I find instructions to change light in the unit?
For model number JES1142SJ04
Hello Mary, thank you for contacting us. We have found some relevant instructions to replace the light bulb, part number PS247776. These instructions may not be of the same exact model, but will help you with the process. Take the silver cover off of the back/sides of microwave. Remove the screws, then slide the cover off. Then slide the white plug from the old bulb. Remove the light bulb and its large black base by lifting it up while pulling back on the plastic latch. We hope this information helps!
Was this helpful?
Thank you for voting!
Related Parts:
Light Bulb and Socket

$20.99
In Stock
- < Prev
- 1
- Next >
Common Symptoms of the JES1142SJ04
[Viewing 3 of 3]Won’t turn on
Fixed by
these parts
these parts


Show All
No heat
Fixed by
these parts
these parts
Show All
Tray won’t turn
Fixed by
these parts
these parts

Show All
Keep searches simple. Use keywords, e.g. "leaking", "pump", "broken" or "fit".
Original lamp burned out.
After looking up on the computer a schematic of the unit, all that was needed was removing four screws to remove the top and side cover which was one piece.
Next was removal of electrical connection to burned out lamp, then removing burned out lamp and installing the new lamp and reconnecting electrical connection.
Job was co ... Read more mplete after reinstalling the cover.
Microwave now working with new lamp lighting when in use.
Next was removal of electrical connection to burned out lamp, then removing burned out lamp and installing the new lamp and reconnecting electrical connection.
Job was co ... Read more mplete after reinstalling the cover.
Microwave now working with new lamp lighting when in use.
Read less
Parts Used:
-
Rudy from Huntington, IN
-
Difficulty Level:Really Easy
-
Total Repair Time:15 - 30 mins
-
Tools:Screw drivers
73 of 89 people
found this instruction helpful.
Was this instruction helpful to you?
Thank you for voting!
Microwave oven was completely dead.
Continuity checks showed the flame sensor was open. Schematic notes it opens at 217 degrees and closes at 30 degrees. Removed sensor and placed in freezer for twenty minutes. Tested sensor and it was now closed, reinstalled and microwave worked normally. Ordered new sensor in case the original is operating at too low a temperature.
Parts Used:
-
CHARLES from LAKE ARIEL, PA
-
Difficulty Level:Easy
-
Total Repair Time:30 - 60 mins
-
Tools:Screw drivers
29 of 39 people
found this instruction helpful.
Was this instruction helpful to you?
Thank you for voting!
The microwave would no longer heat
First I ordered and replaced the diode. That did not help. Then I ordered both the magnetron and the thermostat magnetron because I didn't know what I was doing. After I replaced those, it still wouldn't heat. So I called an electrician. He noticed I had knocked a wire loose. I connected it and the microwave worked. I reconnected t
... Read more
he old magnetron, just to test it. It didn't work. Then I put the new one back in. It's working just fine now! It took quite a while to put everything back in place because it was a built-in. But it was a lot cheaper than getting a new microwave, even with the cost of a repair man to show me I had a loose wire!
Read less
Parts Used:
-
Linda from Warsaw, IN
-
Difficulty Level:A Bit Difficult
-
Total Repair Time:More than 2 hours
-
Tools:Screw drivers
21 of 33 people
found this instruction helpful.
Was this instruction helpful to you?
Thank you for voting!